Microsoft Outlook is a personal information management system developed by Microsoft that allows users to send and receive email messages, manage their calendars, store names and numbers of contacts, track tasks, and create notes. Notes in Outlook are electronic sticky notes. They are used to jot down ideas, questions, and reminders and can be convenient for saving information. Outlook users can leave Notes on the screen.

How to create Notes in Outlook
Follow the steps below to create Notes in Outlook:
- Launch Outlook.
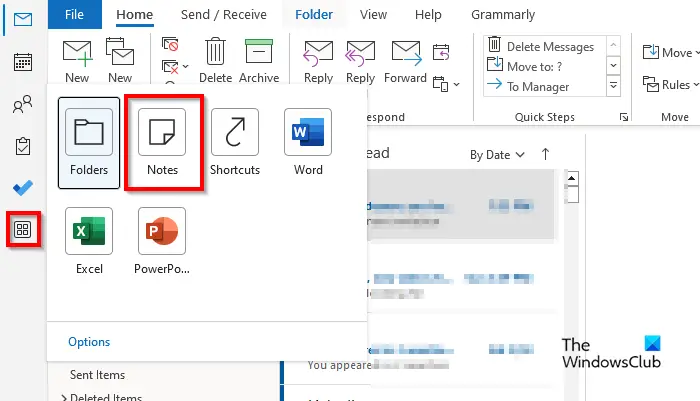
- Click the More app button on the navigation pane, then select Notes.
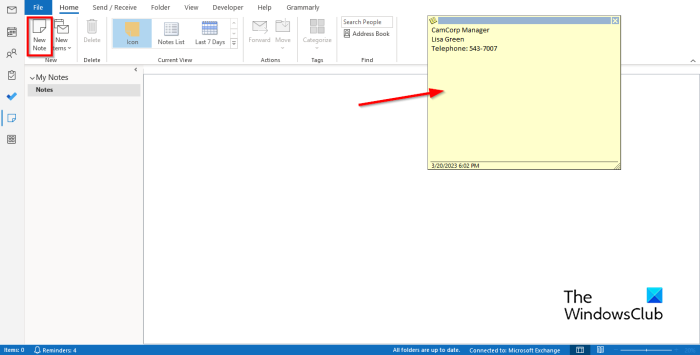
- Click the New Note button.
- Type the info that you want to add to the notes.
- Then click outside the notes.
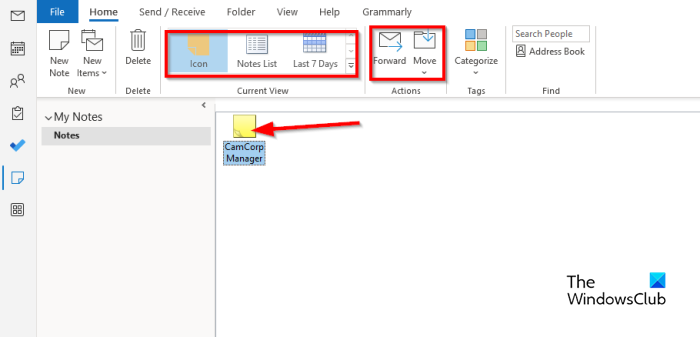
- An Icon of the note will appear in the body.
Launch Outlook.

On the navigation pane on the left of the Outlook interface, click the More app button, then select Notes.
The Notes app will appear on the navigation pane.

To create a note, click the New Note button in the New group.
An electronic sticky note will appear on the screen.
Type the info that you want to add to the notes.
Then click outside the notes.
An Icon of the note will appear in the body, where you can double-click if you want to edit the note.

You can change the view of the note in the body by choosing any of the views in the Current View gallery.
You can forward the note to a recipient by selecting the note, then clicking the Forward button.
If you want to move the notes to a particular folder, select the note, then click the Move button and choose a folder.
If you want to delete the note, select the note, then click the Delete button. The note is removed.
We hope you understand how to create notes in Outlook.
How to create sticky notes in Outlook.com?
To o create sticky notes in Outlook on the Web, sign into Outlook.com and g
Go to the Notes folder. Click on New Note to create a new sticky note.
How do I customize my Notes in Outlook?
- Click the More app button on the navigation pane, then select Note.
- Select Note, then click the Categorize button in the Tags group.
- For any category you have selected, the color of the note will change.
- If you want to rename the category or change its color, click the Categorize button, then click All categories from the menu.
- This will open the Color Category dialog box.
- Rename the Category by clicking the Rename button.
- You can change the color by clicking the Color button and selecting a color.
- Then click OK.
READ: How to reduce the size of large Outlook OST file
How do I organize Notes in Outlook?
- Open the Notes app.
- Click the More button in the Current View gallery.
- Click Manage views.
- A Manage All views dialog box will open.
- Click the Modify button.
- An Advance View Settings: Icon dialog box will open.
- Click Other Settings.
- A Format Icon view dialog box will open.
- You can change the view type to Large icon, Small icon, and icon list.
- You can also change the Icon placement of the notes, then click Ok for all the boxes.
- If you want to place a note in a different position on the body, use your mouse to hold the note and drag it to the position where you want it.
READ: How to reduce the size of attached Pictures in Outlook.
Leave a Reply