If you’re a YouTube creator, adding subtitles should be one of your first priorities when uploading videos. There are folks out there with hearing disabilities, and the ability to read the conversations in the video is a huge deal for them.
Create and edit subtitles on YouTube
And then there are those of us who just enjoy watching a video with captions. It’s a preference that improves the watching experience.
Now, in the past, you were required to use special software in order to add captions to videos, but this is no longer the case since YouTube is proving this feature at no cost to the creator.
- Open and sign in to YouTube Studio.
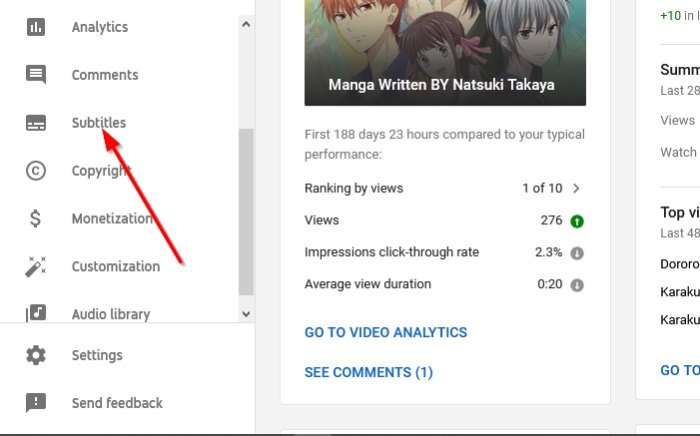
- From the left side select Subtitles.
- Next, select the video you want to add subtitle to
- Select the Language next
- Now in the Subtitles column, select Edit.
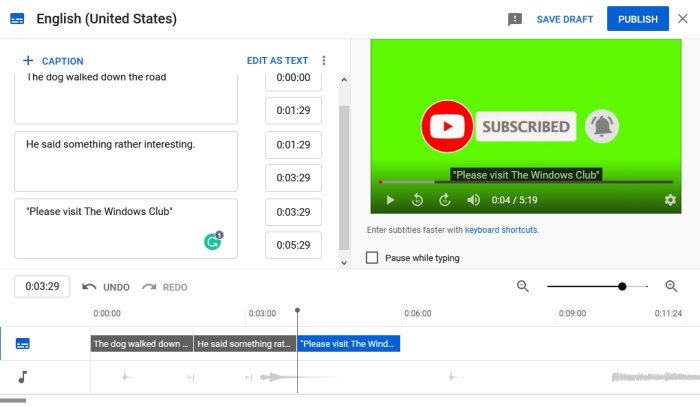
- Add or edit the subtitles
- When done, click Publish.
Let us discuss this in more detail.
Open YouTube Studio

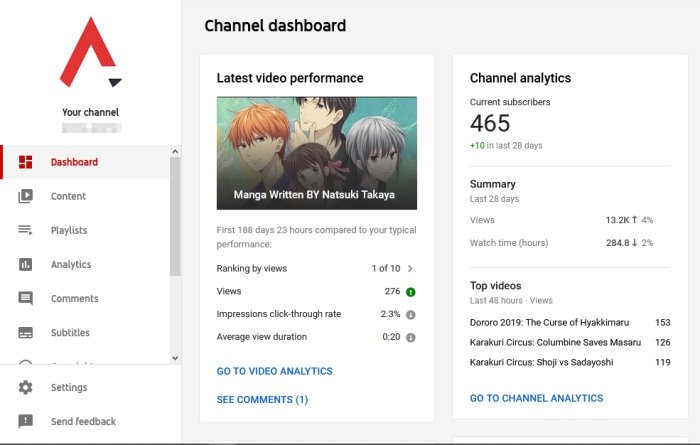
The first thing you will want to do here is to open YouTube Studio as soon as possible. Once that is done, you should be taken to the dashboard which shows the basic statistics of your Channel. Creators can perform several actions via the dashboard, so look around to find something you may find intriguing.
Upload new Videos
Via the dashboard, please click on the upload videos button to add a video if you haven’t already. After the upload task is completed, it is now time to begin the process of adding subtitles to the video.
Choose the Subtitle option

OK, so from the left side you should see a menu. Please select Subtitles from there, and right away you should see a list of videos from the Channel Subtitle page. You will want to click on the video needed for the addition of subtitles.
Bear in mind that after a video has been uploaded to the platform, YouTube would have already created automatic subtitles. Be sure to click on Video Language to add your own subtitle to the uploaded video.

You will have the option to add captions manually by typing them in, add captions via a file on your computer, and more.
It will take some practice if you’re new to adding subtitles to a video, so do not be dismayed. Keep pushing yourself and you will no doubt come out on top.
Customize automatically generated subtitles
It can be tiring to manually type subtitles from scratch, so it makes a lot of sense to be able to edit automatically generated subtitles.
To do this, return to the Channel Subtitle section, then select the video you want to add subtitles to. Change the language to Automatic, and finally, select Duplicate and edit. You should now see a plethora of automatically generated text.
You can edit them to fit your video better. But please read the next properly because it contains many grammatical errors. Additionally, the entire body of the text is a single paragraph, so you might want to transform it into multiple paragraphs.
How do I add and edit subtitles to a video?
To add and edit subtitles to a video, use software like VLC or online tools such as Amara. Import your video, create or upload subtitle files in formats like SRT, and synchronize the text with the video. Edit to ensure accuracy and readability, then save the final version.
How do I edit text in YouTube?
To edit text on YouTube, navigate to YouTube Studio and select “Content” from the left sidebar. Choose the video you want to edit, click “Details,” and update the title, description, or captions as needed. Save the changes to update the text. This allows you to keep your video’s information accurate and engaging.