If you want to create pixel art in GIMP on Windows, this post will interest you. GIMP is well-known graphics editing software which is free and open source. It helps beginners as well as professional graphics designers to create beautiful images and designs. This software can also be used for making pixel art, which is a digital art form drawn and created using pixels as the only building block.
![]()
How to create Pixel Art in GIMP
Here are the main steps you can follow to create a pixel art in GIMP on your Windows PC:
- Download and install GIMP, and launch the app.
- Create a new image.
- Resize width and height.
- Choose the pencil tool.
- Set brush type as Pixel.
- Set preferred foreground and background colors.
- Draw your pixel art.
- Save the final pixel art.
First of all, you need to download and install GIMP on your computer if you haven’t already. Go to its official website, download the latest version, and run the installer to install this graphics editor on your PC. Once done, launch GIMP.
Now, go to the File menu and select the New option, or press the CTRL + N hotkey for the same.
In the appeared prompt, enter the size of the pixel art and press the OK button. Generally, the standard sizes of pixel art are 8×8, 16×16, and 32×32 pixels. But, you can also create 64×64+ pixels as per your requirements.
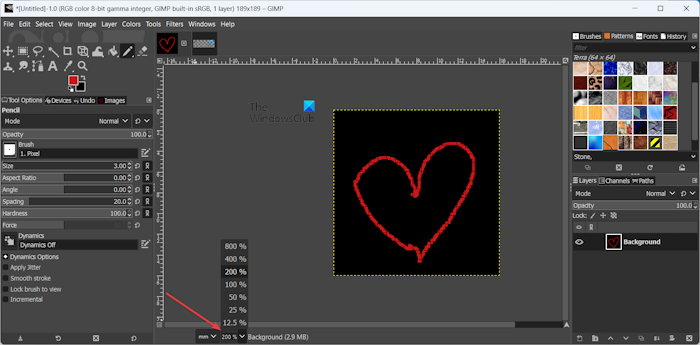
Since these sizes are too small, you will see a very small canvas. However, you can zoom into the canvas to magnify its size. To do that, press the drop-down present at the bottom of the editor and select the zoom level as shown in the above screenshot.
RELATED: How to create a Pattern in GIMP?
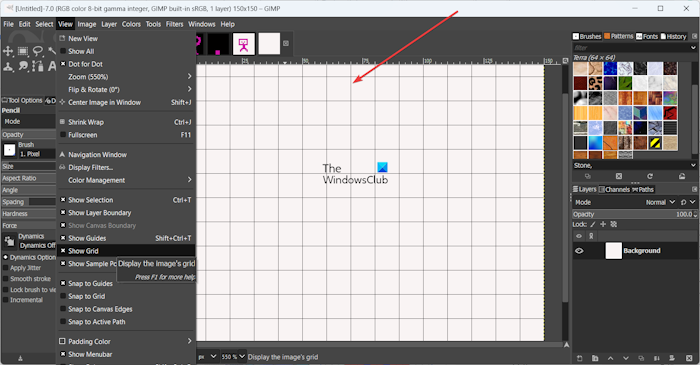
After that, click on the View > Show Grid option to display a grid.
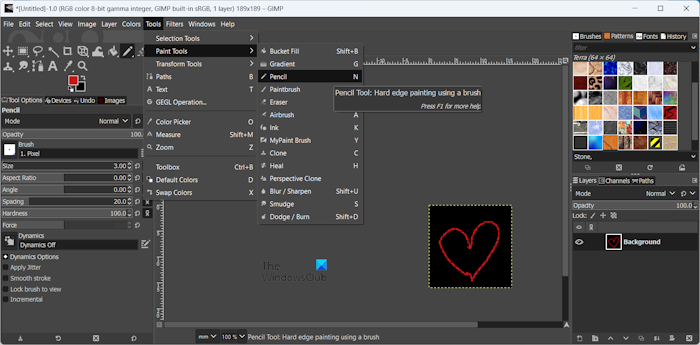
Next, move to the Tools menu and select the Paint Tools > Pencil tool. You can also press the N hotkey to select the pencil tool.
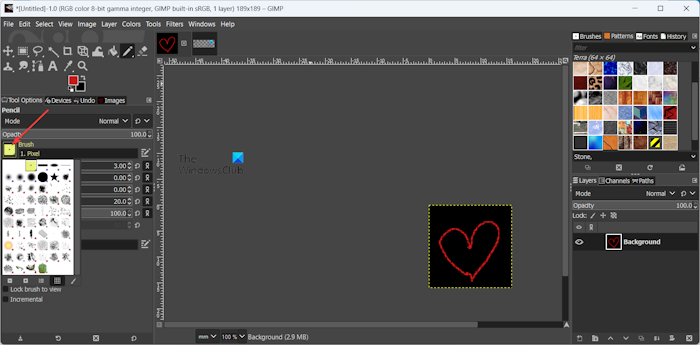
After that, from the left-side panel, click on the icon present beside the Brush option in the Tool Options tab. You can also customize other parameters to set up the pencil tool accordingly, such as size, aspect ratio, angle, spacing, hardness, etc.
Read: How to scan an Image with GIMP?
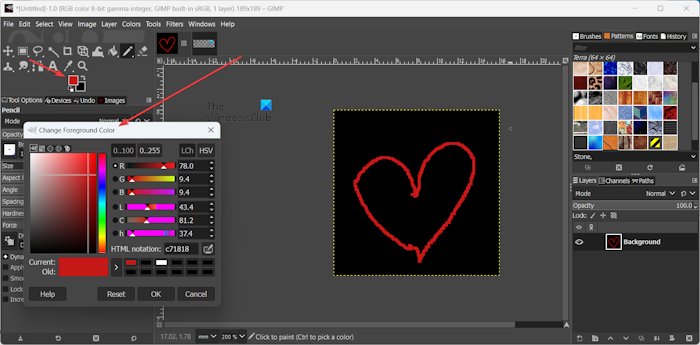
Now, you can set your preferred foreground and background colors. Click on the foreground color icon in the toolbox and then select the desired color. Do the same for the background color.
![]()
Once done, start drawing your pixel art on the canvas. You can create each pixel of the art you want to create.
When the pixel art is done, you can export it to an image file. For that, navigate to the File menu and choose the Export As option. Select the desired file type, enter the filename, and press the Export button to save the pixel art. PNG is the most preferred image format to save pixel art. However, you can choose any other image format like JPEG, GIF, WebP, etc. to export your pixel art.
So, this is how you can easily create a pixel art in GIMP.
Read: How to add a Neon Glow effect to Text in GIMP?
Convert image to pixel art using Pixelize filter in GIMP
If you want to apply a pixel art effect to your images in GIMP, you can use its Pixelize filter to do that. Here are the steps to do that:
First, open the source image in GIMP.
![]()
Go to the Filters menu and select the Blur > Pixelize option.
![]()
Next, in the opened prompt, set up the parameters to customize the Pixelize effect, such as blending options, block height, block width, aspect ratio, etc. As you change the parameters, you can see the preview of the output image on the canvas. If all looks good, you can press the OK button.
Lastly, you can save the output image using the File > Export As option.
See: How to crop, rotate, and change Image size in GIMP?
Can you make pixel art in GIMP?
Yes, you can create a pixel art in GIMP easily. As GIMP is a feature-rich graphics editor, it provides a variety of tools to create different types of images, including pixel art. You can use its pencil tool to make the desired pixel art. We have discussed the complete procedure to do that in this post above.
How do I convert an image to pixel art?
You can convert an image to pixel art using a third-party tool. Multiple free online tools allow you to create pixel art from existing pictures. To name some, Pixelicious, Pixelied, Photo2Pixel, and PixelMe are some good online photo-to-pixel art converters that you can use.
Now read: Best free Calligraphy software for Windows.
Leave a Reply