When we take a picture, they usually come out in a rectangular or square shape. None is circular, but it is possible to create circular images by using GIMP. The task is super simple, at least from our point of view anyway.
How to create rounded circular images on PC
Before we go any further, note that if you want to create a circular image, we would recommend using one linked to the PNG format rather than JPEG for an easier time. Once all of these requirements are met, then it is time to shape things up and transform your image into a circle.
If you are looking for a way to make a picture or photo round as a circle, then using free open-source GIMP is the easiest way to do it. Follow this procedure:
- Add your image to the GIMP editor by either pressing CTRL+O or select File > Open.
- Add alpha channel to photo
- Choose the Ellipse tool
- Make a circle.
Add alpha channel to photo

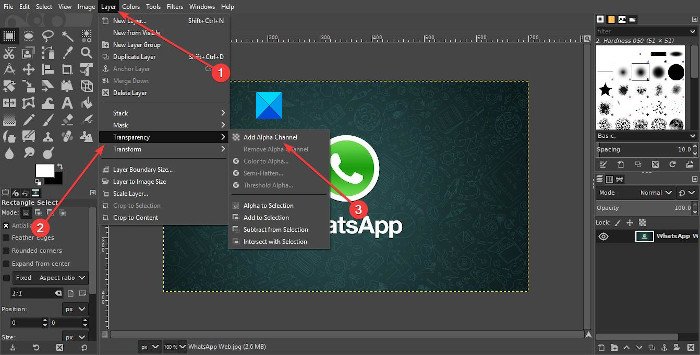
The first thing you will want to do is add a layer to your photo, which is simple. In this situation, we’re talking about the Alpha Channel layer.
To get it done, then, please click on Layer > Transparency > Alpha Channel.
Choose the Ellipse tool

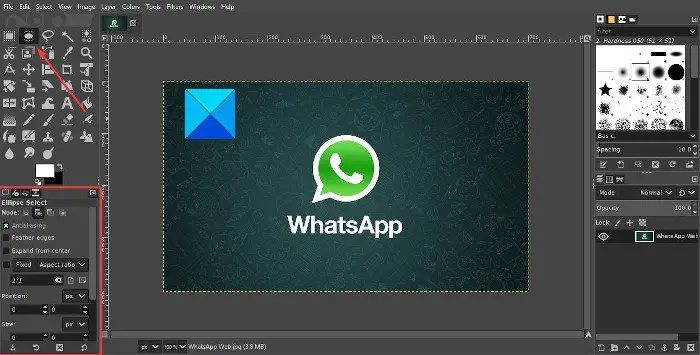
Once the Alpha Channel is added, it’s now time to make the necessary changes to get a circular motion. To do this, we must select the Ellipse Select Tool, and next, we need to make sure the Aspect Ration is set to 1:1. Do this by hitting the clicking on Windows > Dockable Dialogs > Tool Options.
A small window should appear below the toolbox. From here, make sure the Aspect Ratio is fixed at 1:1 and that’s it for that.
Read: How to create Animated GIF from a video file using GIMP.
Make a circle

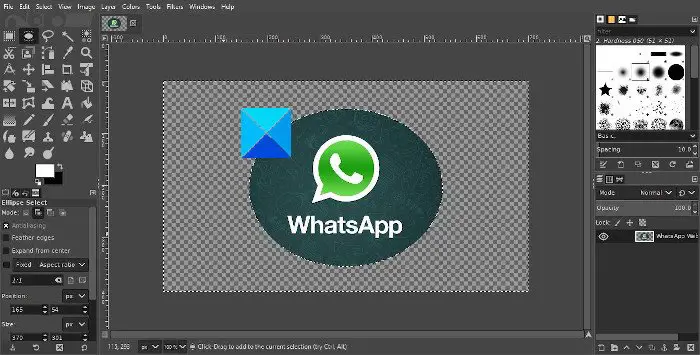
OK, so after doing everything we mentioned above, the next step is to create a circle. Click and hold the Left button on the mouse, then drag until a circle is created. Do whatever it takes to drag properly to create the perfect circle if that is what you want.
After doing so, you will then need to Invert the whole thing, which is selecting everything but the circle. We can do this by clicking Select > Invert, or Ctrl + I. The final step, then, is to press the Delete key on your keyboard to delete all aspects of the photo outside of the circular section.
Finally, it’s time to save the image. We suggest taking the Export route by selecting File > Export and then saving the photo with the PNG extension. As mentioned above, transparency does not work with JPEG, so we suggest avoiding it at first.
After saving as PNG, you can then convert the finished product to JPEG and work with it from there.
Read: How to crop, rotate, and change Image size in GIMP.