From Screen Recording to Morph Transition, PowerPoint’s latest tools can transform your presentations. And there are ways via which you can harness the power of these tools to make your presentation stand out. Zoom Animation in PowerPoint happens to be a case in point.
Like the chapters in a book, a lengthy or complex presentation can be made lively with the Zoom animation feature in PowerPoint. This guide acquaints you with the feature and how to use it to bring your presentation to life.
How to create Zoom animation effect in PowerPoint
We all want every slide in our presentation to be special, but the Zoom feature can make it even more or extra special. Here’s how to use it!
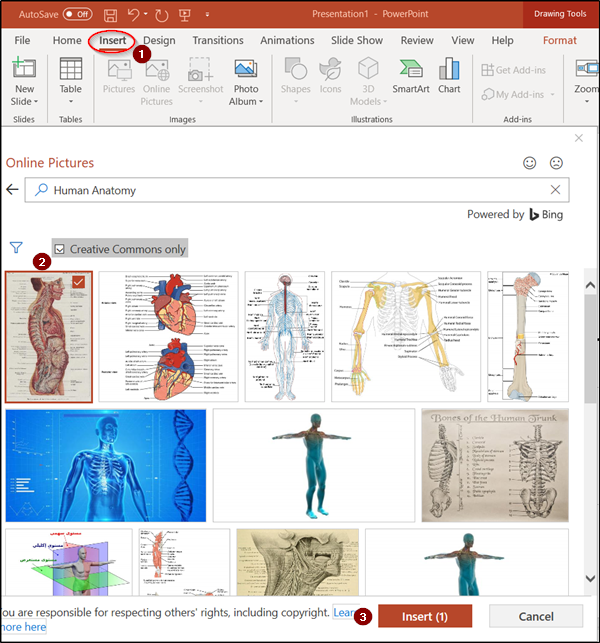
First, add a suitable title and subtitle for your slide to create a Zoom animation effect in PowerPoint. To add or insert an image to your slide, select the ‘Insert’ tab > ‘Online Pictures’ and search for the relevant image. When found, select it and insert it.
Then, to add a zoom animation effect to your slide, duplicate the slide. For this, select the slide in the left pane, right-click it and choose ‘Duplicate Slide’ option.
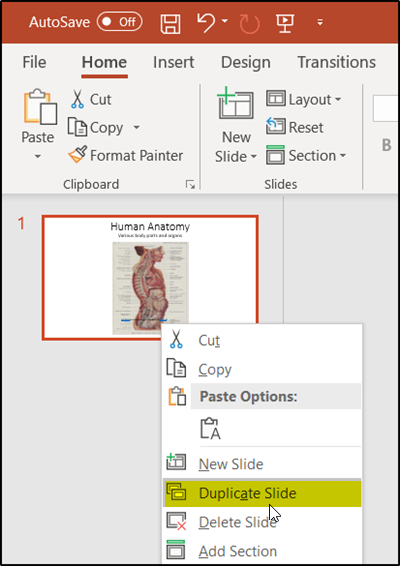
This action will create two copies of the slide.
In the next step, we decide on the area or the part of the body we would like to focus more on. For instance, if I am giving a presentation on a heart ailment, I will focus more on this body part than others.
So, go to ready-made shapes, hit the drop-down arrow, and under ‘Basic Shapes’ select ‘Oval tool’.
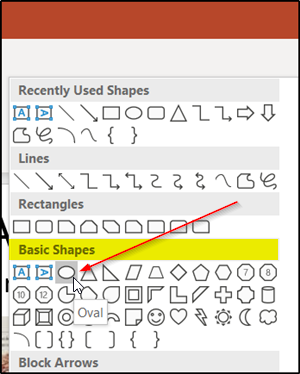
Hold down the Shift button to draw a circle around the area you would like to focus on.
When done, click the circle, navigate your mouse cursor to ‘Shape fill’, hit the drop-down arrow and select ‘No Fills’ option.
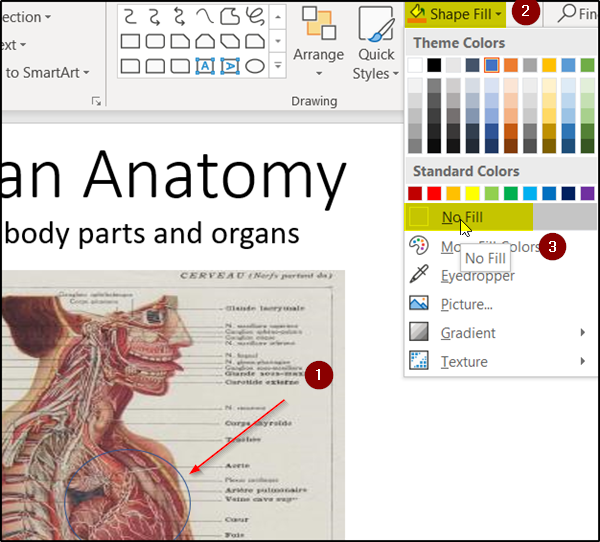
It’s now time for you to select a color for the outline of the circle. So, go ‘Shape Outline’ option under the ‘Drawing section’ and hit the drop-down arrow. Choose a theme color. Also, if you would like to increase the default weight of your outline, select ‘Weight’ under ‘Shape Outline’ and choose the desired value.
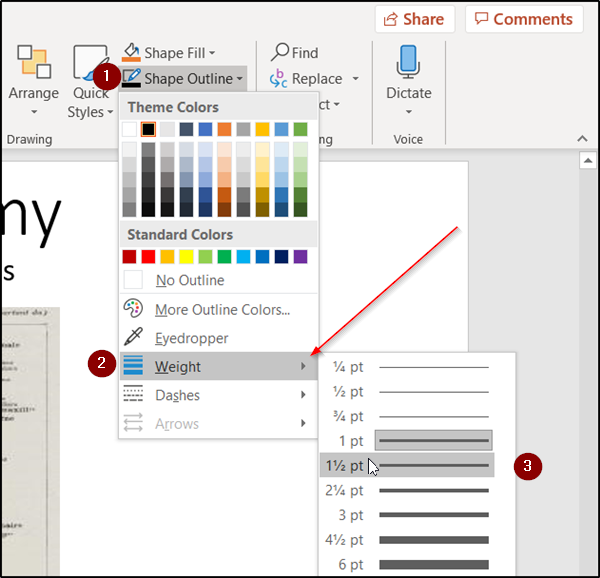
The next step involves the selection of a picture in such a way that it just retains the focus area and removes the rest of it.
So, select the whole picture, go to the ‘Format’ tab under the PowerPoint ribbon menu and choose the ‘Crop’ tool.
Hit the drop-down arrow, select ‘Crop to Shape’ > Basic Shapes > Oval. See the screenshot below for more information.
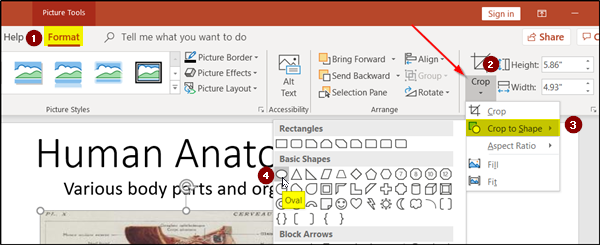
You will notice that the complete image will be enclosed in an oval. To change it to a circle, go back to ‘Crop’, select ‘Aspect Ratio’ option this time and choose 1:1 ratio.
Instantly, the oval shape will now be transformed into a perfect circle.
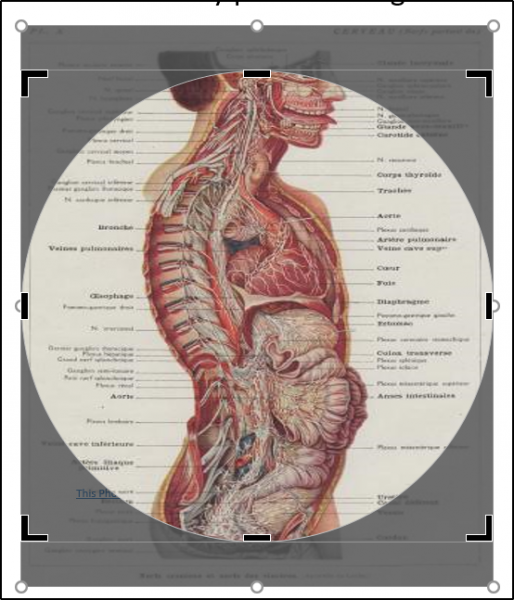
Now, to narrow this circle down to your area of focus, drag the circle (pressing down the Shift key) and adjust its handle so it closes down on the area of our focus. See the picture below for your reference.
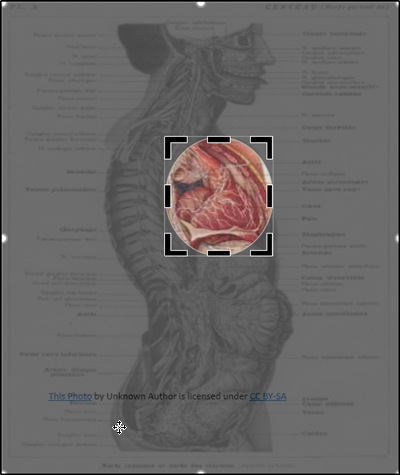
If all looks good, select the shape, press Ctrl + X (shortcut for Cut option), go back to the first slide, and press Ctrl + V. This will merge the two images.
Since we no more need the duplicate slide, delete it and shift to the original slide.
Now, to achieve the Zoom Animation effect for your slide, Select the area by placing your mouse cursor outside the picture and drag it to include the area of your focus.
Go to the ‘Animations’ tab and under ‘Emphasis’ section, select ‘Grow and Shrink’ option.
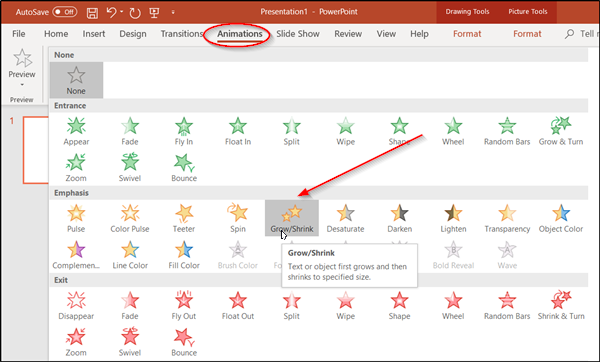
Lastly, if you want to add variation to your Zoom Animation, go to ‘Animations Pane’ under ‘Advanced Animations’ and select ‘Add Animation’ option. Choose ‘Wheel’ animation.

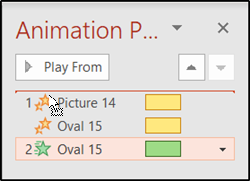
This will add another animation effect to your slide. To change the order of this sequence, i.e., make Wheel animation appear first and Grow and Shrink animation later, simply change the order by dragging one animation over another in ‘Play Form’ in the right-pane.
That’s all there is to it!
Of course, Zoom animation won’t compensate for a bad presentation, but if used correctly, it will add charm to your presentation by giving it a more natural and fluid feel.
Also read: How to zoom in on Picture during PowerPoint presentation.
Leave a Reply