In this post, we will show you how to wrap to curve text around an image in Photoshop. Being creative with Photoshop is key to getting jobs and satisfying clients. Being able to write around any shape is very creative as any shape can become a canvas. Writing around shapes can also help to highlight them, it can also be a means to save space when designing.
How to curve text around an image in Photoshop
Here I will discuss the steps to write around any shapes in Photoshop and I will show a few examples that you can follow. The reason you will be able to write around any shape is that you will be able to select the path. The path is like the outline of shapes and letters, in Photoshop you can use these paths for various things and writing around them is one of those things. The steps involved are:
- Access Photoshop
- Create a Shape to write on
- Select Path
- Write Text on Text
1] Access Photoshop
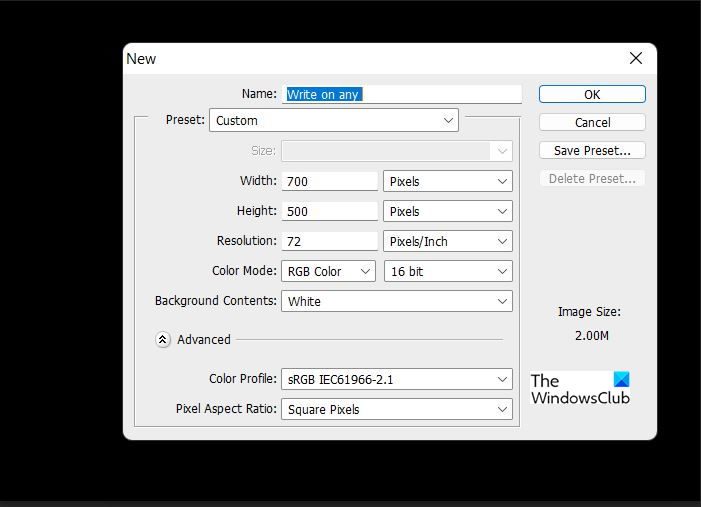
Open Photoshop and choose the desired options. Write the name of the file and click ok.
2] Create Shape to Write on

Find an image of your choice to use. Find one that is clean and has a solid color and a clear difference between the background and the image. For the first example, we will be using a red heart. Place the image in the center of the drawing area.
You can also create the art that you want to write around. You can also write around a letter or number or symbol, just make sure it is big enough so that you can select the path and write.
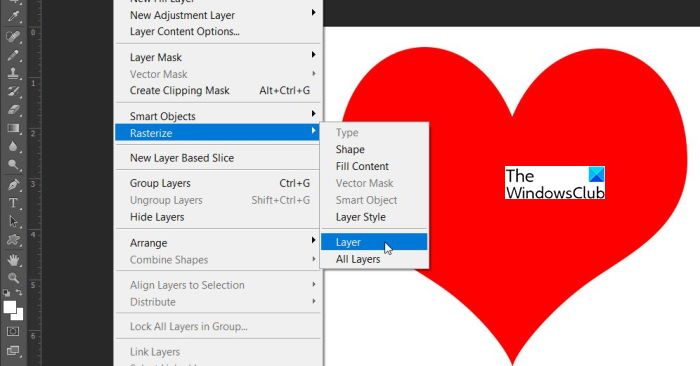
If you created the image that you want to write around then you will have to Rasterize it before you can write around it.
Select the image, go to Layer, then go to Rasterize then click Layer.
3] Select Path
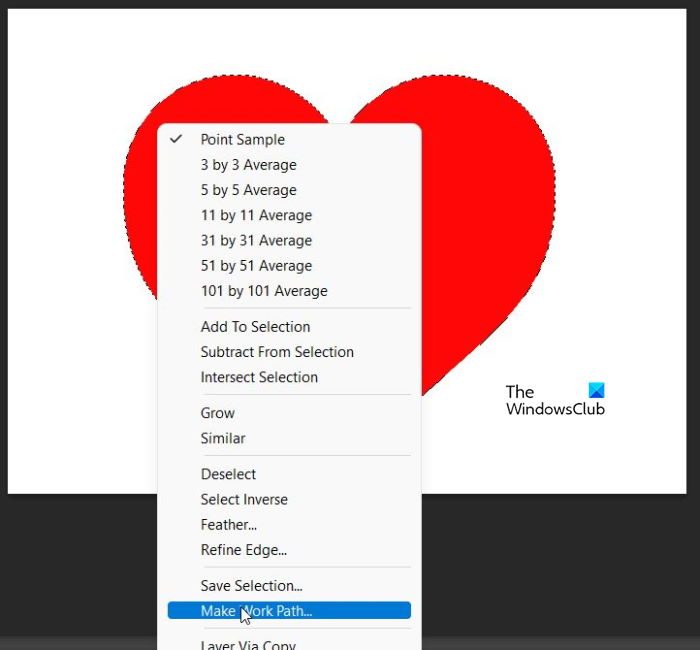
Select the Magic Wand from the left panel and click on the image. When there is a selection, Right Click, and from the dropdown menu choose Make Work Path. You will see the selection around the object.
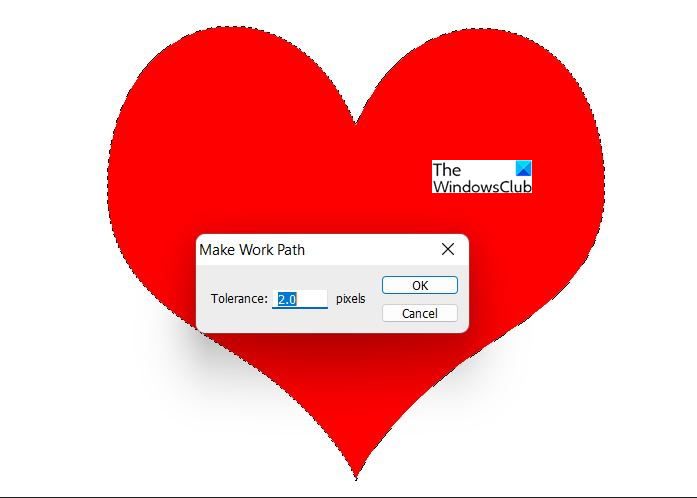
An Options Box will appear asking to choose Tolerance, the bigger the tolerance the wider will be the Work path on the object.

Select the Text tool from the left panel and move it closer to the object at the point that you want to start writing. You should see the text tool start to take the direction of the text. Just click and then start typing. You may also choose to keep the object as a part of the project.
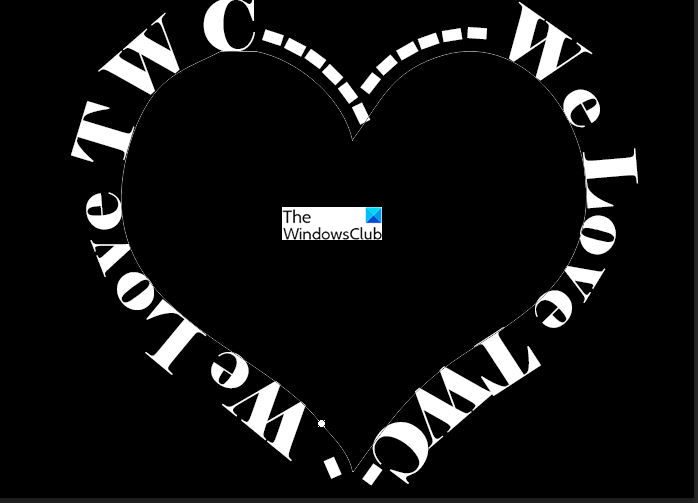
When you are finished writing you may decide to delete the object.
To delete the object, go to the Layers Panel and click the Eye on the object’s layer, this will turn off the visibility of the object and leave the words in place.
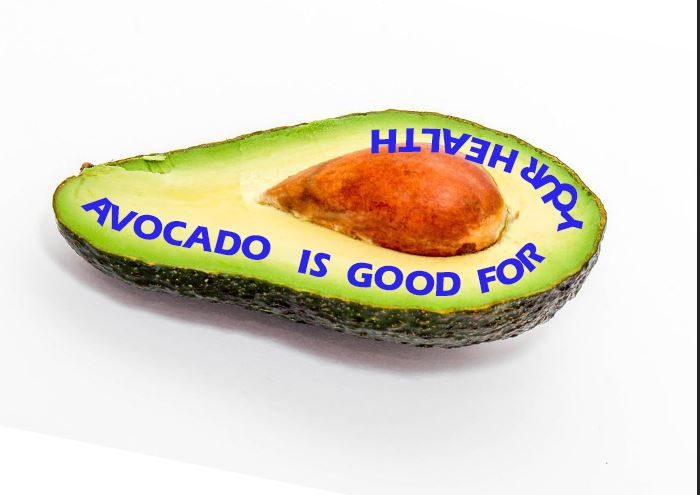
No object is too hard to write around, If you can use the Magic Wand to select, you can make a Path for text. Here is another example with the text having a different angle.
4] Write Text Around Text
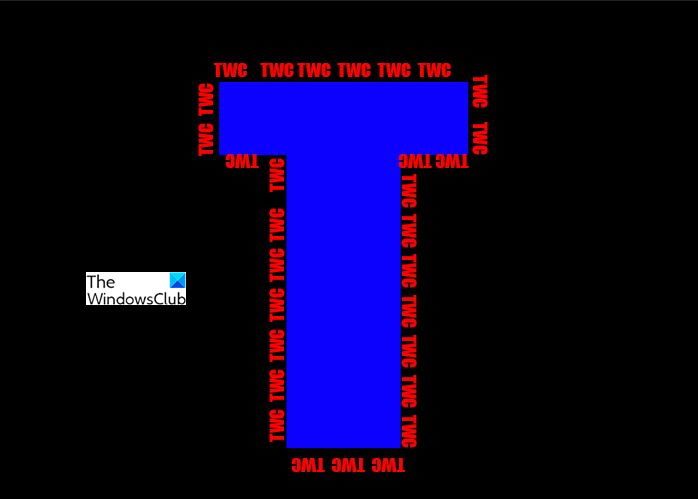
The true beauty of this method of writing is that it can be used to write text on text. You just need to write a character and then you can write around them. You can also write around a word; you just must make sure that all the letters are joined or touching at a point. You could decrease the space between the letters until they are touching.
Read: Adobe Illustrator Tips and Tricks for Beginners
What objects can text be written around?
Text can be written on any object that has a clear path to select. Just select it with the Magic Wand, Right-click, and from the menu choose Make Work Path. The object can be removed from the work path or allowed to stay. Text can be written on any object if the magic wand can select it then a path for writing can be created.
Read: Photoshop keeps freezing, lagging, crashing
Can the shape be removed after writing?
The shape can be removed after writing. When the shape is removed the text will be left in the outline of the shape. To remove the shape, click on it and make it invisible in the layers panel.