In this post, we will show you how to curve text in GIMP. Designers often use curved text while creating logos, badges, or posters to give a distinctive look to their compositions. There’s no denying the fact that GIMP is a powerful graphics editor software, but when it comes to working with text, GIMP can be a bit tricky sometimes.
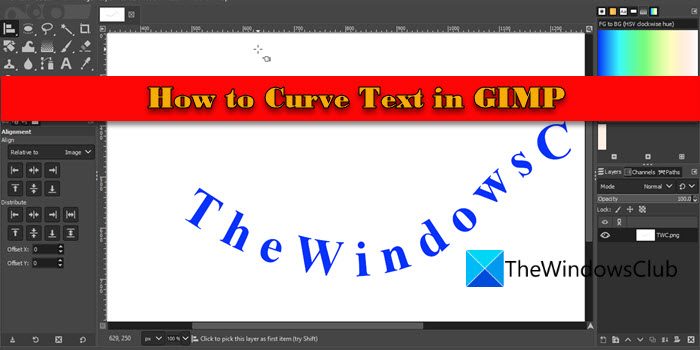
If you need to create intricate and complex curved text, you may find professional graphics design tools more suitable. But if your requirements are relatively simple or you’re just a beginner, GIMP is the appropriate, cost-effective solution.
How to Curve Text in GIMP in Windows 11/10
GIMP doesn’t have a built-in feature that allows you to create curved text. But there’s a workaround to accomplish the task.
Curving text in GIMP can be done using a combination of tools and techniques. You can draw a path, write the text, and then align the text along that path to give it a curved look. In this post, we will show you how to curve text in GIMP in a few simple steps.
1] Write and set up the text
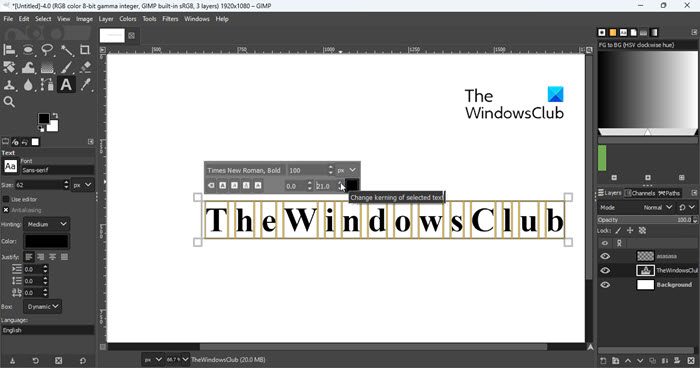
Launch GIMP and create a new image template in the default size (File > New > Template > 1920×1080 px). Then select the Text Tool from the toolbox in the left panel. Bring your cursor to the canvas and click anywhere in the blank area. Type the text that needs to be curved.
Press Ctrl+A to select the entire text and use the popup just above the text to modify the font type and size as per the requirement. Use the kerning parameter to adjust the spacing between individual letters.
Tip: Proper spacing between letters ensures that letters will not overlap each other when curved.
Next, select the Alignment Tool (grouped with the Move Tool) from the toolbox, bring it over the text, and click on it. Tiny squares will appear on the corners of the text, indicating that it has been selected. Now press and hold the Ctrl key and scroll the mouse wheel in a backward direction to zoom out the canvas. This will give you a clearer picture of the text alignment relative to the canvas.
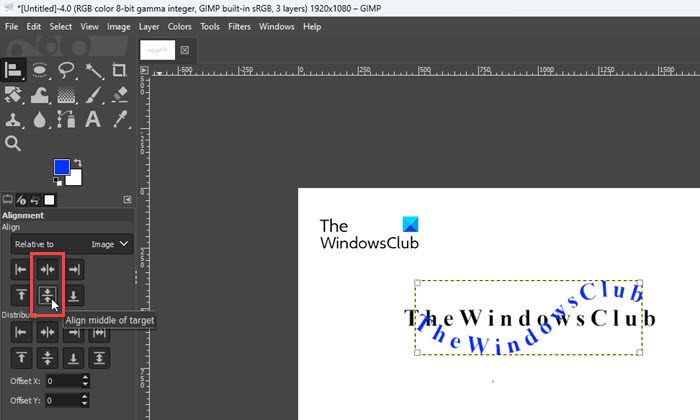
Now in the Alignment section below the toolbar, click on the Align center of target and Align middle of target options. You have your text written and set up; now it’s time to make the curve to bend the text.
2] Draw the curve
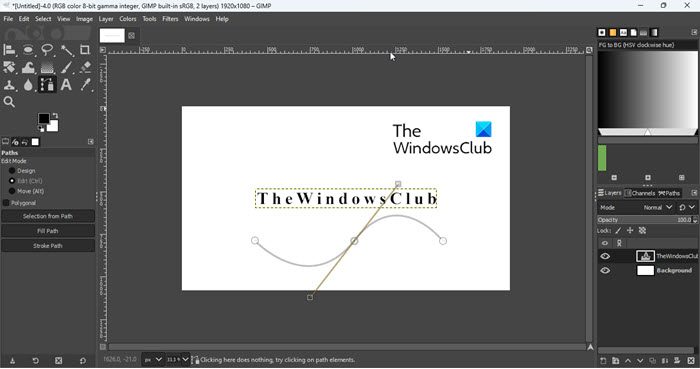
Select the Paths Tool from the toolbar and bring the cursor over the canvas. To make a curve, you have to create nodes. These nodes will join to make a path that can be edited to create bends wherever required.
To create the first node, click on the blank area somewhere down the beginning of the text (make sure ‘Design‘ is selected under Edit Mode in the Paths section on the left panel). Then based on the shape of your curve, create subsequent nodes. For example, if you want a U-shaped curve, you only need 2 nodes. But if you want a tilde-shaped curve, you would require 3 nodes.
Tip: Whatever the shape of the curve, the width of the path should be either equal to or slightly wider than the text.
Let’s say you want a tilde-shaped curve. So you’ll create 3 nodes, one near the beginning of the text, one near the center, and one last near the end of the text.
Now switch to the Edit Mode in the Paths section on the left panel and click and drag the second node. As you drag the node, handles will appear that will help you bend the path in the desired shape. Drag the handle in a downward direction to create the curve. Again, click and drag the second node in the upward direction to give a tilde shape to the final curve. You may also press the Shift key to uniformly adjust the curve.
3] Link text to the curve
Next, you need to place the text along the curve. And for that, you need to create a new layer.
Click on the Layer menu on top of the program window and select the New Layer option. Name the layer to something like ‘CurvedText’ and press Enter. Then in the Layers panel on the right side, right-click on the text layer and select Text along Path.
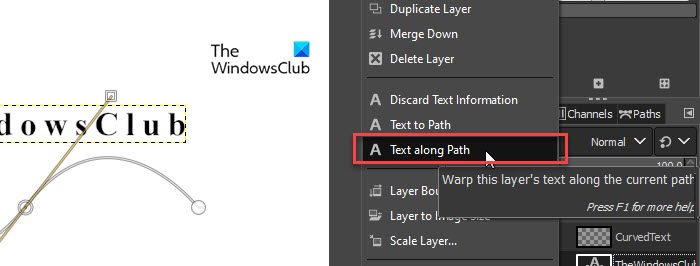
This will add the text directly onto the path. Multiple tiny nodes around the letters indicate that the text is now linked to the curved path.
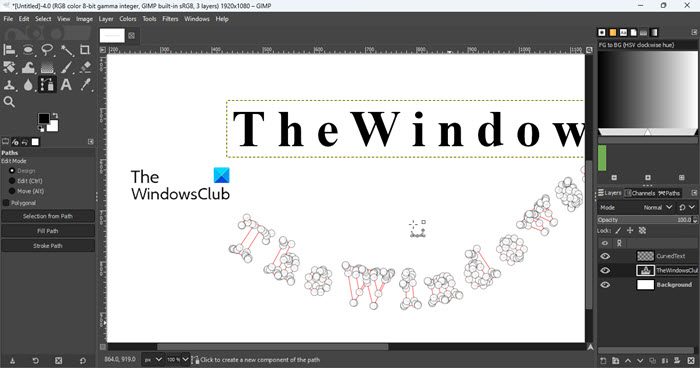
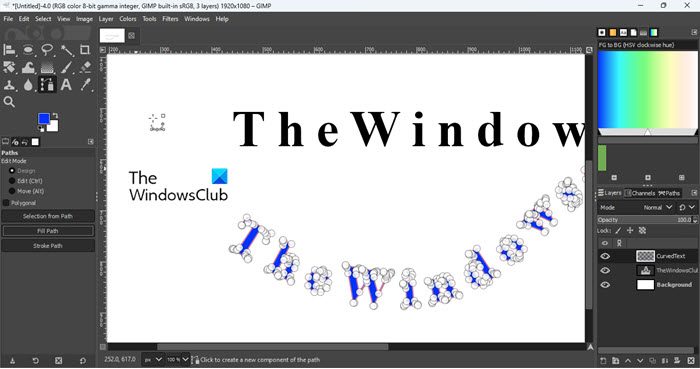
Next, switch to the CurvedText layer in the Layers panel. Change the active foreground color in the toolbar to the color you want to fill your text with and click on the Fill Path button under the Paths section. A Fill Path popup will appear. Click on the Fill button to apply the changes.
4] Adjust the curved text
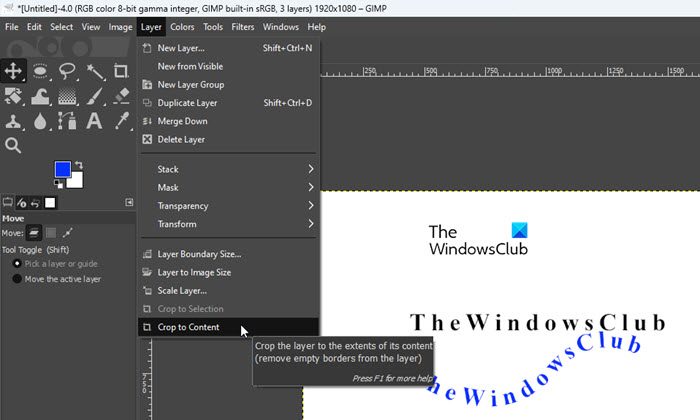
Select the Move Tool to hide all the tiny nodes. Then switch to the Paths tab in the Layers panel on the right side and click on the hide icon to hide the path (the red border around the letters in the text). Switch back to the Layers panel and while being on the CurvedText layer, click on the Layer menu on top and select the Crop to Content option. This will crop the selected layer to the extents of its content.
Now again, grab the Alignment Tool, click on the curved text, and then click on the Align center of target and Align middle of target options.
Finally, hide the original text layer from the Layers panel and you have your curved text right in front of you.
5] Save the image
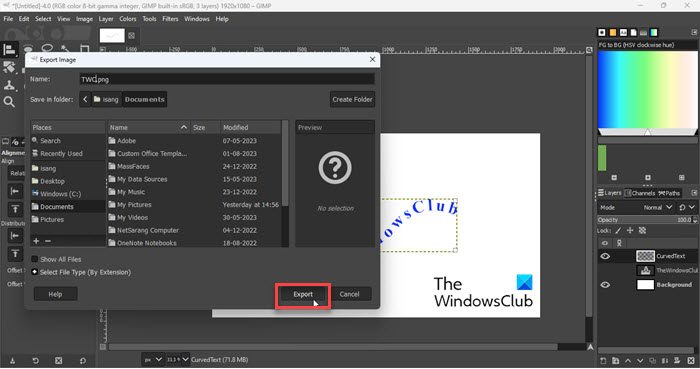
The last step is to export the composition as an image. Click on the File menu and select the Export option. In the Export Image dialogue box, enter a suitable name for the file and click on the Export button. Another popup will appear. Click on Export again to finish saving your work.
This is how you curve or bend text in GIMP. I hope you find this useful.
Read: How to remove the background from a photo using GIMP.
How to make a curve in GIMP?
You can use the Paths Tool in GIMP to draw straight or curved lines connected by multiple nodes. Select the Paths Tool from the toolbox and click anywhere on the blank canvas to place the first node. Then take your cursor to the location where you want to place the next node, and then click and drag to create a curved segment.
Where is Curve Bend in GIMP?
Curve Bend is a distort filter that can be applied to an image in GIMP. The filter is located under Filters → Distorts → Curve Bend… It lets you draw a curve that will distort the active layer or selection. The distortion is progressively applied from one edge of the layer or selection to the other.
Read Next: How to make a Gradient in GIMP.
Leave a Reply