In Microsoft Word, styles are a combination of predefined font style, color, and size that you can apply to text to change its appearance. If you do not want the built-in styles offered in Word, you can modify an existing built-in or create a new style.
What are the advantages of using styles in Word?
Built-in styles in Microsoft Word help users to format a document with a consistent and professional look quickly. Using custom new styles, you can create a combination of font style, color, and size to change the appearance of a Word document.
How to Customize and Create a new Style in Word
Follow the methods below to customize and create a new style in Word.
- Modifying an existing style by updating it to match formatting in your document
- Modifying a style manually in the Modify Style dialog box
- Create a new style
- Remove new style from Style gallery
1] Modifying an existing style by updating it to match formatting your document
Select a text that has a style applied for example Heading 1.
The text selected style is highlighted in the Styles gallery.
Then format the styled text, for instance, changing the size for Heading 1 from 16 to 26.
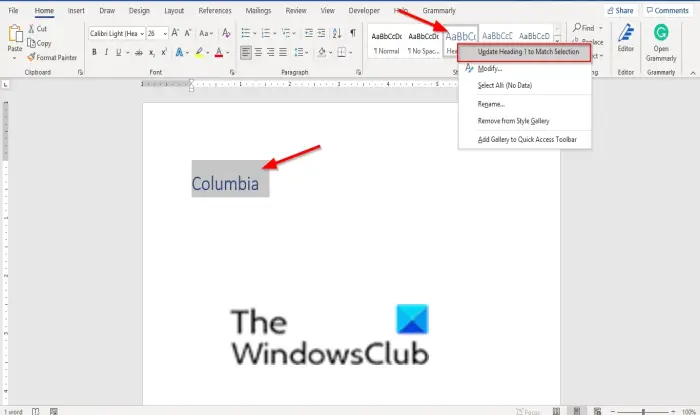
On the Home tab, in the Styles group, right-click the style that you want to change, then click Update (Style Name) to Match Selection.
2] Modifying a style manually in the Modify Style dialog box
You can modify a style in the Styles gallery without using the text in your document.
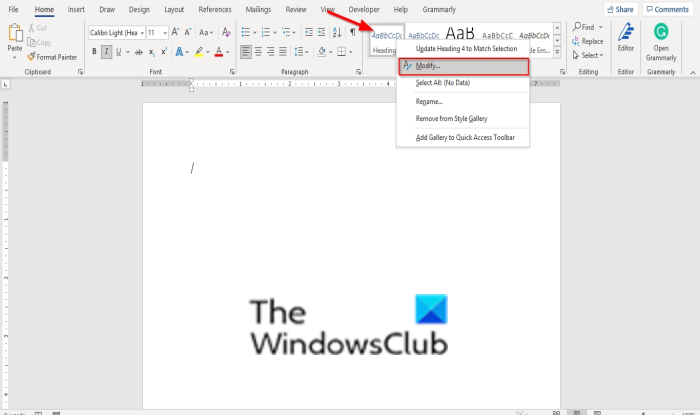
On the Home tab in the Styles gallery, right-click any style in the Styles gallery and select Modify.
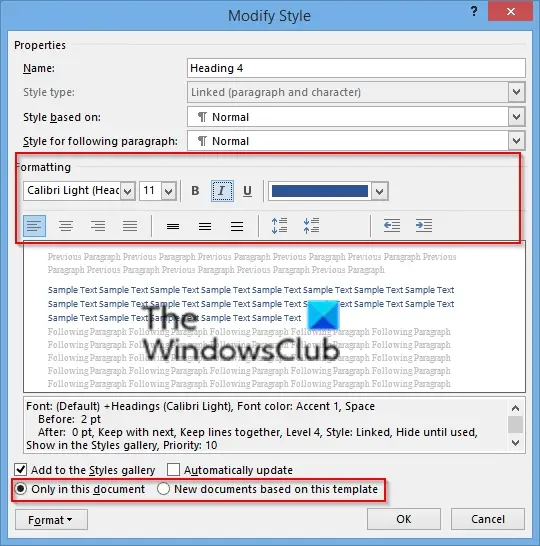
A Modify Style dialog box will open.
In the Formatting section, you can make any formatting changes you want such as font style, size, color, alignment, line spacing, or indentation.
You can choose if the style change applies to the current document or to all future documents.
Then click OK.
3] Create a new style
You can select a formatted text in your document to create a new style to add to your Styles gallery.
Right-click the text that you want to add as a new style to the Styles gallery.
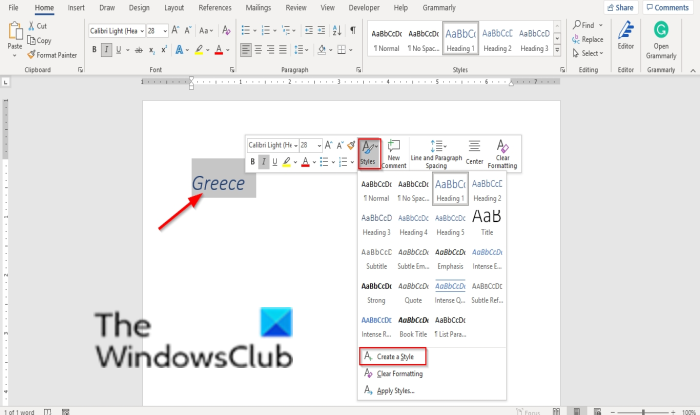
In the mini toolbar that appears, click Styles and then click Create a Style.
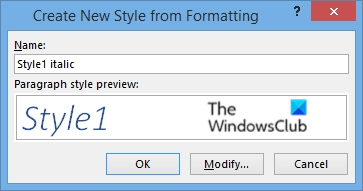
A Create new style from Formatting dialog box will open.
Give your style a name and click OK.
The new style will appear in the Styles gallery.
4] Remove new style from Style gallery
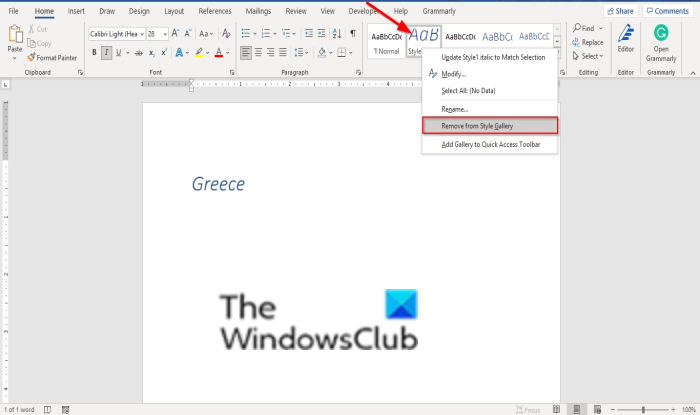
Right-click the style you have just created in the Styles gallery and select Remove from Styles gallery.
We hope this tutorial helps you understand how to customize and create a new style in Word; if you have questions about the tutorial, let us know in the comments.
How do you modify a style?
In order to modify a style in Microsoft Word, you need to choose the style first in the Styles section. Then, right-click on the style and choose the Modify option. Next, you can change or customize things as per your requirements. No matter which style you choose, the process of modifying it is the same.
That’s all! Hope it helped.