Windows 11 is the new OS update from Microsoft. On Windows 11, the entire UI is changed with new features and stylized icons. In this guide, we show you how you can customize the File Explorer Menu bar on Windows 11.
On the previous versions of Windows like 10/8/7, we see Names of the options or features in the menu bar. Microsoft dropped the names on Windows 11 and opted for icons that do the same. The icons and the UI changes made all the difference and made Windows 11 and its Explorer look beautiful. Let’s see how we can do different things on Explorer in Windows 11.
How to customize and use Windows 11 Explorer
These are the following things you can do and customize the items in a folder using the Windows 11 Explorer menu bar.
- Delete Files from the Menu
- Change Icon Sizes of Files
- Show or Hide Navigation, Details, and Preview Panes
- Show Hidden Items
- Enable Checkboxes
- Hide File Name Extensions in the File Name
- Pin an item to Quick Access
- Select or Deselect Files
- Create new items
- Share Files from the Explorer menu
Let’s see how we can do them.
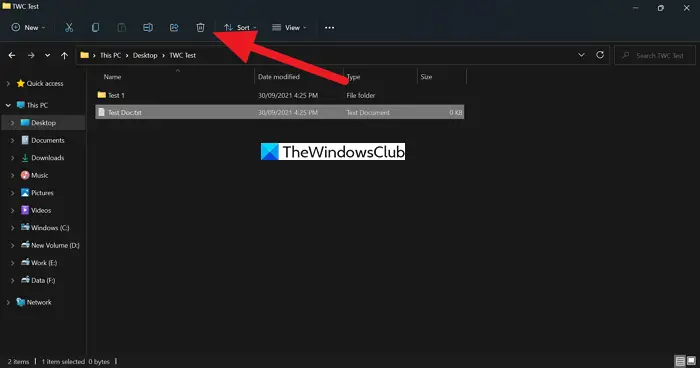
1] Delete Files from the Menu
You can now easily delete files from the menu bar of the Explorer on Windows 11. Select the file you want to delete and click on the Trash icon in the menu bar.
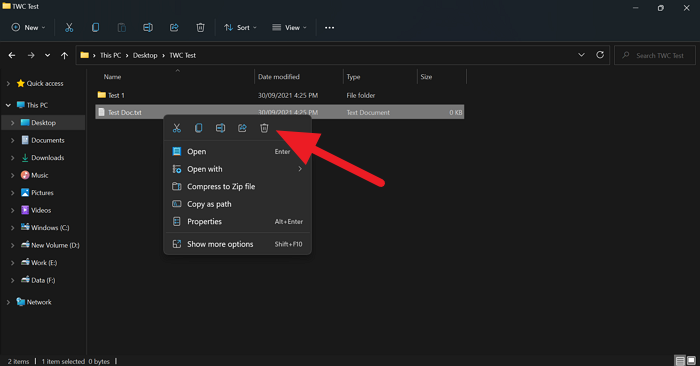
Alternatively, you can right-click on the selected file and click on the same Trash icon you see in the context menu.
Read: Manage Files and Images like a Pro with PowerToys
2] Change Icon Size of Files
If you want to see files in a folder in big or small icons, you can easily do it from the Menu bar of the Explorer. Click on the View button in the menu bar and select the size you want to apply to the icons.
![]()
Alternatively, you can also change the size of icons by clicking on the small buttons at the bottom-right of the Explorer.
3] Show or Hide Navigation, Details, and Preview Panes
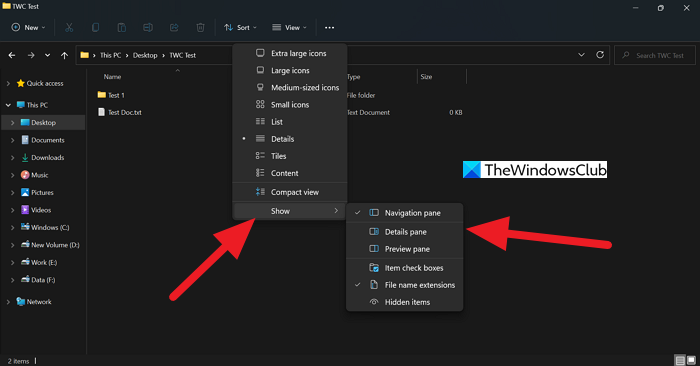
We see folders and local discs on the Navigation pane, and details of the selected file in the Details pane, and a preview of the selected file in the Preview pane. We can show or hide them in Explorer whenever we want in a few clicks.
To show or hide, Navigation, Details, and Preview panes, click on the View button in the menu bar of the Explorer and then move the cursor on to Show in the options. You will see options of Navigation, Details, and Preview panes. Click on the pane you want to see or hide. If a tick mark is there besides a pane option, then it is enabled or shown in the Explorer. If not, it is hidden.
4] Show Hidden Items
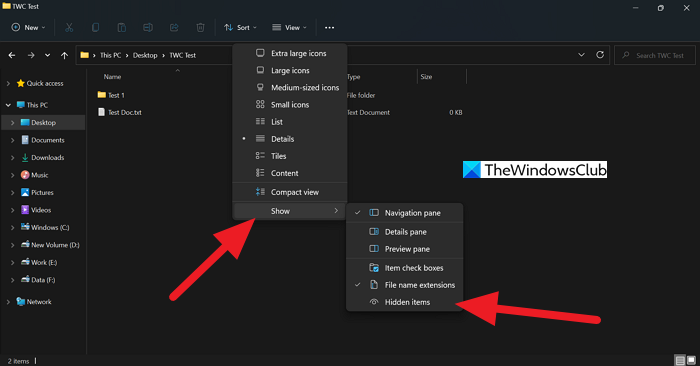
You can now easily show or hide hidden files from Explorer. Just click on the View button from the menu bar and click on Hidden items in the Show options. As said earlier, if there is a tick mark beside it, it is enabled, if not, it is not shown.
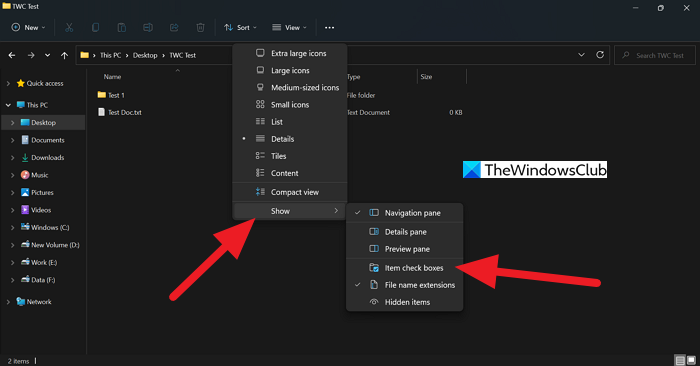
5] Enable Checkboxes
Checkboxes are available in Explorer to ease the file selection process. You can select all the files just by clicking on a check box on top of the item. To enable Checkboxes, click on View in the menu bar and select Item check boxes from the show options.
6] Hide File Name Extensions in the File Name
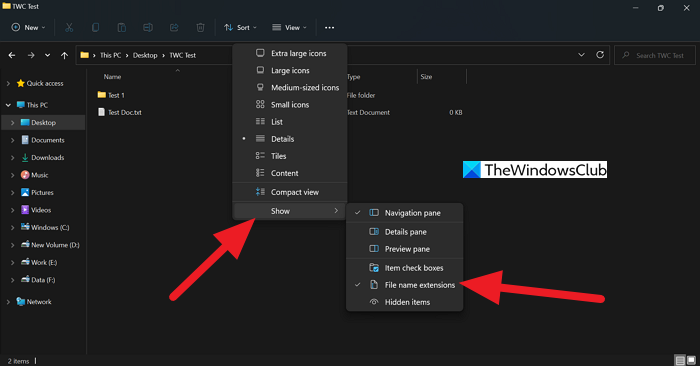
We see file extensions in the file names like .txt, .docx, or some other extension. You can hide them easily using the Menu bar of the Explorer. To do so, click on the View button in the menu bar and move the cursor on to the Show and then click on File name extensions.
7] Pin an item to Quick Access
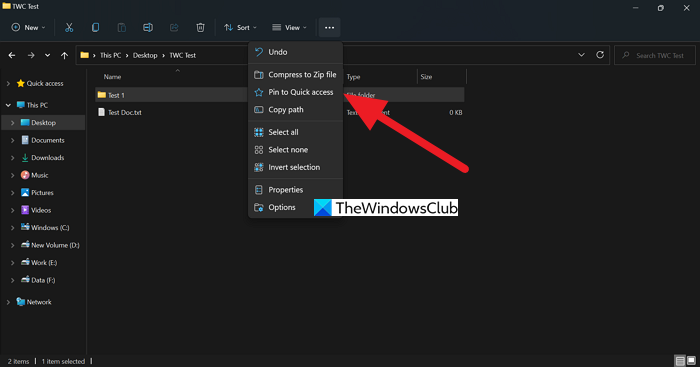
Quick access item is seen in the Navigation pane of Explorer. We can easily access the folders or items in Quick access. To add an item to Quick access, click on the three-dot button in the menu bar. Then, click on Pin to Quick access from the options.
8] Select or Deselect Files
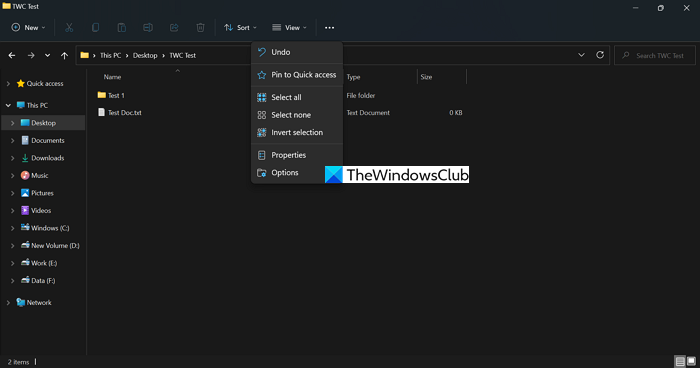
You can select items in a folder, or deselect them or invert select them from the Menu bar of Explorer itself. To do so, click on the three-dot button in the menu bar and choose the selection option you see in the drop-down menu like Select all, Select none, and Invert selection.
Alternatively, you can select files using the Ctrl button on the keyboard and mouse click. You can also select all the items in a folder using the Ctrl+A keyboard shortcut.
9] Create new items
Creating new items in a folder is too easy in the new Explorer. Just click on the New button in the menu bar and select the type of file you want to create from the options.
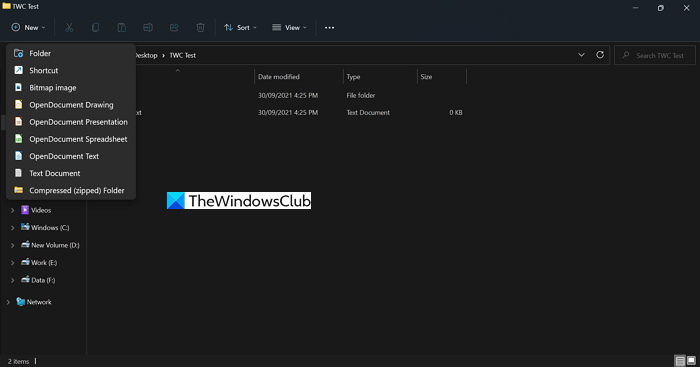
You can also create new items by right-clicking in a folder and selecting New from the context menu.
10] Share Files from the Explorer menu
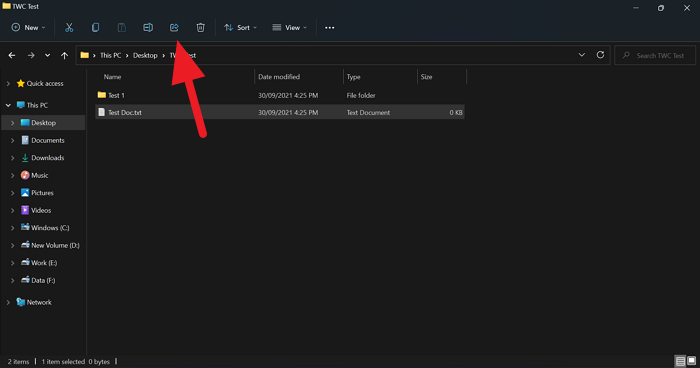
If you want to share items from Explorer, you can do it easily with a few clicks. Select the item you want to share and click on the Share button in the menu bar and then select the way you want to share the item from the options you see after.
Read: Windows 11 File Explorer Tips and Tricks.
Does Windows 11 have a new File Explorer?
Yes, Windows 11 has a new file explorer with updated UI in sync with the Windows 11 UI. The names on the menu bar are replaced with icons. The context menu is down-sized with icons and few options. The new Explorer is an advanced version of Windows 10 explorer in terms of its look.
How do I change the context menu in Windows 11?
Currently, you cannot change the context menu in Windows 11. Earlier, it was possible with a few tweaks in the Registry Editor which are curtailed by Microsoft in the latest Windows 11 updates. We have to wait and see if we can get an option to change it in the later versions of Windows 11.
Related Read: How to Turn Off Transparency in Windows 11.