If you do not like the default lock screen settings, you can change them using the Windows Settings panel. Although the options are limited, you can personalize them according to your requirements. Here is how you can customize the Windows 11 lock screen, log-in or sign in screen.

Like Windows 10, Windows 11 has an uncluttered lock screen with minimum things visible. For example, it displays a background wallpaper, clock, date, and some other essential things. The best thing is that the background of the lock screen can be set as per your requirements, it is possible to change the lock screen status, etc. Therefore, if you are looking for an option, this article could be handy for you.
How to customize the Windows 11 Lock Screen or Sign in screen
To customize the Windows 11 lock screen or log in screen, follow these steps:
- Press Win+I to open Windows Settings.
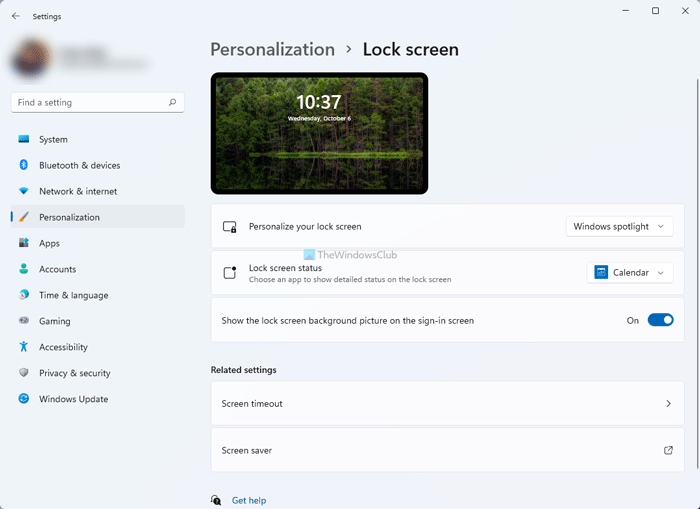
- Go to Personalization > Lock screen.
- Expand the Personalize your lock screen section.
- Choose Windows spotlight, Picture, or Slideshow.
- Expand the Lock screen status list.
- Select an app you want to display.
- Toggle the Show the lock screen background picture on the sign-in screen button to turn it on or off.
Let’s learn more about these steps in detail.
Before customizing the Windows 11 lock screen, you need to open the Windows Settings panel by pressing the Win+I button. Then, switch to the Personalize tab on the left side and click the Lock screen menu on the right side.
Here you can find three options:
- Personalize your lock screen: It helps you choose what background you want to display. For example, you can select Windows Spotlight, which fetches the background image from Bing. Apart from that, you can select the Picture option to show your favorite picture or memory on the lock screen.
- Lock screen status: It is possible to show Calendar notifications, Mail, Weather, etc., information on the lock screen. For that, you need to choose an option from here.
- Show the lock screen background picture on the sign-in screen: By default, Windows 11 shows the lock screen background image on the sign-in screen or the screen where you enter your password to sign in to your user account. If you do not want to show the same image, you can toggle this button to turn it off.

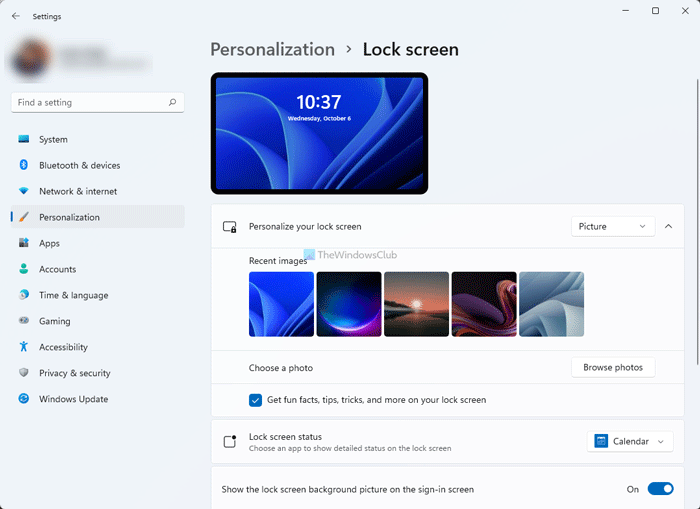
If you choose the Picture option, you can select an image from the predefined list or choose something from your computer. For that, click on the Browse photos button and select an image you like.

On the other hand, you can also turn on or off fun facts, tips, tricks, etc., from being appeared on the lock screen. For that, remove the tick from the Get fun facts, tips, tricks, and more on your lock screen checkbox.
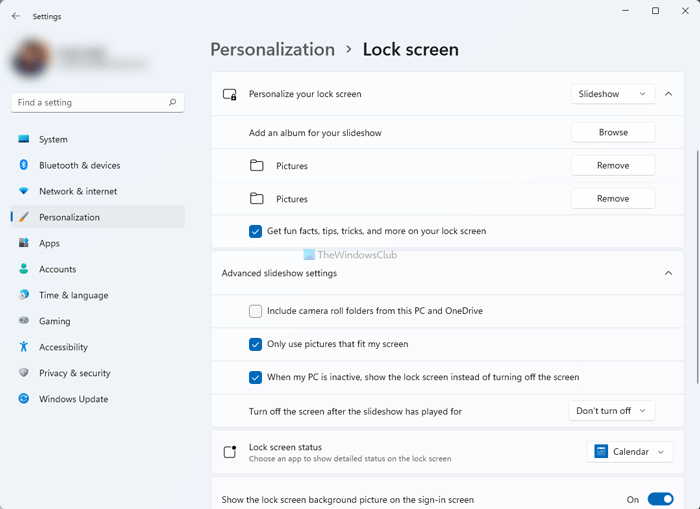
If you select the Slideshow option, you can select a folder of images manually. Other than that, you have the following options:
- Include camera roll folders from this PC and OneDrive
- Only use pictures that fit my screen
- When my PC is inactive, show the lock screen instead of turning off the screen

You can toggle the corresponding buttons to turn them on or off.
You can also disable Lock Screen Background Motion if you do not like it.
Related: How to customize Windows 11 Quick Settings.
How do I change the lock screen picture on Windows 11?
To change the lock screen picture on Windows 11, you need to open Windows Settings and go to Personalize > Lock screen. Here, expand the Personalize your lock screen option and choose the Picture option. After that, you can select an image from the list or click the Browse photos button to select your own image.
Related: How to customize Windows 11 Start Menu.
How do I customize my Windows lock screen?
You need to head to the Windows Settings > Personalize > Lock screen to customize your Windows lock screen. Here you can find all the options you need to change various things on the lock screen. A detailed guide is mentioned here, and you can follow it to get the job done.
Hope this guide helped you customize your Windows 11 lock screen easily.
Leave a Reply