If you are a server admin and part of an organization, you will be asked to configure Work Folders. They provide a super convenient solution for storing work files that are accessible by all required employees. In this post, we will explain how to install and deploy Work Folders on the Windows Server.
What are Work Folders in Windows Server?
Work Folders is a convenient feature in Windows that allows you to access your work files from your personal computer or other devices. This functionality is particularly beneficial for remote workers or those who frequently travel, as it enables seamless access to important documents without needing to be on the company network.
When using Work Folders, you can store copies of your work files on your personal devices, such as laptops, tablets, or smartphones. These files will automatically synchronize with your company’s data center, ensuring that you always have the latest version available, regardless of where you are. This feature also helps maintain data security and compliance, as the synchronization process is managed according to your organization’s policies.
Overall, Work Folders provides a user-friendly solution for managing work files, making it easier to work from anywhere while keeping your data secure and up-to-date.
Install and deploy Work Folders in Windows Server
To install, configure, and deploy Work Folders, you need to follow the steps mentioned below.
- Install Work Folders Role
- Start Windows Sync Share Service
- Create a Work Folder
- Configure Work Folder
Let us discuss them in detail.
1] Install Work Folders Role

As mentioned earlier, Work Folders is a role of Windows Server that you need to install along with its related features. Once you do that, then we will be able to configure it. To do so, follow the steps mentioned below.
- Open Server Manager.
- Go to Manage > Add roles and features.
- Now, click on Next.
- Select Role-based and feature-based installation and click on Next to continue.
- You then have to select the local server and click on Next to reach the Server Roles tab.
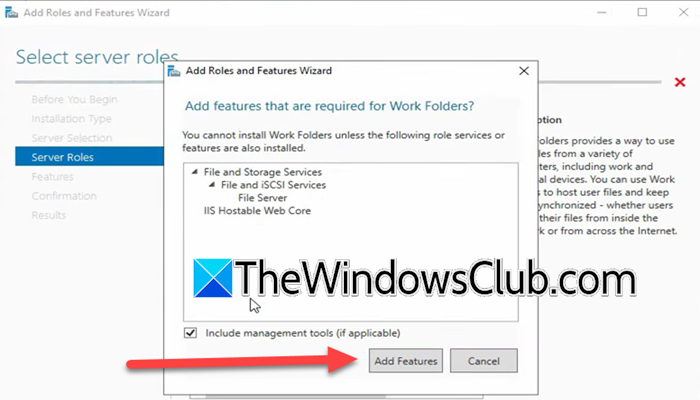
- You can now expand File and Storage Services, then File and iSCSI Services, and check Work Folders.
- Then, click Add Features once you get the prompt.
- Now, click on Next > Install.
Wait for a few seconds as the feature is being installed on your server. Once done, you can close the window.
Related: How to set up Work Folders in Windows 11
2] Start Windows Sync Share Service

Now that we have installed Work Folders on our system, we will go ahead and enable the Windows Sync Share service. To do so, follow the steps mentioned below.
- In Windows Server Manager, click on Tools > Services.
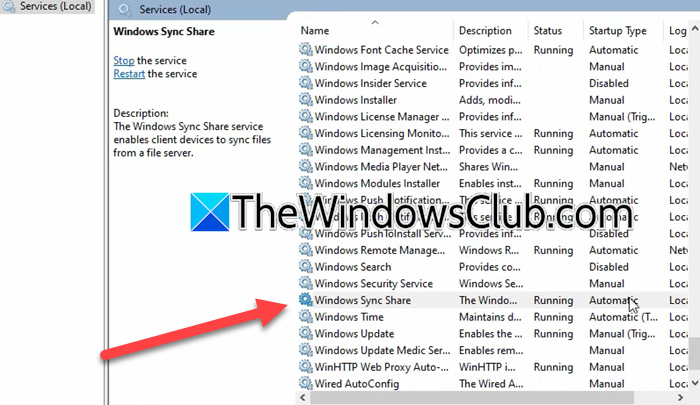
- Now, look for Windows Sync Share service.
- If it’s not started, right-click on it and click on Start.
You need to check if the Windows Sync Share service is set to Automatic, if not, right-click on it, select Properties, change the Startup to Automatic, and click on Ok.
3] Create a Word folder

After installing the Work Folders feature and enabling Windows Sync Share, we need to go ahead and create a Work Folder. To do so, follow the steps mentioned below.
- In the Server Manager, go to File and Storage Services > Work Folders.
- Click on the hyperlink that says To create a sync share for Work Folder, start the new Sync Share Wizard.
- Now, click on Next.
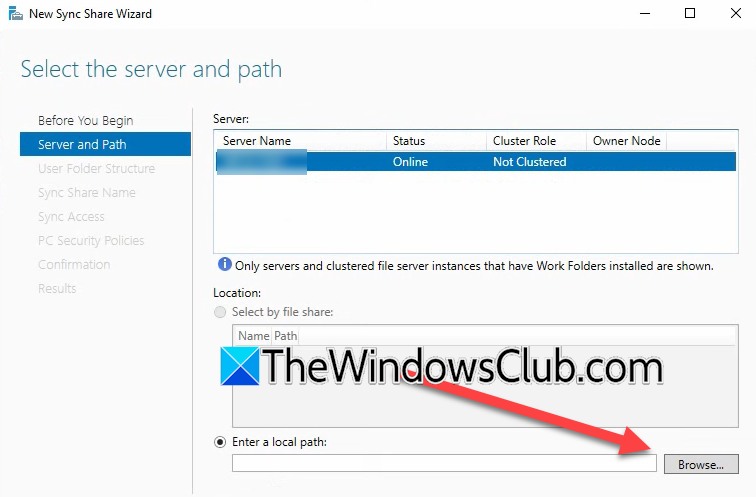
- Click on Browse and select the local folder that you want to share.
- Now, click on Next, then select a structure of your choice (depending on your organization’s template) and click on Next.
- Add name and description; click on Next.
- Now, click on Add, enter “Domain Users” in the Enter the object name to be selected, and click on Check names; click Ok.
- Once you have selected the user, click on Next.
- Select the option as per your requirement.
- When you are on the Confirmation tab, take note of the Server Name as that will be the URL we will need to add later, and click on Create.
You will see a new work folder has been created.
4] Configure Work Folder

This is our final step as we are going to configure the work folder that we created earlier. To do so, go through the steps given below.
- You need to access the client computer that’s a part of your Active Directory network and log in there as the domain admin.
- Since for this tutorial, we are going with unsecured synchronization of files, we need to make some registry changes, for that, open Run, type ‘regedit’, and click Ok.
- Go to
Computer\HKEY_LOCAL_MACHINE\SOFTWARE\Microsoft\Windows\CurrentVersion. - Right-click on CurrentVersion and select New > Key.
- Name it Work Folder, now, right-click on the newly created folder, select New > DWORD (32-bit value); name it AllowUnsecureConnections.
- Double-click on AllowUnsecureConnections and set its value to 1.
- Search for Work Folders and click on Set up Work Folders.
- You need to enter the URL, which will be http://URL_you_copied, and then click on Next.
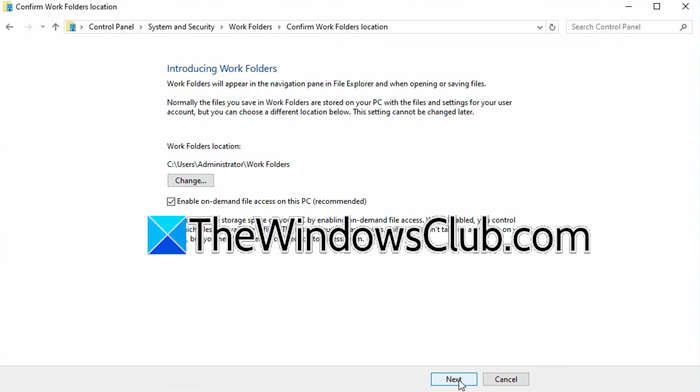
- Select the work folder’s location or keep it default and click on Next.
- Click on Sync up Work Folders and then click on Close.
Now, you can access the Work Folder from the File Explorer.
Read: How to configure Domain Controller in Windows Server
How to use Active Directory in Windows Server?
To use Active Directory, you first need to install the Active Directory role and relative features from the Server Manager. Then, you have to configure it and add users. We recommend you check our guide on how to configure Active Directory in Windows Server to know more.
Read: Backup and restore Active Directory in Windows Server.
Leave a Reply