PC users especially gamers that have both the integrated (built-in) and dedicated (discrete) GPU installed on their system might experience low FPS probably because the rig or the applications or games running might be using the built-in graphics card. In this post, we will show you methods on how to disable the Integrated Graphics Card on Windows PC to improve performance and general user experience.

How to disable Integrated Graphics Card
A dedicated graphics card comes completely separate from your CPU, has its memory source, and doesn’t rely on your system’s RAM. This means a discrete graphics card delivers crisp, clear graphics quickly, enabling video editing and complex graphic design. That said, if both the integrated and dedicated GPU is installed on your system, to fully utilize the dedicated graphics card, you might need to disable the integrated GPU.
We will discuss this topic under the following subheadings.
- Check which GPU is currently in use & differentiate between the Integrated and Dedicated GPU
- Disable Integrated Graphics in Device Manager or BIOS
Read: How to check GPU health on a Windows computer
1] Check which GPU is currently in use & differentiate between the Integrated and Dedicated GPU
In a setup where you want your PC to use the dedicated GPU, you need to connect your monitor to the graphics card because if the monitor is connected directly to the motherboard, the system uses the integrated GPU by default.
You can check which GPU you have and in use on your system using any of the following methods:
- DirectX Diagnostic Tool
- Task Manager
- Display Settings
- Device Manager
- Freeware
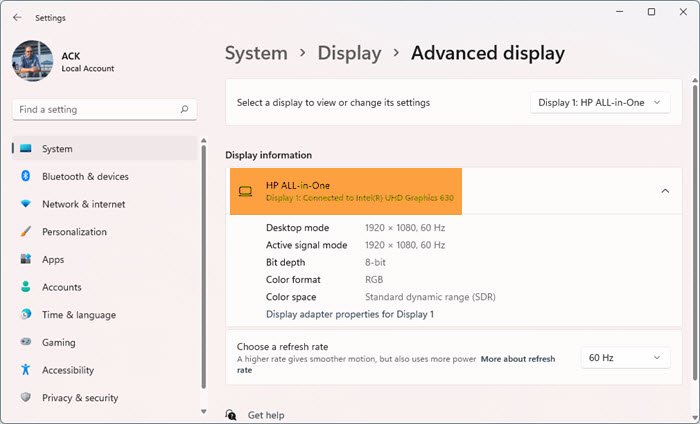
To use the Windows Settings app to see which GPU you have and is currently in use follow these steps:

- Press the Windows key + I to open Settings.
- Go to System > Display > Advanced Display.
- Under Display information, you can see the GPU that your monitor is currently using.
The number of monitors you will see connected to your PC depends on if you have one or multiple displays. You can click the drop-down and select the desired GPU under the Select a display to view or change its settings heading.
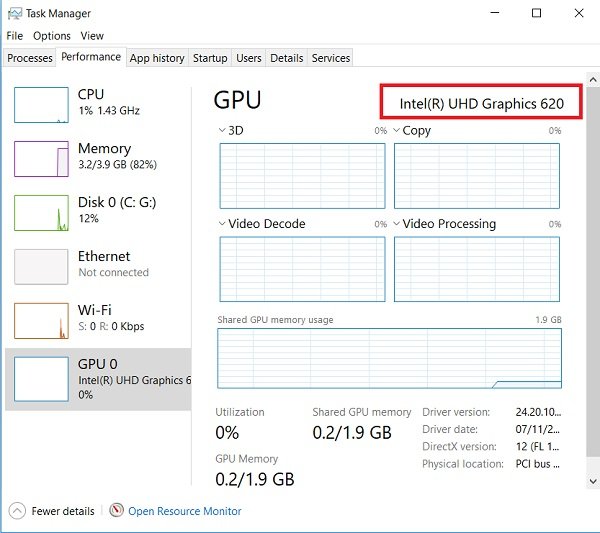
Now, to differentiate between the integrated and dedicated GPU on your system, follow these steps:

- Press Ctrl + Alt + Delete simultaneously to open Task Manager,
- Click on More details if the Task Manager only shows the list of applications running.
- Go to the Performance tab.
- Now, at the lower left part, if you see GPU 0 and GPU 1, it means that your PC has an integrated and dedicated GPU respectively.
Read: What is an NVIDIA LHR GPU? LHR vs. non-LHR GPU compared
2] Disable Integrated Graphics in Device Manager or BIOS

Now that you have been able to identify and differentiate between the built-in and discrete GPU on your system, you can disable the integrated graphics card in Device Manager or the BIOS.
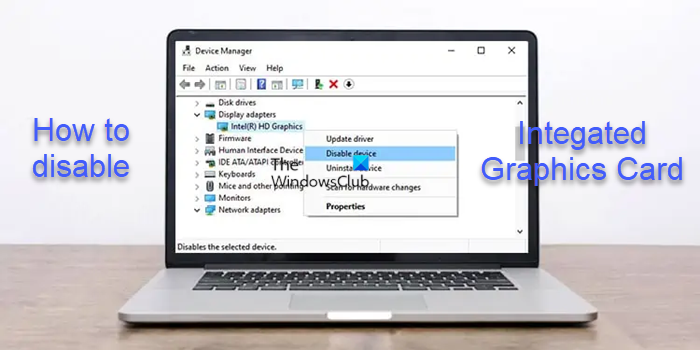
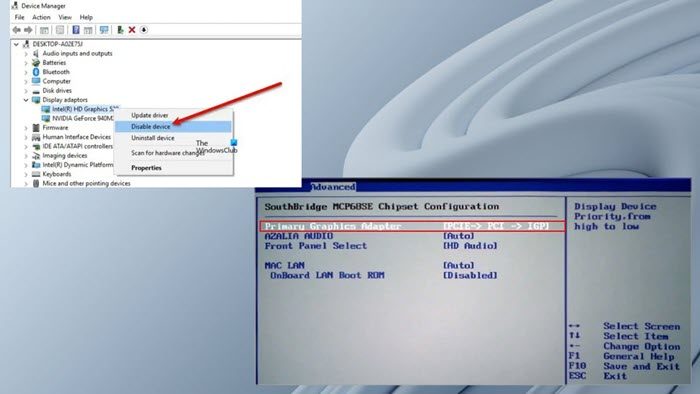
To disable the integrated graphics card in Device Manager, follow these steps:
- Press Windows key + R to invoke the Run dialog.
- In the Run dialog box, type devmgmt.msc and hit Enter to open Device Manager.
- Now, scroll down through the list of installed devices and expand the Display adapters section.
- Right-click on the integrated graphics device.
- Select Disable device from the context menu.
To disable the integrated graphics card in BIOS, you just need to set the dedicated GPU as the primary graphics adapter. Here’s how:
- Boot into BIOS on your computer.
- Go to the Advanced tab. You may have different setting names that represent the primary graphics adapter.
- Now, set your primary graphics adapter to PCI/PCIe instead of Auto or IGFX.
- Also, set the VGA priority to Offboard.
- Save and exit.
If you cannot find these settings, you can consult the motherboard’s user manual for how to navigate/use the BIOS settings.
That’s it!
In conclusion, disabling the integrated GPU depends on whether you are a desktop or a laptop user. If you disable your integrated graphics card in BIOS, and in the event, your dedicated graphics card fails, your monitor may go blank even when you connect the monitor to the motherboard. In this case, you may need to reset the BIOS to resolve this issue.
Nonetheless, disabling integrated graphics on laptops is not recommended, as they require both GPUs to operate smoothly. However, if the integrated graphics is disabled, Windows will switch to the Microsoft Basic Display Adapter driver for handling software-based video processing.
We hope you find this post on disabling Integrated Graphics Cards on Windows PC informative enough!
How do I use GPU instead of integrated graphics?
If you’re unable to switch between integrated Intel Graphics and NVIDIA Discrete Graphics Card on your Windows 11/10 system, you can use the NVIDIA Control Panel to perform this operation by following these steps:
- Open the NVIDIA Control Panel.
- Under 3D Settings select Manage 3D Settings.
- Click the Program Settings tab.
- Now, select the program you want to choose a graphics card for from the drop-down list.
- Finally, select the preferred graphics processor you want to use in the drop-down list.
Cannot switch between integrated and dedicated GPU on Windows 11
If you are unable to switch between integrated and dedicated Graphics Card, boot into BIOS and check if you can switch the graphics card from there. Alternatively, you can use the NVIDIA Control Panel to perform this operation.
Read next: How to clear NVIDIA, AMD, or AutoCAD Graphics Cache
Does disabling integrated graphics improve performance?
On laptops, tasks are switched between the integrated and the dedicated GPU, where the latter handles graphics-intensive tasks such as video rendering, gaming, etc., and the former handles low specs applications such as discord, or even the internet browser. So, with regards to performance improvement, if your computer solely runs on iGPU, disabling the hardware will not improve performance. However, if you have a dedicated graphics card on your PC, then Windows will automatically use the GPU to perform graphics-intensive tasks.