When required, Microsoft Office apps like Word and PowerPoint settings can be configured to enable or disable the spell-check feature. This is particularly useful when we are drafting a letter or making notes for a blog or something. At other times, we do not require this. For instance, when we throw in things like contact names and other proper nouns, spell check fails to recognize the difference and although not required, flags them with red wavy lines underneath. The OneNote app is no exception to this rule. If you do not want the proofreading feature in OneNote to be disabled, follow the instructions.
If you want to disable automatic spelling and grammar checking in OneNote 2016 or OneNote app for Windows, you will have to change the settings in the former and use the Onetastic addon in the latter.
Disable Spell Check feature in OneNote
OneNote has the same spelling and Grammar check feature as seen in Microsoft Office. We’ll cover the method to disable the feature in both OneNote and OneNote app for Windows. To know the difference between the two, see our earlier post on the difference between OneNote app and OneNote desktop software.
Turn off spell-check in OneNote desktop software
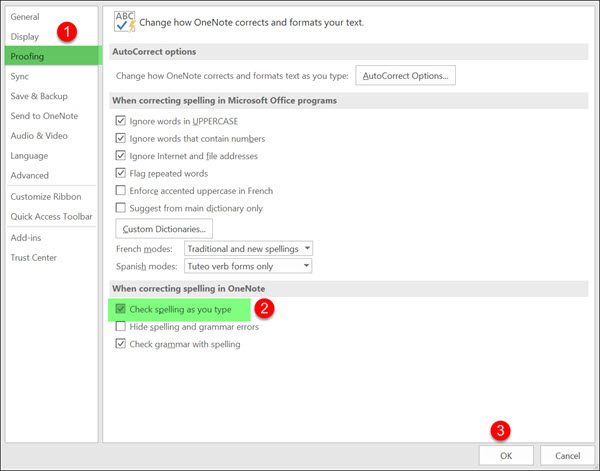
Launch OneNote. Move to the ‘File’ menu, click it and select ‘Options’ from the list displayed on the left.
Next, choose ‘Proofing’ tab and under the section ‘When Correcting Spelling in OneNote’ uncheck the box marked against ‘Check Spelling As You Type’ option. You may also uncheck ‘Check grammar with spelling’.
Finally, hit the ‘Ok’ button to allow the changes to take effect.
Disable Spell Check in OneNote App for Windows
Open OneNote app and choose ‘Settings and More’ visible as 3 dots.
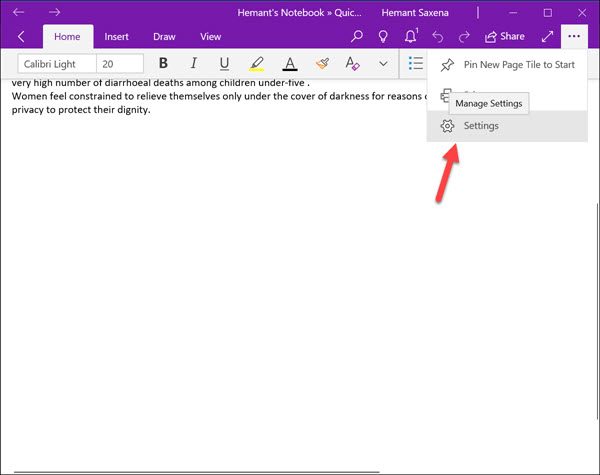
Next, select ‘Settings’ > Options and scroll down to find ‘Proofing’ option.
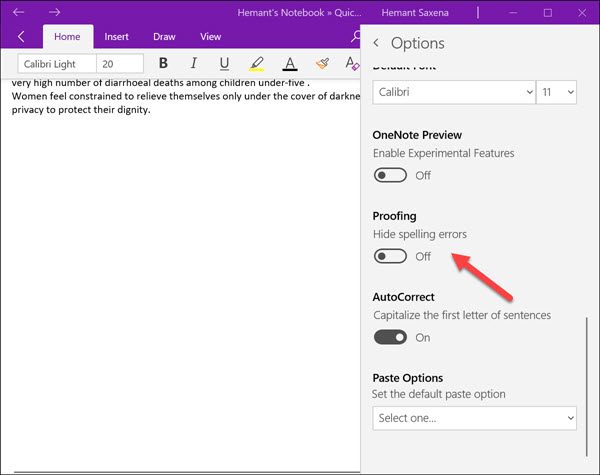
When found, move the slider to ‘On’ from ‘Off’ to hide the spelling errors.
Use Onetastic Addin to disable Spell Checker
Onetastic is a free add-in for Microsoft OneNote. The optional tool adds many new features to the OneNote app (menus, macros, OneCalendar, Image Tools, and more). Besides, it can copy and paste text from an image. The only thing that counts as the shortfall of this ingenious add-in is its availability, which is limited to Desktop users. Mobile users cannot use this feature. Also, Onetastic is available only on Windows.
To see it working, download and install it. Be sure to select the correct version of this add-in (32-bit or 64-bit version of the add-in to match your OneNote 2016 version)
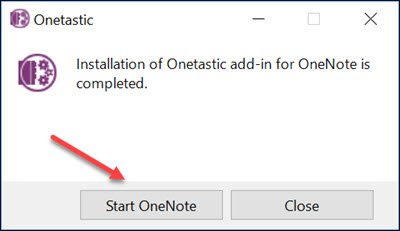
Once done, run the executable file and Start OneNote, when prompted.
After that, choose the ‘Home’ tab and move to ‘Download Macros’ section as shown in the screenshot below.

Once there, hit ‘Show macros from Macroland’ tab.
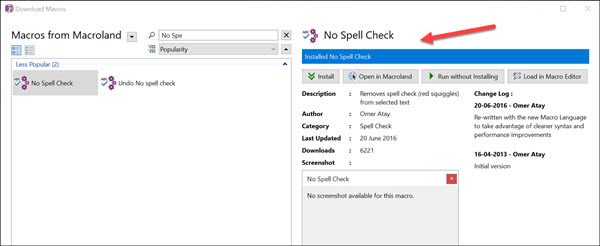
Next, select ‘No Spell Check’ macro and hit ‘Install’ button.
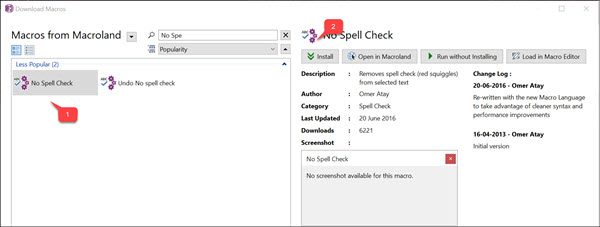
When done, you will notice the Installed No Spell Check blue-colored notification. Exit the window.
Switch to OneNote desktop software and under the ‘Home’ tab ‘Spell Check’ option should be visible to you. Simply click the option, and select ‘No spell check’.
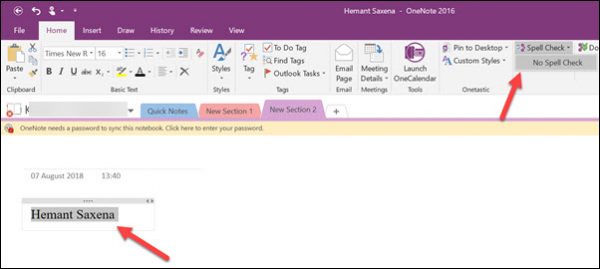
When selected, you will find red wavy lines appearing under a word instantly disappear.
Can you spell check in OneNote?
Yes, Spell Check is available in OneNote. To open the Spell Checker, click the Review tab and the Spelling button in the Spelling group. A proofing pane will appear on the right with suggestions. Choose the correct suggestion, then click OK.
How do I Ignore All in OneNote?
In OneNote 365, there is no option for Ignore All, you can only use Ignore Once when using the spellchecker, but the ignore All option is available in Excel, Word, PowerPoint, and Outlook.