GNU Image Manipulating Program (GIMP) is a free open-source image editing software. GIMP has a lot of features that can make designing or editing easy. The ability to make dotted lines in GIMP can add interest to artwork especially if they are for advertisement. In designing, unusual things draw interest. Learning how to draw dotted lines in GIMP can add interest to your work.
How to draw a Dotted Line in GIMP
All artwork is made up of lines, and lines are the basic building block of artwork. This makes it important to know how to enhance your lines. Knowing how to draw dotted lines can be used in also making shapes dotted as well.
To make dotted lines or circles and shapes with dotted lines using GIMP, follow these steps:
- Open a new file in GIMP
- Locate the Menu bar
- Use the Paths tool to draw the line
- Edit the default color and weight if you wish
- Next, set the Stroke path options
- Select the style and make line dotted
- Save the file.
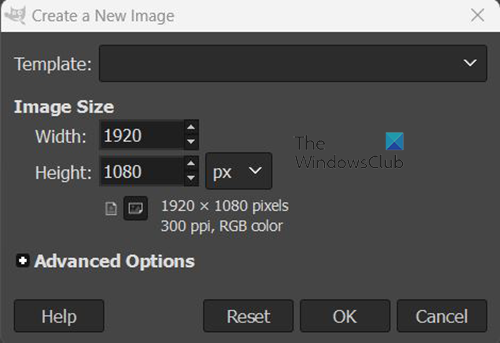
Open GIMP and then open a new document. you can open the new document by going to File then New or pressing Ctrl + N. The Create a new image dialogue box will open for you to choose your document options. Choose the settings that you want for your document then press OK to confirm and keep the options and open the canvas.
It is now time to draw the line, you will use the Paths tool to draw the line. You can access the Paths tool from the left tools panel or the top menu bar.
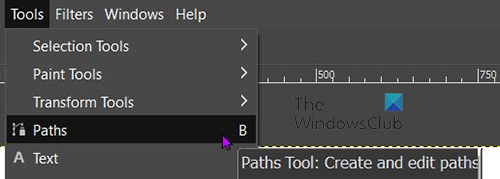
Go to the top tools bar and press Tools then Paths of press B. you can also get to the Paths tool by going to the left tools panel and clicking the Paths tool icon which is between the Smudge tool and the Text tool.

When the Paths tool is selected click one part of the canvas and move and click another part of the canvas. A line will be created between the two points that were clicked. The path will come out with the default color and weight, you will need to edit it to make it fit your project.
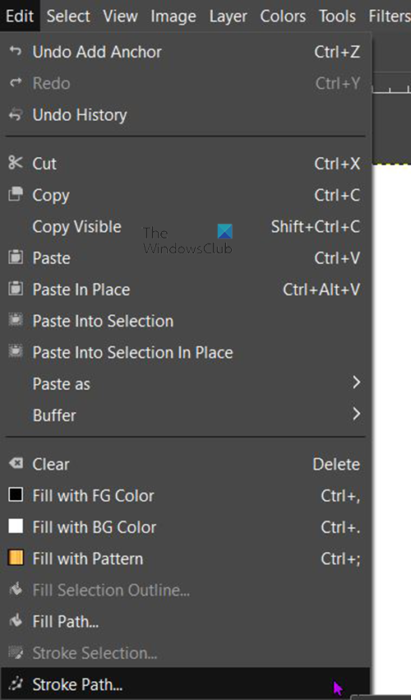
To edit the path, go to the top menu bar and click Edit then Stroke path.
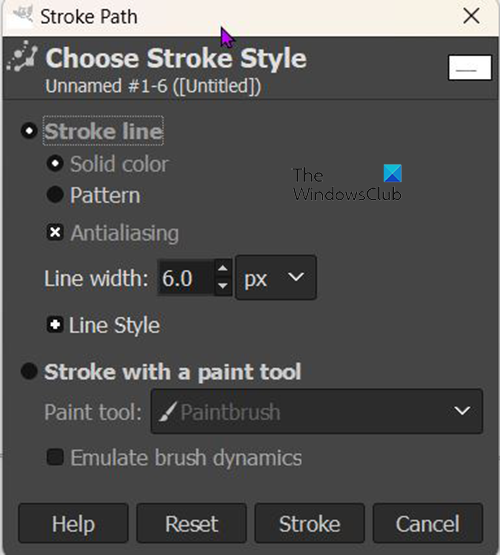
The Stroke path options window will appear and you will see the default values. You can change them to whatever you want.
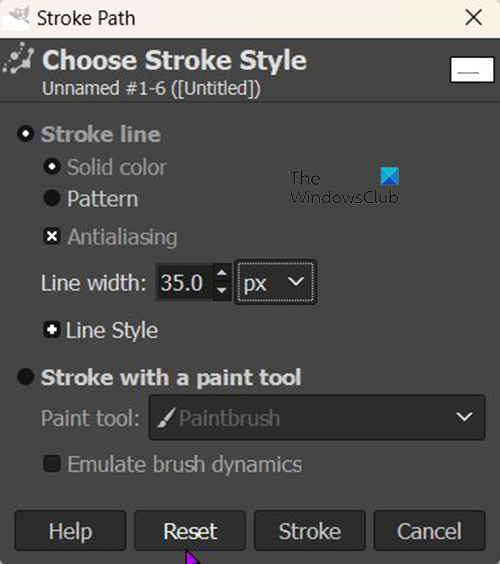
To make the line thicker change the value of the Line width to whatever value would fit your project then press ok. For this article, I will use a value of 35 px. Right beside the Line width box is the unit of measurement option. You can click on the drop-down arrow and change the current unit of measurement to what you want. When you are finished press Stroke to confirm the changes.
This is the stroke with a width of 35 px.
The article aims is to show you how to create dotted lines. That is the next change that will be made to the strike.
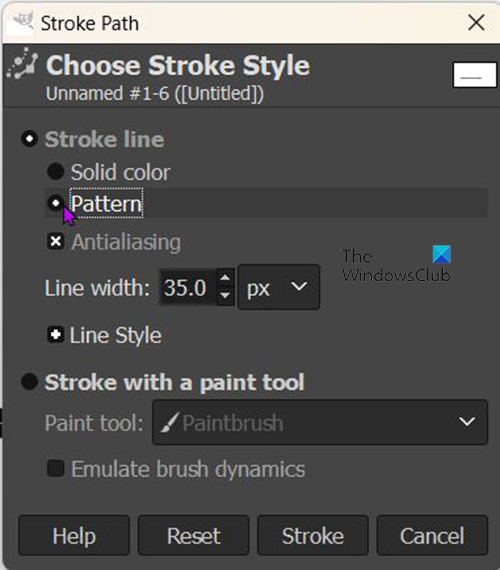
To make the dotted line, go back to Edit then Stroke path. The Stroke path options window will appear. Look under Stroke line where you will see Solid line checked as the default. Click Pattern to change from a solid line to a Pattern.
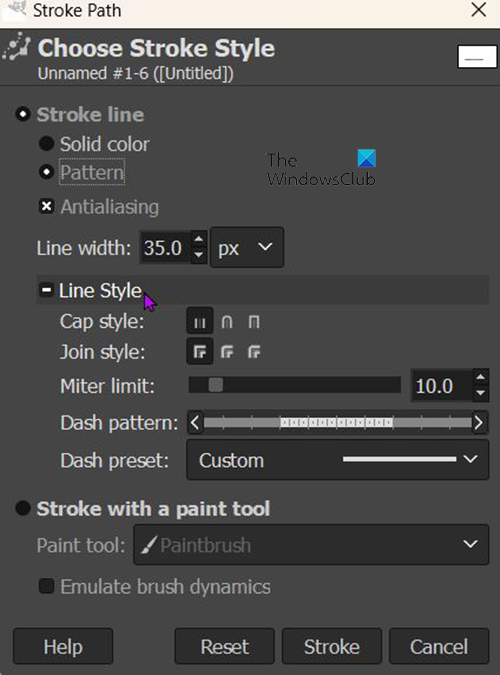
While still in the Stroke options box, look for Line style and click and click on it. You will see the window extend to show line-style options that you can choose from.
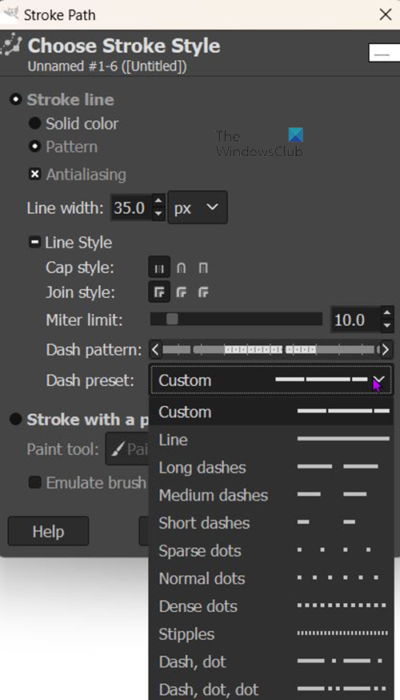
Look for Dash preset and click it to reveal the list of dots and dashes to choose from. You can choose dash or dots and they have options to choose from. However, since this article is about dotted lines, the dots will be chosen. There are different dots to choose from so choose the one that you want. When you are finished choosing click Stroke to accept and close the window. This is the line that is now made of dots.
Read: How to scan an Image with GIMP
How do I move a path in GIMP?
When you use the Path tool to create the path, you can move it to any position you want to. To move the path just hold Alt then click and drag the path to the place that you want it.
Read: How to make Stencil in GIMP
How do I give a path a color in GIMP?
When you have drawn the path you can then choose the color that you want. Go to the foreground color swatch and click it, when the color picker appears choose the color that you want. When you have chosen the color, go to Edit then Stroke path, and a stroke properties window will appear. From the stroke, properties window look under Stroke line and choose Solid color. You then give the line a Width. When you are finished click Stroke. The path will take the color that is in the foreground swatch.