Enabling all cores of a processor can improve performance and multi-tasking capabilities, reduce the amount of energy consumed by the system, and improve the overall stability of the device, as the processors can be much more effective in handling unexpected errors.
Windows generally tracks the available processor cores and uses or allocates them as and when necessary. However, the cores can also be enabled manually.

How to enable all CPU cores on Windows 11
Enabling all CPU cores on Windows 11/10 computers would involve two distinct phases: modifying the settings from the firmware end and configuring the settings at the OS end.
- Enable Multi-Core Support and Hyperthreading
- Use System Configuration Tool
1] Enable Multi-Core Support and Hyperthreading
While the BIOS settings can help activate the option to use all the cores, the System Configuration Utility can help effectively manage and allocate the cores.
Enable Multi-Core Support
- Restart the PC and enter the BIOS by pressing the F2 or DEL key, displayed on the screen during booting.
- Check for Device Options under Advanced settings and choose the CPU settings option.
- Check for the option named Multi-Processor.
- Change the value of the settings to ENABLE to activate all cores.
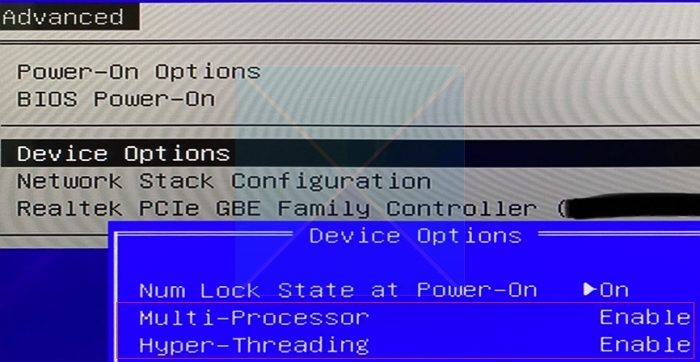
Enable HyperThreading
Hyperthreading, an Intel technology, allows splitting up a physical processor core into 2 virtual cores or threads. These cores can compute and execute instructions independently, improving the system’s overall efficiency.
Once the multi-core support has been enabled, the Hyperthreading can be activated from the BIOS or UEFI by following the below-mentioned steps:
- Restart the system and enter the BIOS by pressing the F2 or DEL key (as applicable).
- Navigate to the Processor/Processor Settings section and select the Hyper-Threading Technology option with the arrow keys.
- Press ENTER followed by arrow keys to ENABLE the option.
- Press F10 to save the changes and exit
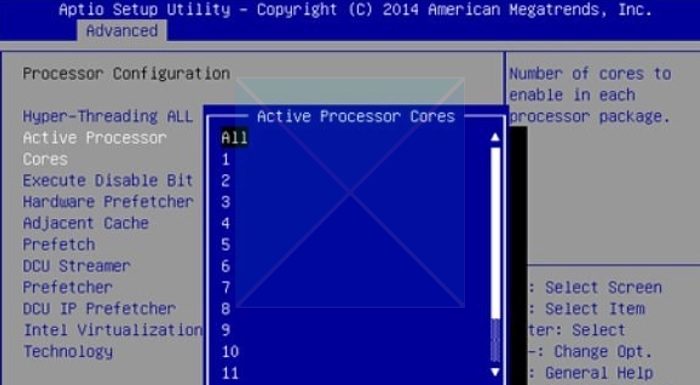
To confirm that the option has been enabled:
- Open the Windows Terminal from the desktop
- Type wmic and press ENTER.
- Enter the below-mentioned command
CPU Get NumberOfCores,NumberOfLogicalProcessors /Format:List
on the prompt and press ENTER.
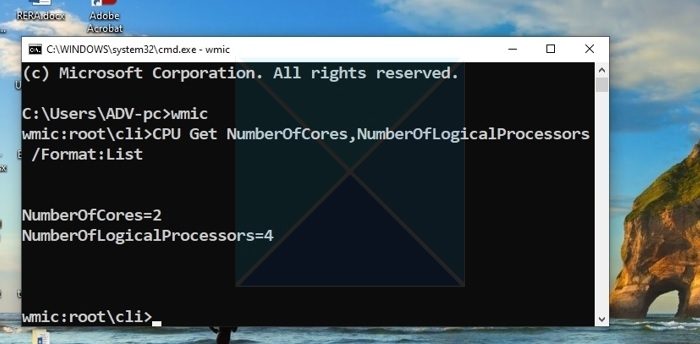
Alternatively, open the Task Manager and click on the Performance Tab to check the number of cores and logical processors.
The result would show the Number of Cores and the Number of Logical Processors. If hyperthreading is enabled, the number of logical processors displayed will be twice the number of cores.
Read: MULTIPROCESSOR CONFIGURATION NOT SUPPORTED Blue Screen
Note: Hyperthreading is not available for a few selected processors. Hence, it cannot be enabled if the installed processor doesn’t support the feature.
2] Use System Configuration Utility
By default, all cores on your processor are active, and you should never manually set processor cores in Windows 11; it is best to let Windows manage your processor. You can enable all cores by:
- Type msconfig into the Windows search bar and open it
- Go to the Boot tab and click on Advanced Options.
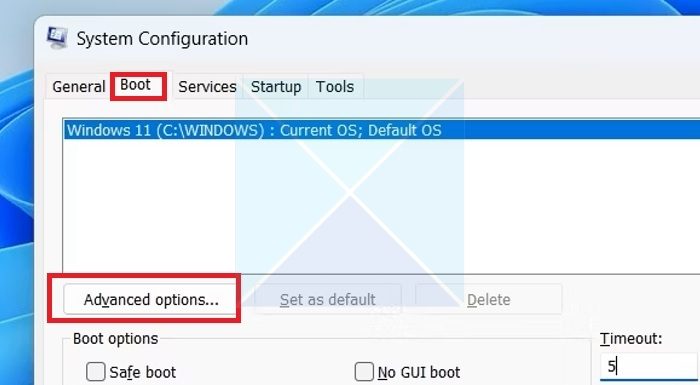
- Ensure that the number of processors box is checked
- Select the number of cores you like, then press OK, then Apply
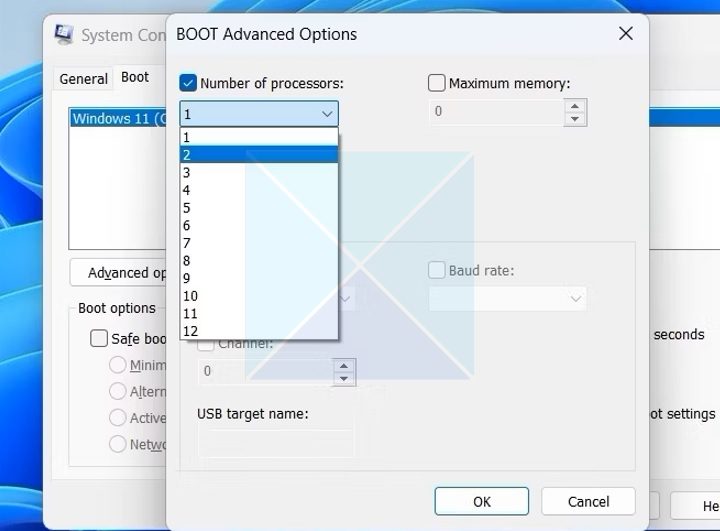
- Restart the system so the changes take effect.
I hope the post was helpful.
Read: How to Enable or Disable CPU Core Parking in Windows
What are processor cores?
CPU processor cores are individual processing units that run instructions and perform calculations. Multiple cores improve performance by handling multiple tasks simultaneously. Modern CPUs have 2-16 cores, and high-end systems may have more. Hyperthreading enhances computing capabilities by allowing a single core to function as two virtual or logical cores.
Why is my Windows showing only One Processor Core?
If the Task Manager or MSConfig shows only One Processor Core, it could be because of outdated chipset drivers or BIOS firmware. If multi-core support or hyper-threading is disabled in BIOS settings, this can occur. Thus, you will have to update or reinstall your chipset drivers, check the BIOS setting, remove core limits in MSCONFIG, and update your BIOS as well.
Why are some cores disabled on my CPU?
This usually happens if you buy a second-hand CPU or one at a heavy discount. It is also reported that if the defect is isolated in a non-critical area, the manufacturer will often just shut down the broken section—that way, they can sell the chip at a reduced price instead of scrapping it entirely.
Leave a Reply