If you want to enable or install Education themes in Windows 11, here is how you can do that. Microsoft included Education themes in Windows 11, and you can enable them using Registry Editor. This article explains the exact steps you can follow to get and apply those themes for free.

Windows 11 comes in different versions, including Windows 11 Education Edition. It is pretty easy to install Windows 11 Education Edition on your computer when you are linked to an educational institution. Although it comes with several restrictions, you can certainly try it on your computer. However, things are not the same for other editions. Having said that, you do not get the Education themes automatically when you install Windows 11 Home, Pro, or any other version. You need to enable them manually with the help of the Registry Editor.
How to enable hidden Education themes in Windows 11
To enable or install Education themes in Windows 11, follow these steps:
- Press Win+R to open the Run prompt.
- Type regedit and hit the Enter button.
- Click on the Yes button.
- Navigate to device in HKLM.
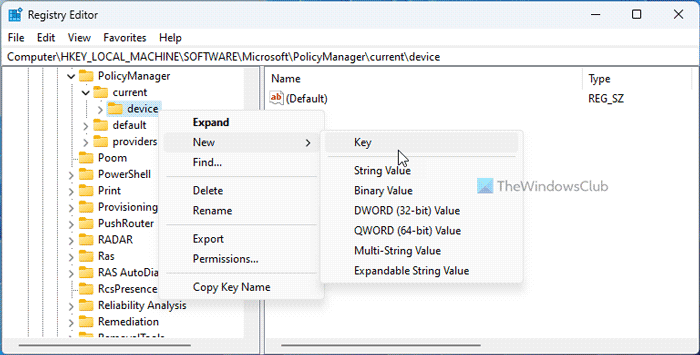
- Right-click on device > New > Key and name it Education.
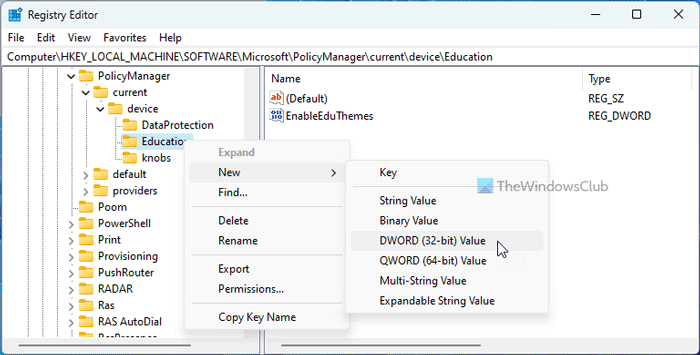
- Right-click on Education > New > DWORD (32-bit) Value.
- Set the name as EnableEduThemes.
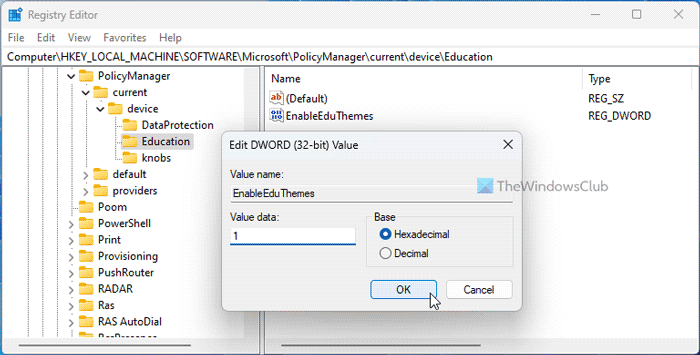
- Double-click on it to set the value data as 1.
- Click the OK button.
- Restart your computer.
Remember to create a System Restore point and backup all Registry files to be on the safe side.
Open the Registry Editor on your computer. Although there are many methods, you can use the Run prompt method to get it done. That said, press Win+R to open the Run prompt, type regedit, and hit the Enter button. Then, click on the Yes button on the UAC prompt.
Once the Registry Editor is opened on your computer, navigate to the following path:
HKEY_LOCAL_MACHINE\SOFTWARE\Microsoft\PolicyManager\current\device
Here you need to create a sub-key. For that, right-click on the device key, select New > Key and name it Education.

Next, you need to create a REG_DWORD value. For that, right-click on Education > New > DWORD (32-bit) Value and set the name as EnableEduThemes.

By default, it comes with a Value data of 0. However, you need to double-click on it and set the Value data as 1 and click the OK button.

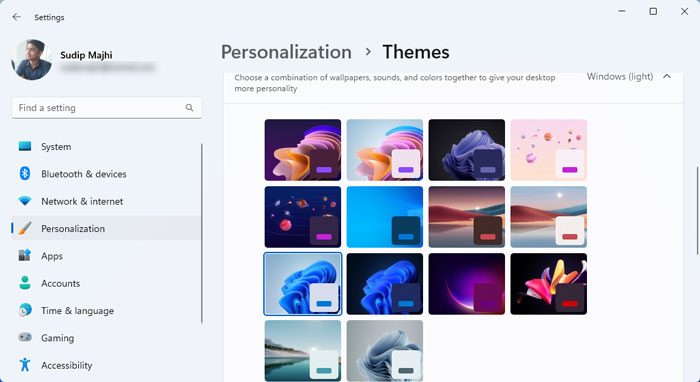
Next, close all windows and restart your computer. These steps enable the theme for you. If you want to apply it, you need to open the Windows Settings by pressing the Win+I hotkey and going to Personalization > Themes.
Following that, select the new theme and apply it as usual. Once done, you can find the new theme on your system.
How do I install a downloaded theme in Windows 11?
To install a downloaded theme in Windows 11, you can simply double-click on it if it is already extracted. Other than that, you can open Windows Settings, go to Personalization > Themes and click on the Browse themes option. Then, you can choose the theme file to install on your system.
Read: How to install the hidden Aero Lite theme in Windows 11.
Leave a Reply