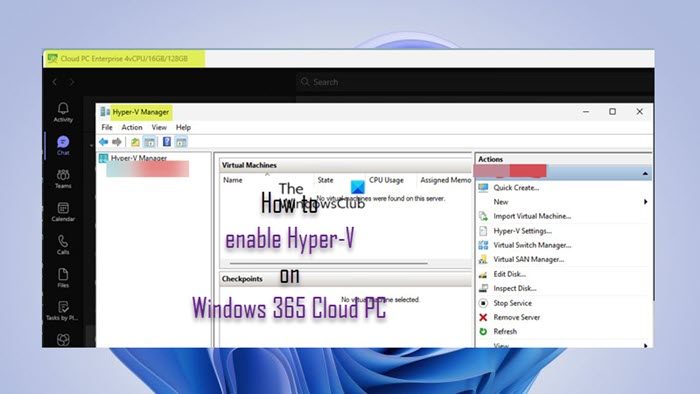
Nested Virtualization allows users in organizations that have deployed Windows 365 Enterprise to create virtual instances on their Cloud PC as they would on their local device. In this post, we will walk through the steps for the ways or methods to enable Hyper-V on Windows 365 Cloud PC.

How to enable Hyper-V on Windows 365 Cloud PC
With the Nested Virtualization feature for Virtualization-based workloads, users can use the following systems on their Windows 365 Enterprise Cloud PCs:
So, if you use a Cloud PC and want to run local VMs, then you could enable the hypervisor on the Cloud PC and run Hyper-V. We will discuss this topic under the following subheadings.
- Requirements
- Enable Hyper-V on Windows 365 Cloud PC via Settings app, PowerShell, or DISM commands
- Run Hyper-V on your Cloud PC
- Troubleshooting Nested Virtualization performance issues
Read: How to enable Hyper-V Enhanced Session in Windows 11
1] Requirements
To use virtualization-based workloads, the Cloud PC must meet these requirements:
- 4vCPU or higher (at least 8vCPU and 32GB RAM) Cloud PC. Downsizing to 2vCPU Cloud PCs will disable nested virtualization). Resizing from a lower spec to the required is not supported.
- Be in one of the supported regions as listed in this Microsoft documentation.
- All regions are supported for 8vCPU.
- All regions are supported for 4vCPU. However, some users in certain regions might experience a decline in their 4vCPU Cloud PC performance when using Nested Virtualization.
- If you have deployed your Cloud PC before April 5th, 2022, you must reprovision the Cloud PC.
Read: Check if your Intel or AMD processor supports Hyper-V using these tools
2] Enable Hyper-V on Windows 365 Cloud PC via Settings app, PowerShell, or DISM commands

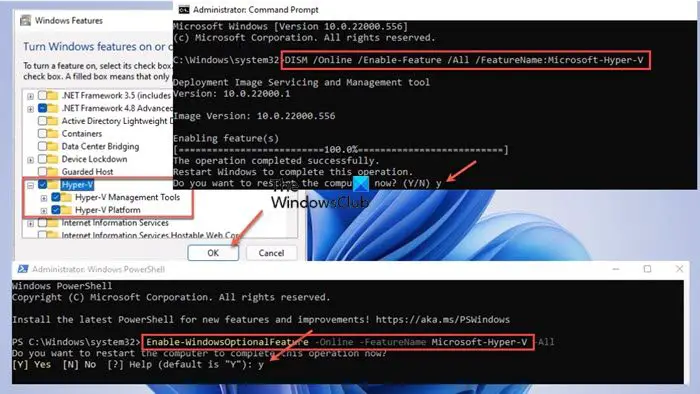
Enabling Hyper-V on a Cloud PC isn’t much different from how you would do the same on a physical client machine. You need local admin privileges on the device, either through given rights or a secondary account. By default, Hyper-V is not enabled. As shown below, you can enable Hyper-V via the Settings app, PowerShell, or DISM commands.
Settings app
- Open the Settings app.
- Select Apps on the left navigation pane.
- On the Apps page, on the right pane, click Optional features.
- Next, scroll down to the Related settings section.
- Click More Windows features to open the Windows Features applet.
Alternatively, you can search the Start menu for Turn Windows features on or off and open the Control Panel applet.
- In the applet, scroll, and checkmark Hyper-V.
- Next, expand Hyper-V and checkmark both the Hyper-V Management Tools and Hyper-V Platform options.
- Click OK for the feature to be installed.
- Finally, click the Restart now button on the prompt.
PowerShell
- Open PowerShell in elevated mode and run the command below:
Enable-WindowsOptionalFeature -Online -FeatureName Microsoft-Hyper-V -All
- Tap Y when prompted.
DISM
- Open Command Prompt in elevated mode and run the command below:
DISM /Online /Enable-Feature /All /FeatureName:Microsoft-Hyper-V
- Tap Y when prompted.
Read: How to Start & Stop Hyper-V VM using PowerShell
3] Run Hyper-V on your Cloud PC

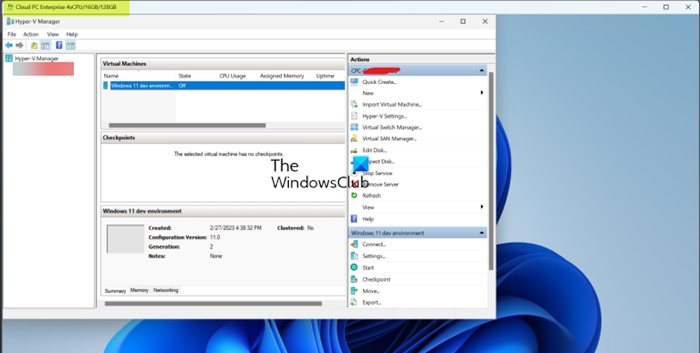
Once the Hyper-V feature has been enabled and you have restarted your machine, you can start the Hyper-V Manager. Make sure to start Hyper-V with admin privileges; otherwise, you will not be able to connect to your local machine as a server. Now, you can create your virtual machines using either your image or the quick create feature, just like you would if running Hyper-V on a physical client!
Read: How to make Hyper-V virtual machine launch automatically at startup
4] Troubleshooting Nested Virtualization performance issues

In the regions listed below, some users may experience a decline in their 4vCPU Cloud PC performance when using Nested Virtualization.
- Southeast Asia
- Central India
- South Central US
- East US 2
- West US 2
- West US 3
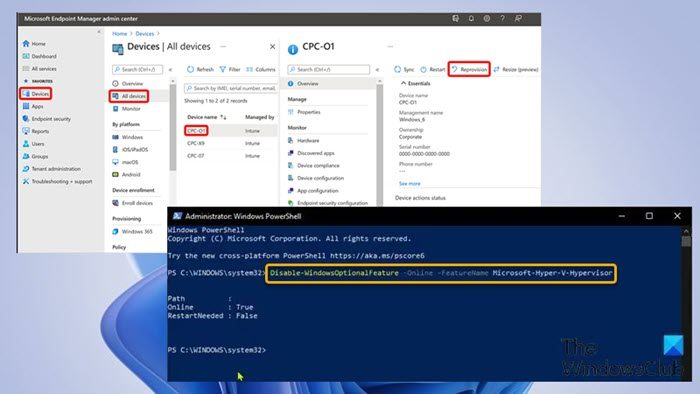
In this case, you can either reprovision the Cloud PC by following the steps below or uninstall or disable Hyper-V on the Cloud PC.
- Head over to intune.microsoft.com.
- Once signed in, select Devices > All Devices.
- Choose a Cloud PC device.
- Select Reprovision.
- In the Reprovision box, select Yes.
The reprovision process will now begin. After the new Cloud PC is created, Windows 365 sends access information to the new user.
I hope you find this post informative and helpful!
Related post: How to enable or disable Nested Virtualization for VMs in Hyper-V
Does Windows 365 support virtualization?
Yes. The Requirements section above in this post contains the necessary information. So, provided that the requirements for the Cloud PC are met, you can follow the instructions we have provided in this post to enable Hyper-V on Windows 365 Cloud PC. To use Windows 365 Cloud on a PC, users must set up the Remote Desktop client with their Azure Active Directory credentials. Once done, the user can double-click the assigned Cloud PC to launch it.
How do I know if Hyper-V is enabled?
To perform this task, follow these steps:
- Right-click the Start button and select Event Viewer from the Power User Menu. Alternatively, open the Run dialog box, type eventvwr, and hit Enter.
- Next, open the Hyper-V-Hypervisor event log.
- In the navigation pane, expand Applications and Services Logs > Microsoft > Hyper-V-Hypervisor.
- Click Operational. If the Windows hypervisor is running, no further action is needed.
Read next: Virtual machine could not be started because the hypervisor is not running.
Leave a Reply