Is your SmartScreen Filter turned off? Or do you get the message SmartScreen Filter cannot check this website? If that is so, this post will show you how to enable or disable SmartScreen Filter on Windows 11/10 using the UI, the Group Policy, and the Registry Editor.
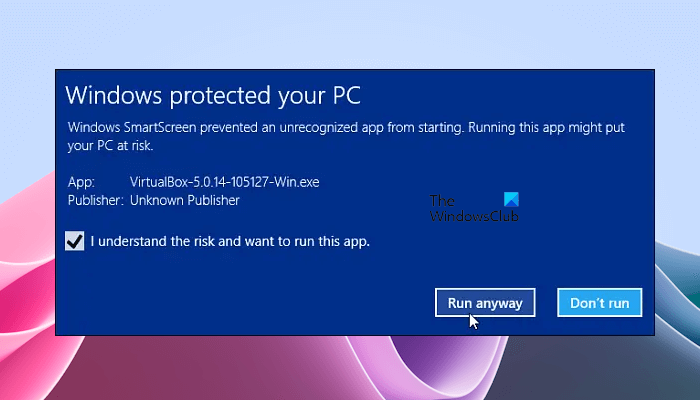
For those who don’t know what SmartScreen is, it is a feature that helps detect phishing websites, and can also help protect you from installing malicious software or malware. So whenever you encounter a suspicious site, a warning will be displayed on the browser window to notify the user about the site’s nature and whether the user trusts the site owner/publisher to continue further on the URL provided.
Read: SmartScreen filter warning messages explained.
Enable or Disable SmartScreen Filter on Windows 11/10
Here, we will show you the following three methods to enable or disable the SmartScreen Filter on Windows 11/10.
- Via Windows 11/10 Settings
- By using the Local Group Policy Editor
- Via the Registry Editor
Let’s see all these methods in detail.
Enable or disable SmartScreen Filter using Windows 11/10 Settings
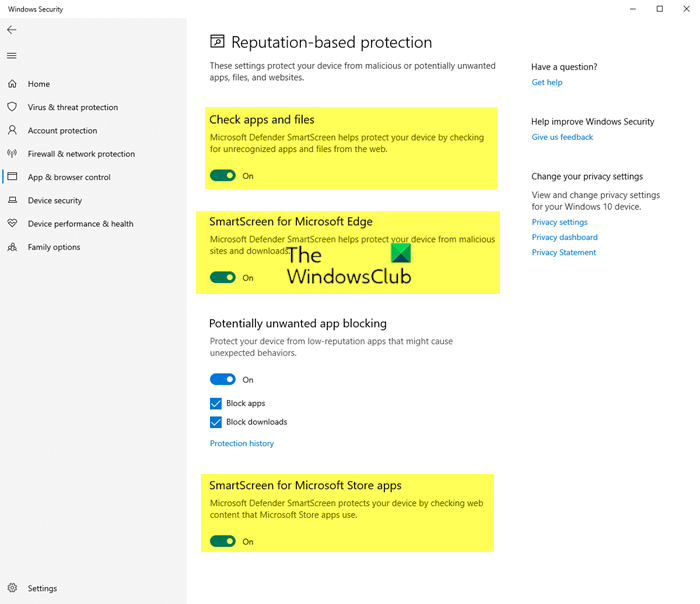
Use the following steps:
- Open Windows 11/10 Settings.
- Go to Privacy & security > Windows Security.
- Click Open Windows Security.
- Select App & browser control in Windows Security.
- Now, click on the Reputation-based protection settings link.
- Turn on or off the following settings as required
- Check apps and files
- SmartScreen for Microsoft Edge
- SmartScreen for Microsoft Store apps.
Do note that when you turn off the above-mentioned options, you will leave your computer vulnerable.
Via Microsoft Edge
You can also enable or disable SmartScreen Filter in Microsoft Edge Settings. However, when you turn on or off this feature for Microsoft Edge in Windows 11/10 Settings, the feature will automatically disabled in Edge Settings. Go through the following instructions:
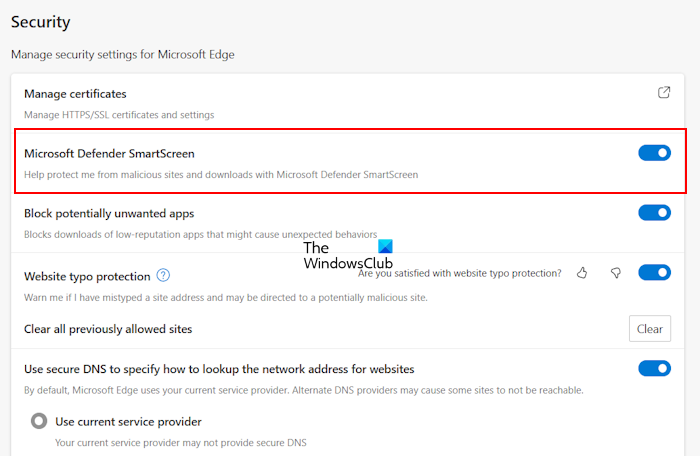
- Open Microsoft Edge.
- Open its Settings by clicking on the three dots on the top right side.
- Select the Privacy, search, and services category from the left side.
- Scroll down to the Security section on the right pane.
Here toggle the Microsoft Defender SmartScreen switch to the Off or On position as required.
Via Internet Properties
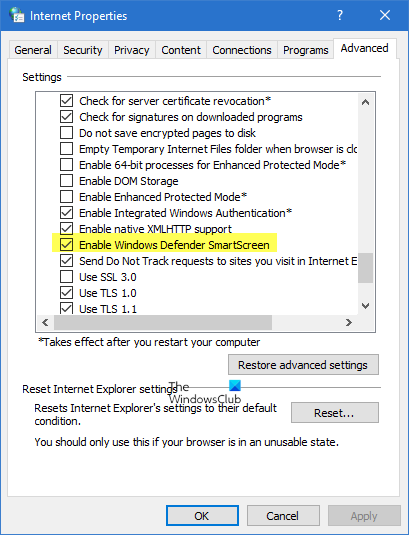
You can also open Internet Options/Properties. Go to the Advanced tab and scroll down for Security Category. There if you want to enable/disable the feature, you can accordingly check the box captioned “Enable SmartScreen Filter” and then press OK.
Now after you enable the feature, every time you encounter a suspicious URL it will display a message.
If you don’t want to use this feature, you can just uncheck the checkbox to disable the same, but it’s highly recommended since phishing attacks are increasing day by day, increasing the potential threat to confidential information of email accounts.
In the latest version of the Windows 11 operating system, the option to enable or disable SmartScreen Filter is not available in the Internet Properties. Therefore, you have to use Windows 11 Settings for the same.
TIP: You can also quickly bypass the SmartScreen filter and download files, without turning off SmartScreen Filter.
SmartScreen Filter is turned off
You can also enable and disable the SmartScreen Filter via the Local Group Policy Editor and the Registry Editor. This method is also useful if your SmartScreen is turned off or you receive the message that it is disabled by an administrator.
Enable or Turn on SmartScreen Filter using the Local Group Policy Editor
The Local Group Policy Editor is not available in Windows 11/10 Home Edition. Therefore, if you are a Windows 11/10 Home user, you can skip this method.
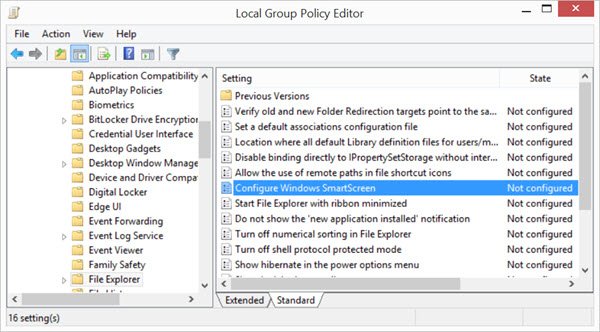
Open the Run command box (Win + R keys) and type gpedit.msc. Click OK to open the Group Policy Editor. Now, navigate to the following path:
Computer Configuration > Administrative Templates > Windows Components > File Explorer
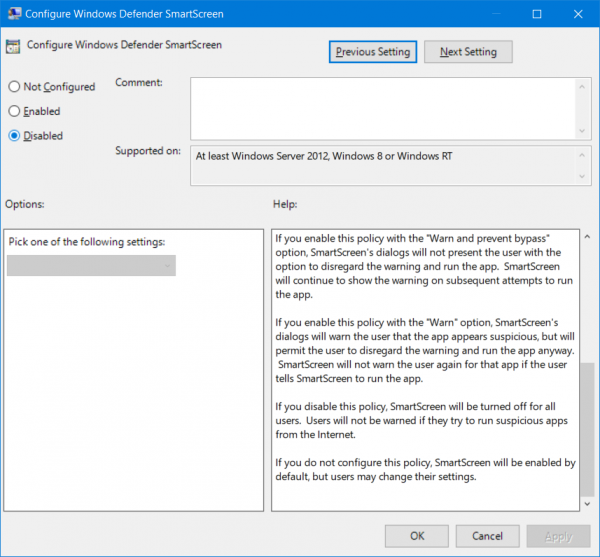
In the right pane, double-click on Configure Windows SmartScreen to change its settings. In recent Windows 11/10 versions, it is called Configure Windows Defender SmartScreen.
This policy setting allows you to manage the behavior of Windows SmartScreen. Windows SmartScreen helps keep PCs safer by warning users before running unrecognized programs downloaded from the Internet. Some information is sent to Microsoft about files and programs run on PCs with this feature enabled. If you enable this policy setting, Windows SmartScreen behavior may be controlled by setting one of the following options: Require approval from an administrator before running downloaded unknown software, Give user a warning before running downloaded unknown software or Turn off SmartScreen. If you disable or do not configure this policy setting, Windows SmartScreen behavior is managed by administrators on the PC by using Windows SmartScreen Settings in Action Center.
Read: How to disable SmartScreen for Microsoft Store apps.
Enable SmartScreen Filter using Registry Editor
This method required modifications in the Windows Registry. Therefore, before you proceed, we recommend you create a System Restore Point and back up your Registry. This will help you revert the changes if any problem occurs.
Open the Run command box and type regedit. Click OK and then click yes in the UAC prompt. This will open the Registry Editor.
Now, navigate to the following path:
HKEY_LOCAL_MACHINE\SOFTWARE\Policies\Microsoft\Windows\System
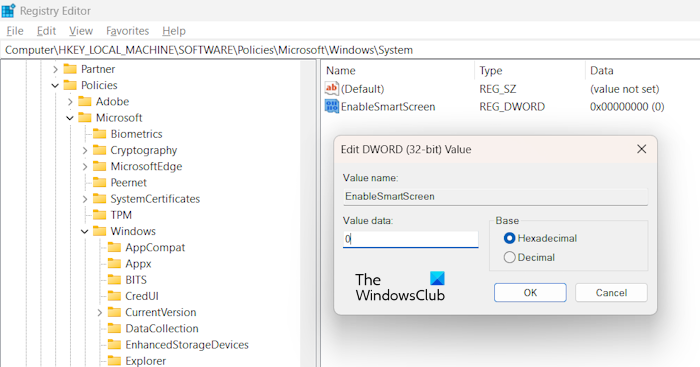
To easily go to the above-mentioned path, copy and paste it into the address bar of the Registry Editor. Hit Enter after that. In the right pane, you may find a DWORD value EnableSmartScreen.
If this value is not there, create it manually. Make sure that the System key is selected on the left side. Now, right-click in the empty space on the right side and select New > DWORD (32-bit) Value. Rename this newly created value as EnableSmartScreen.
Right-click on the EnableSmartScreen value and select Modify. Enter 0 in its Value data to turn off SmartScreen. Enter 1 in its Value data to turn on SmartScreen.
We have explained different values for EnableSmartScreen below:
- 0: To turn off SmartScreen
- 1: Give the user a warning before running downloaded unknown software
- 2: Require approval from an administrator before running downloaded unknown software.
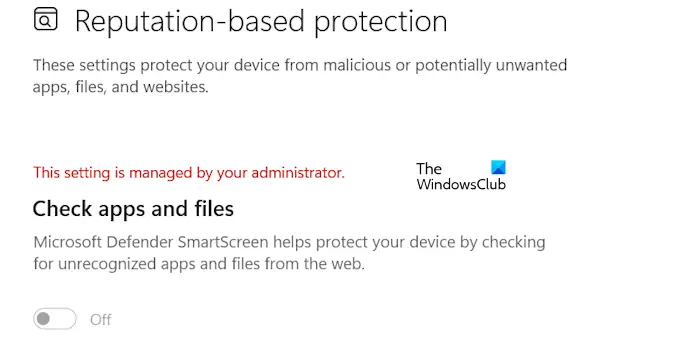
After modifying the value in the Registry Editor, you need to restart your computer for the changes to take effect. This Registry Editor value will make the SmartScreen option for apps and files greyed out and you will see the following message in Windows Security UI:
This setting is managed by your administrator.
To fix this problem, you have to delete the EnableSmartScreen value in the Registry Editor. But to do this, you need to log into your system as an administrator. Open the Registry Editor and go to the above-mentioned path. Right-click on the EnableSmartScreen value and select Delete. After doing so, restart your computer for the changes to take effect.
That’s it. I hope this helps.
Is Microsoft Defender SmartScreen safe?
Microsoft Defender SmartScreen is completely safe and was developed by Microsoft. This feature is enabled by default. However, if you want, you can disable it in Windows Settings. If this is turned on, it will provide you [phishing protection, malware protection, reputation-based URL and app protection, etc. It also blocks the URLs associated with potentially unwanted applications.
Is disabling SmartScreen safe?
SmartScreen in Windows 11/10 computers protects users from many vulnerabilities. The SmartScreen for Microsoft Edge protects you from visiting malicious websites and downloading malicious files. Therefore, disabling this feature is not safe. Doing so will make your device vulnerable.
You might want to read these posts too:
Is it possible ths program is causing my internet to slow down a lot ? I have ruled out other items , the biggest slowdown seems to b with facebook and the games there I play. I do get some delay with other sites also like our local tv web sites yahoo etc