Windows 10 is not an operating system designed solely for desktops and laptops. The folks at Microsoft have made sure to add features that can transform the OS into something that works well on tablet computers.
This feature is called Tablet Mode, and users can enable and disable it at any time, even if they are not using a tablet. It is a cool feature, no doubt, but not all users of Windows 10 know how to turn it on and off whenever they want.
Enable or Disable Tablet Mode in Windows 10
Luckily, we are going to use this article to explain how to enable and disable the Tablet Mode whenever you want. Getting it done is very simple, at least from our point of view, so let us know in the comments if problems have arisen.
- Open the Settings menu
- Navigate to System
- Select Tablet from the list
- Change additional tablet settings
Let us talk about this subject in more detail, shall we?
1] Open the Settings menu

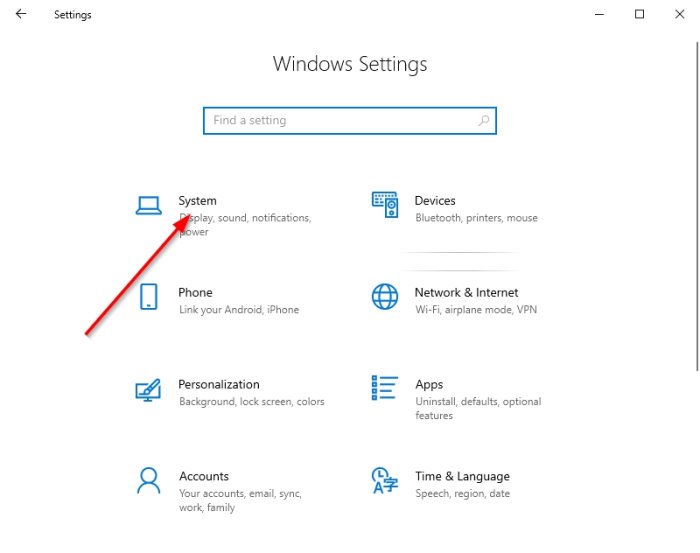
First, you will want to fire up the Settings menu by selecting Windows key + I. When the Settings window appears, you should see over a dozen options to choose from, but only one will take precedence today.
2] Navigate to System
Moving along, please click on System. It is the first option from the list, so you cannot miss it.
TIP: Read about the Tablet mode in Windows 11.
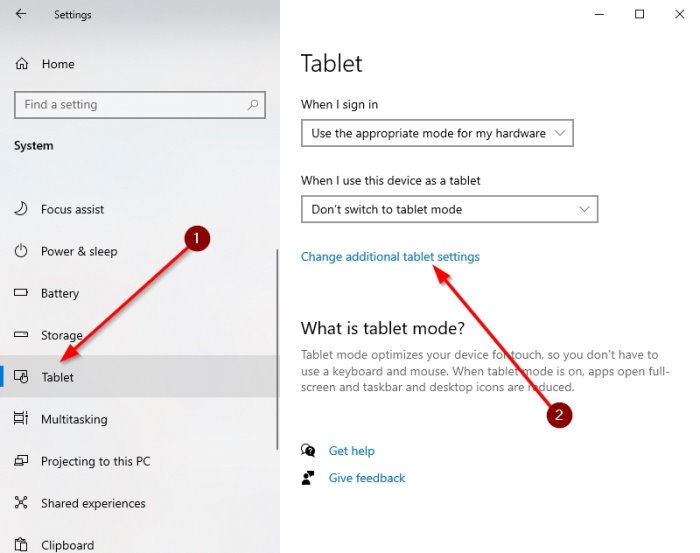
3] Select Tablet from the list

Originally, the option to enable or disable Tablet Mode required users to select System > Display, but after many updates to Windows 10 since its inception, Microsoft has changed a few things. So now, folks must navigate to System > Tablet.
4] Change additional tablet settings

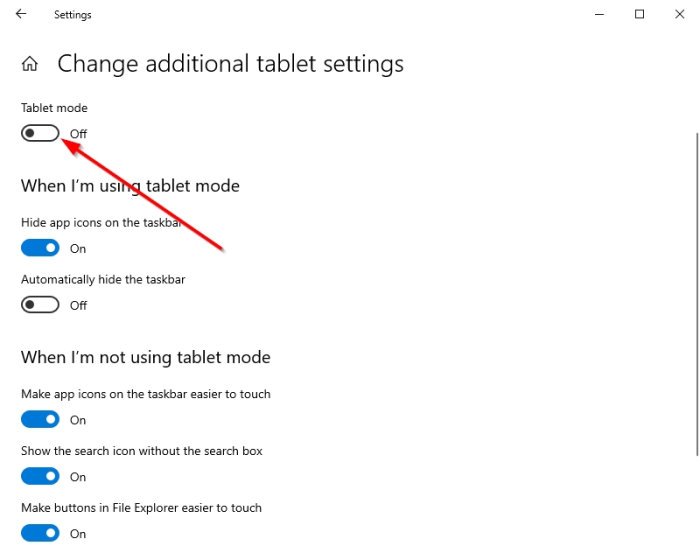
The final step here is to click on Change additional tablet settings. You should now see a section that reads, Tablet mode. Toggle the button below it to turn it off or no at will.
Some options below allow you to decide how the computer works when in or out of tablet mode. Look at them carefully and make the changes that best suit your needs.
Read next: How to automatically switch to Tablet Mode in Windows 10.