On Windows 11/10, the Telnet Client and Server is disabled by default. If you want to enable it, you can do so using the Command Prompt or via the Control Panel. For your information, Telnet (short for teletype network) is a protocol meant for internet or LAN communication. It is primarily used to control other computers easily. On Windows, it is available as a command-line utility, and using it helps in opening a command-line interface for the remote computer.
Enable Telnet in Windows 11/10
You can use the Command Prompt or Control Panel to disable or enable the Telnet client on Windows 11/10.
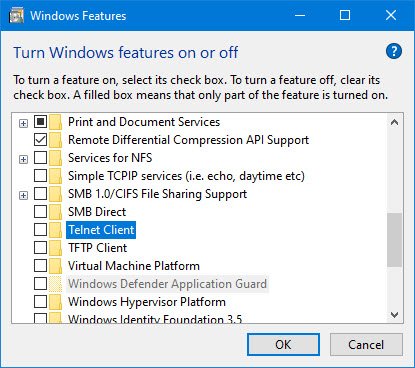
1] Enable Telnet via Control Panel

In case you want to enable it through Windows Explorer here are the steps:
- Click on Start and under search type in appwiz.cpl
- Then click Turn Windows feature on or off from the right-side panel
- There look for Telnet Server and Telnet Client and click on that box
- Click OK and reboot the system if prompted.
To disable Telnet, you have to uncheck Telnet Client, click OK and restart your system.
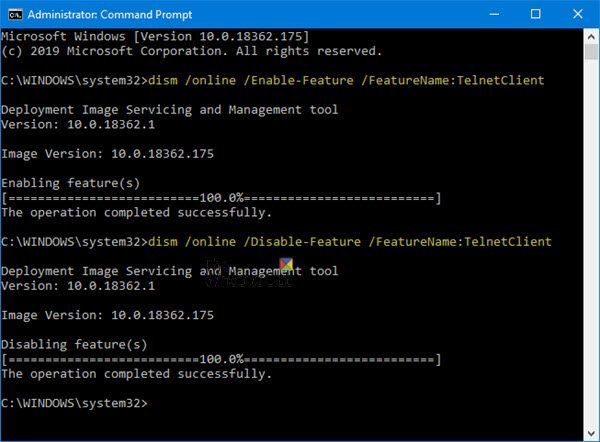
2] Enable Telnet using CMD

To enable Telnet through Command Prompt:
Click on Start and under search type in CMD
Right-click on CMD and click on Run as administrator
Enter the Administrator password if it prompt
Then type in the following command and hit Enter to enable the Telnet Client:
pkgmgr /iu:"TelnetClient" OR dism /online /Enable-Feature /FeatureName:TelnetClient
We have used the pkgmgr /iu:”TelnetServer” command to enable the Telnet Server.
To disable Telnet, you have to use:
dism /online /Disable-Feature /FeatureName:TelnetClient
Take a look at some of these interesting Telnet tricks like watching Star Wars using Telnet in Windows. See this post if Telnet is not recognized as an internal or external command on Windows 11/10.
Read: How to enable TFTP client on Windows 11/10.