The Search Bar on the Taskbar is one of the most useful components of Windows 10. One can search for files and folders on the computer or the connected OneDrive cloud account. Searches on Bing can also be made using the same Search box, which makes it even more useful. Getting it on the Windows 10 Lockscreen will enable the user to get to the search results even faster. Enabling the Search Box on the Windows 10 Lock screen is possible using Mach2 software.

Before you begin, you should know that the tool edits or replaces OS files and this could create issues. So please create a system restore point first.
Enable the Search Bar on Lock screen in Windows 10
You need to download the latest release of Mach2 software from its Github repository. Depending on the architecture of your operating system, download the appropriate version of either x86 or x64.
A ZIP archive will be downloaded to your computer. Extract the contents of this ZIP archive to a separate folder.
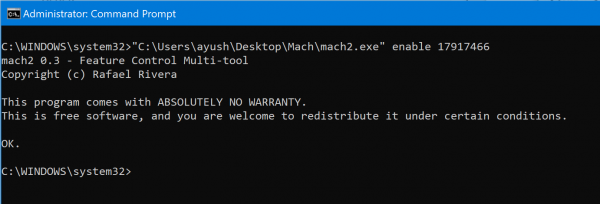
Open Windows Command Prompt with Admin rights.
In order to enable the Search Box on the Windows 10 lock screen, execute the following command:
"<FULL PATH OF THE MACH2.EXE FILE>" enable 17917466

Reboot your computer to find the Search Box on the Windows 10 Lock screen added.
To disable the Search Box on the Windows 10 lock screen, execute the following command:
"<FULL PATH OF THE MACH2.EXE FILE>" disable 17917466
Reboot your computer to find the Search Box on the Windows 10 Lock screen removed.
The Mach2 ZIP archive and extracted files are safe to be deleted now.
UPDATE: The Mach2 software has been retired and is not supported on Windows 10 version 2004 or newer. As an alternative, please use ViVe.
Enjoy!