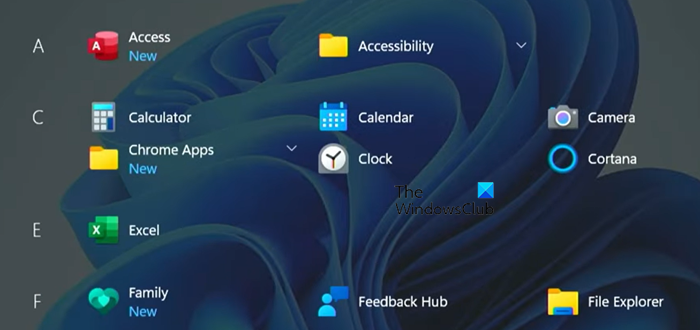
In this guide, we will see how you can enable Full Screen Start Menu using REGEDIT or GPEDIT on your Windows 11/10 computer. So, if you like the look and feel of a full-screen Start Menu, this guide is for you.
Before you begin, it is recommended to backup all Registry files and create a System Restore point.
Enable Windows Full-screen Start Menu using Registry
To turn on full-screen Start Menu in Windows 11/10 using Registry Editor, follow these steps-
- Press Win+R to open the Run prompt.
- Type regedit and hit the Enter button.
- Click the Yes button.
- Navigate to Explorer in HKLM.
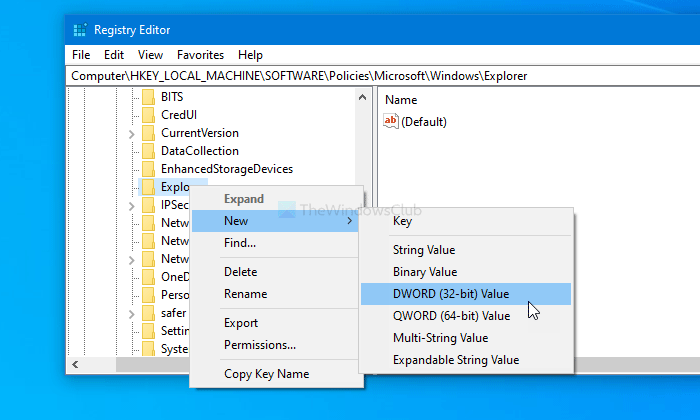
- Right-click on Explorer > New > DWORD (32-bit) Value.
- Name it as ForceStartSize.
- Double-click on it to set the Value data as 2.
- Click OK to save the change.
Open the Registry Editor on your computer. For that, press Win+R to open the Run prompt, type regedit, and hit the Enter button. It opens the UAC prompt where you have to click the Yes button. After opening the Registry Editor, navigate to the following path-
HKEY_LOCAL_MACHINE\SOFTWARE\Policies\Microsoft\Windows\Explorer
However, if you want to make a full screen Start Menu only in the current user account, navigate to the same path inside HKEY_CURRENT_USER.
In case you cannot find Explorer, right-click on the Windows key, select New > Key, and name it as Explorer.
Following that, right-click on Explorer, select New > DWORD (32-bit) Value, and name it as ForceStartSize.
By default, it carries 0 as the Value data. Double-click on it to set the Value data as 2 (Full screen Start).
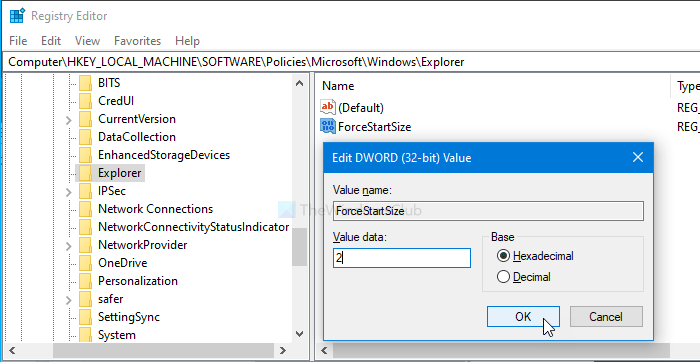
Click the OK button to save changes. After that, restart your computer to find the difference.
In case you want to revert the change, navigate to the same path, and delete the value.
Note: If you are unable to see any changes, we recommend you download ExplorerPatch from github.com. You need to go the “How to?” section and then download the setup file for your architecture.
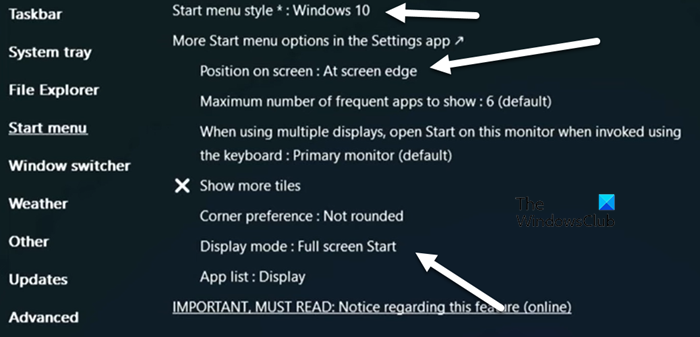
Then, search out “Properties(ExplorerPatch), set the Taskbar Style to Windows 10, go to Start Menu, and set to Start Menu Style to Windows 10, Position on screen to At screen edge, and Display mode to Full screen Start. Finally, click on Restart File Explorer.
Turn on full-screen Start Menu using Group Policy
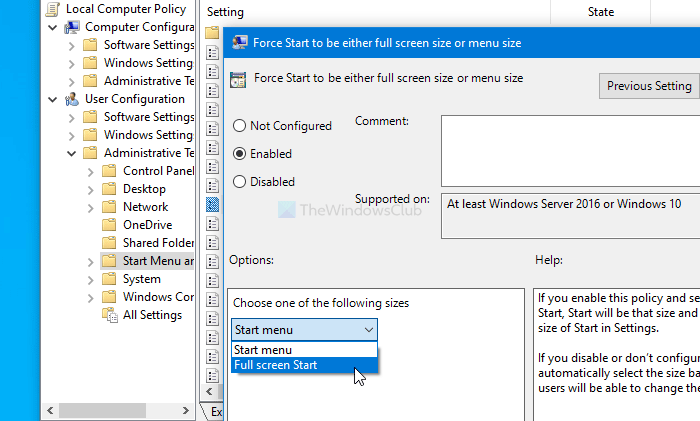
To turn on full-screen Start Menu in Windows 11/10 using Group Policy, follow these steps-
- Press Win+R to open the Run prompt.
- Type gpedit.msc and hit the Enter button.
- Navigate to Start Menu and Taskbar in User Configuration.
- Double-click on Force Start to be either full screen size or menu size.
- Select the Enabled option.
- Expand the drop-down list and choose Full screen Start.
- Click on the OK button.
Press Win+R to open the Run prompt on your computer. Type gpedit.msc and hit the Enter button. It will open the Local Group Policy Editor on your computer. After that, navigate to the following path-
User Configuration > Administrative Templates > Start Menu and Taskbar
In case you want to apply the setting to all users, navigate to the same path inside Computer Configuration.
Here you will see a setting called Force Start to be either full screen size or menu size.
Double-click on it and select the Enabled option.
Then, expand the Choose one of the following sizes drop-down list, and choose Full screen Start option.
Finally, click the OK button to save the change. You might have to restart your computer to get the difference.
If you want to revert the change, open the same setting and select Not Configured.
That’s all! I hope it helps.
Read: How to disable Start Menu animation in Windows 11
How do I force full screen on Windows 11?
One of the easiest ways to force Full Screen on Windows 11 is by using the keyboard shortcut F11. You can either press or press and hold the Fn button and then press F11 and your window will go full screen.
Also Read: Pin website shortcuts to Taskbar & Start Menu in Windows.
Leave a Reply