This article will look at how to export CSV in PowerShell on Windows using examples. The Export-CSV feature converts Windows PowerShell objects into strings and then saves them into CSV files.
Windows PowerShell is a cross-platform tool that can perform quite a number of automation tasks. For example, users can use PowerShell to extract data from Microsoft services like Microsoft 365 or Active Directory. If you need to further process such data in Excel or other spreadsheet systems, you need to use the Export-CSV function of the Windows PowerShell utility.

CSV is an abbreviation for Comma-Separated Values. The file format allows users to import or export data from one platform to another. It’s so easy to handle these processes, but you need the know-how, which we will cover shortly. It’s good to know that Export-CSV is a cmdlet that one can use in Windows PowerShell to export the command output into a CSV file. This helps you export and convert data into file formats compatible with different other databases or applications.
How to export CSV in PowerShell on Windows
To export CSV in PowerShell, we recommend using Windows PowerShell ISE, as it gives you control over how you handle the process and the CSV files. It is more flexible in how the CSV is formed on your PC. To export CSV in PowerShell, you need to know how to open it as an administrator and understand the general syntax for Export-CSV which is shown below.
Get-Variable -name [variable name] | Export-CSV [path-to-file].csv
Before we go to the real example, it’s good to also understand the parameters used in Export-CSV. Here are some of them:
- Path: This is the destination location of where you want to save your output file. For example, you can specify locations like the local drive or any other. If you don’t specify, Export-CVS will save the file in the current PowerShell directory.
- Append: This parameter specifies if a user wants to append data to a new file or an existing one. If you omit-append, Export-CSV will create a new file and save all data in that file. If you specify, Export-CSV will append data in any ready file.
- Delimiter: This parameter shows the end of a substring. It can be a comma but you can always change that.

To demonstrate how to export CSV in PowerShell, we will show you how to use Export-CSV to export users’ data from the Azure directory. Follow the following steps to export CSV in PowerShell:
- On the search box, type PowerShell ISE and click on the Run as administrator option.
- Click Yes on the Account User Control prompt that will appear.
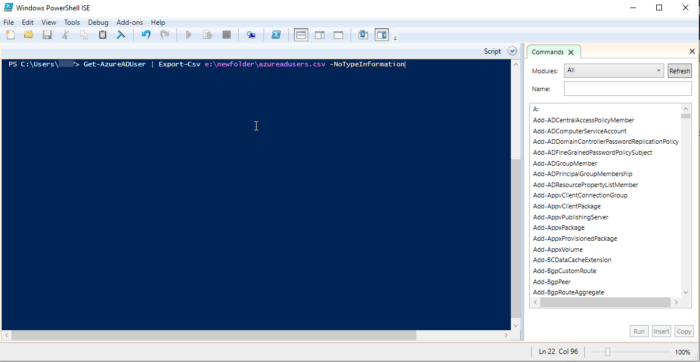
- Insert the following command line and then press Enter:
Get-AzureADUser | Export-Csv e:\newfolder\azureadusers.csv -NoTypeInformation
If you want to export more precise data, you can add another parameter, Delimiter. Here, you used a comma which s the delimiter character. In our above example, you can go further and modify the command as follows:
Get-AzureADUser | select username, email, department | Export-CSV e:\newfolder\azureaduser.csv -NoTypeInformation
The Export-CSV will output the same information but will have additional columns with the parameters that you specified when running the command.
We hope that something helps you here.
Read: How to export Windows Services list using command line
What is an alternative to Export-CSV in PowerShell?
The other alternative to Export-CSV is the ConvertTo-CSV cmdlet, which can be used to convert objects to CSV. It also returns the output in the form of a stdout stream rather than a file. You can also use ConvertTo-CSV to recreate objects from CSV strings. The converted objects are string values of the initial objects that have property values. The main difference between Export-CSV and ConvertTo-CSV is that the first one saves CSV strings to a file; otherwise, both are similar.
Which PowerShell script is used to export all processes into a CSV?
Export-CSV cmdlet is the PowerShell script used to export all processes into a CSV. The script creates a CSV of the objects that you want to output. The object in a specific row contains a character-separated list of its property values. Users can utilize Export-CSV to create spreadsheets or share certain data with applications that are compatible with CSV input files.
Read: How to Convert CSV to Excel (XLS or XLSX) using Command line.
Leave a Reply