Want to transfer InDesign Table into Excel? This post will show you how to export an InDesign file to Excel. You can use InDesign and Excel together for projects. InDesign is a top desktop publishing software that is good for print and e-publishing. Excel is a top spreadsheet software that is good for taking data in tables, calculating, creating different types of charts and graphs, and much more.

You may have tables that you need to place into Excel for auto calculations or to turn them into graphs and charts. This means learning to export InDesign data into Excel is quite important.
How to Export InDesign Data into Excel
Exporting InDesign tables or data to Excel is quite easy, and there are a few ways to do it. this article will take you through the different ways to export your data into Excel.
- Copy and paste
- Save as PDF, then import into Excel
1] Copy and paste
Copying a Table from InDesign and pasting it into Excel is one way to export data from InDesign into Excel.

Since Excel is going to place data into tables, it would be data from tables that you would want from Excel.

To copy the data from tables in InDesign, select the Type tool, then select the table by clicking and dragging over all the content that you want from the table.
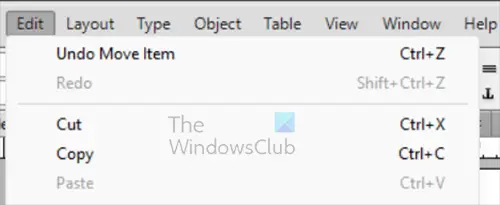
When the table is selected, copy the selected data by going to File, then Edit, then Copy or press Ctrl + C.
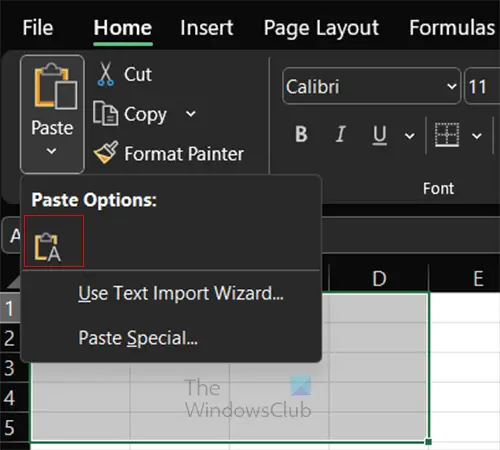
Open Excel and click the cell where you want the data to start. Go to the paste button on the top menu bar. Click the drop-down arrow on the paste button to reveal paste options.
Paste text only

If you press the A button, you will paste the content copied from InDesign, but you will keep the text only.

This is the table that is placed in Excel with regular paste.
Use Text Import Wizard
Using the text Import Wizard to place the text from InDesign into Excel allows you to choose some specific options. Since you are moving a table from one software to a different one, you may need to tell Excel how to specify where the columns and rows are separated.
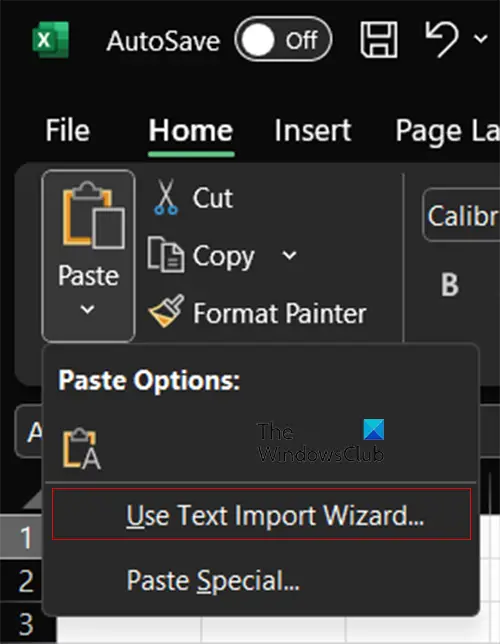
To use Text Import Wizard, copy the data from InDesign, then go to Excel and click the drop-down button on the paste button. Select the Use Text Import Wizard.
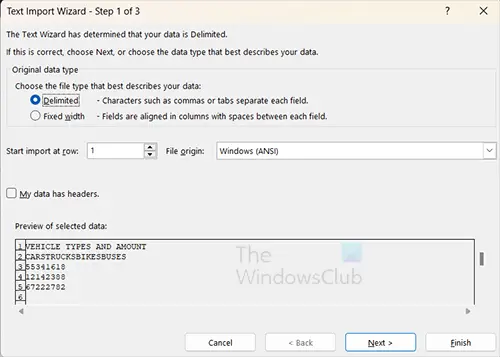
The first step of the Text Import Wizard will show up; Excel will detect the state of the data that you selected. When you have chosen the options, press Next to move to the next screen.
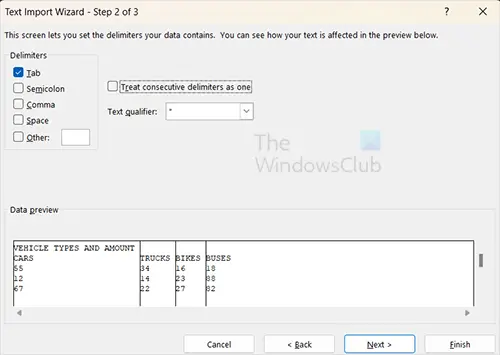
In the next window, you will see Space selected and everything else unselected under the heading Delimiters. You can keep Space selected if you have not merged cells with data. If you keep Space selected, your merged cell with data will be placed in Excel with column lines between each word. Select Tab, and Excel will pick up the spaces created by the table lines in InDesign will be used to decide where columns are. Since the data is already in tables in InDesign, these selections will work. Click Next if you want to choose more options, or press Finish.
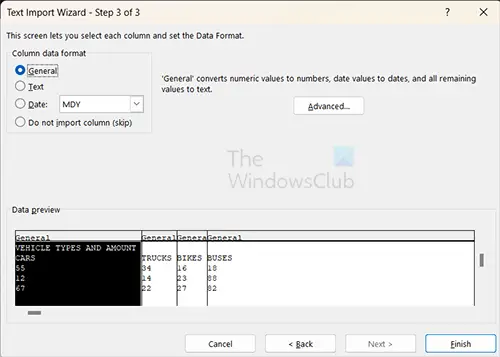
If you press Next, you will be able to select how you want your data to be formatted. Depending on your data, you will select a different option; you can see the changes in the preview window. You then press Finish to import the data.
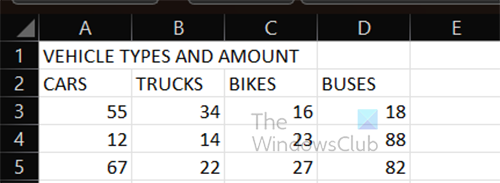
This is the table imported into Excel.
2] Save as PDF, then import into Excel
Another way to export InDesign data into Excel is to save the data as a PDF. You would create your table in InDesign and then save it as Adobe PDF (Print).

With the PDF saved, go to Excel and click the Data tab.
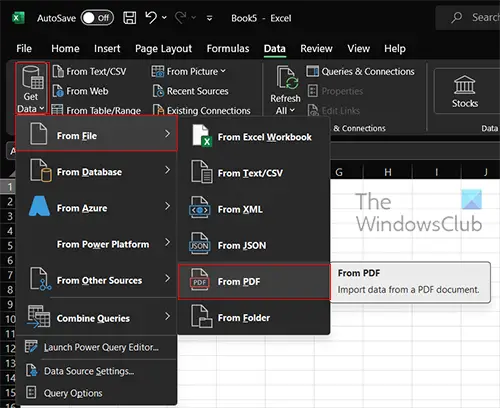
You then go to the Get Data button and click the drop-down arrow, then select From File, then From PDF.
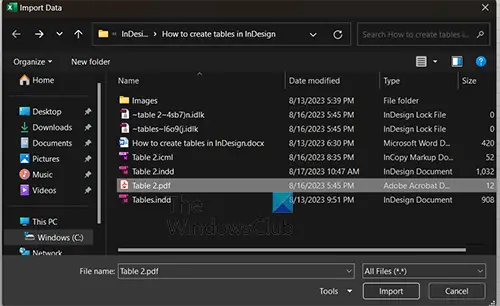
The Import data window will open, choose the PDF file and click Import.
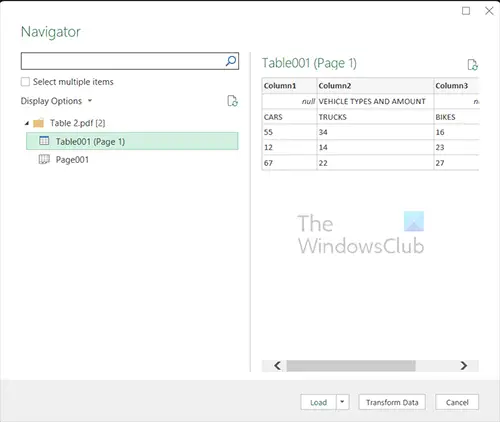
The Navigator window will open, and here you will see multiple versions of the files will show. Click on each to see a preview of what it will look like. You then press Load when you see the one that you want.

The table will be placed into Excel, and the table will be formatted with alternating colors.
Read: How to create interactive buttons in InDesign
How do I create a table in InDesign?
You can create a table in InDesign in a few ways, but the Insert table options will be described here.. You can select the Type tool, create a text frame, then go to the top menu and select Table, then Insert Table. The options box will appear, choose the numbers and rows you want for your table and press OK.
How do I create a fillable PDF table?
To create a fillable PDF table, you first create a table in InDesign. You would then save the document as a PDF. Open the PDF document with the table in Acrobat Reader and go to Prepare a Form. Follow the instructions, then click Ok. You will see the table filled with text fields for you to type. You can fill out the table and print it or save it, or both.