GNU Image Manipulation Program is a free open-source image manipulation software, GIMP has features and tools that make it a fierce competitor with some paid high-end image manipulation software. With the many features and tools available to users of GIMP it is easy to learn how to Fade out Images and make them washed out in GIMP.
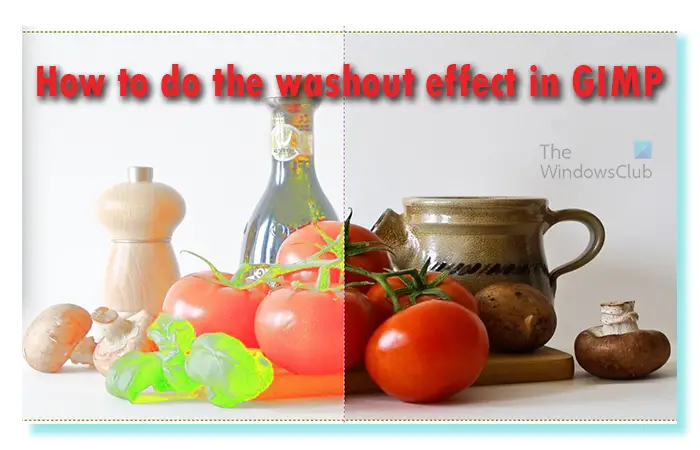
How to Fade out Images and make them washed out in GIMP
Making images look washout is a style that can spark interest, especially if done with the right images. The washout effect is created by making colors lighter. Who would have thought that making a color lighter can make it attractive? Well, this article will go through the steps of using GIMP to do the washout effect on an image.
- Place the image in GIMP
- Adjust Hue saturation
- Save the working file
- Export a flattened copy
1] Place the image in GIMP
The first step to doing the washout effect on an image in GIMP is to place the image into GIMP. There are a few ways to place the image into GIMP.
- You can find the image’s location on your device then right-click on the image and choose Open with the GIMP. The image will open in GIMP just like a background and not on a canvas.
- You can also open the image in GIMP by opening GIMP and then creating a new canvas by going to File then New to open up the New image dialogue box. Choose the settings that you want for your new image then press Ok to create the canvas. You can now add the image for the washout on the canvas created. To add the image go to File then Open to open the add image window. Search for the image and select it and click Open. The image will be opened as a separate document. You can just click on it and drag it onto the canvas you created.
- The next way that you can place an image into GIMP is to follow the previous way to create a blank canvas. You then go to the image’s location on your device. Click the image then drag it into GIMP and place it on the blank canvas.
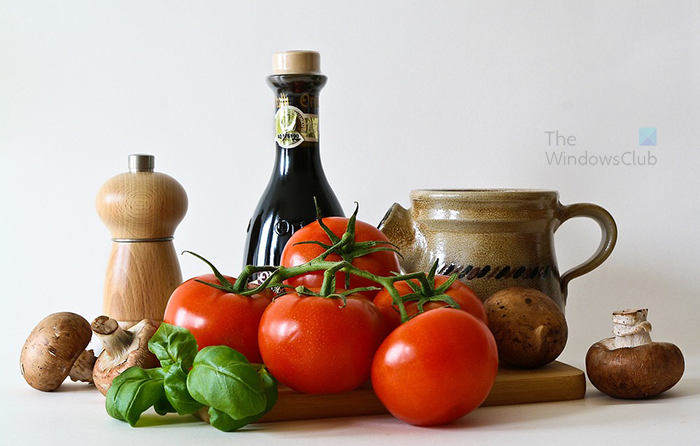
This is the original image that the wash-out effect will be done on.
2] Adjust Hue and saturation
The next step is to adjust the Hue and saturation of the image that you placed in GIMP.
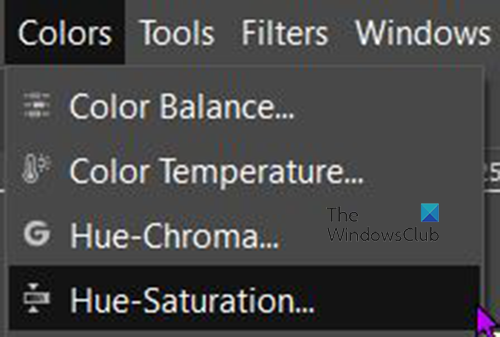
To adjust the saturation of the image go to the top menu bar and press Color then press Hue-saturation.
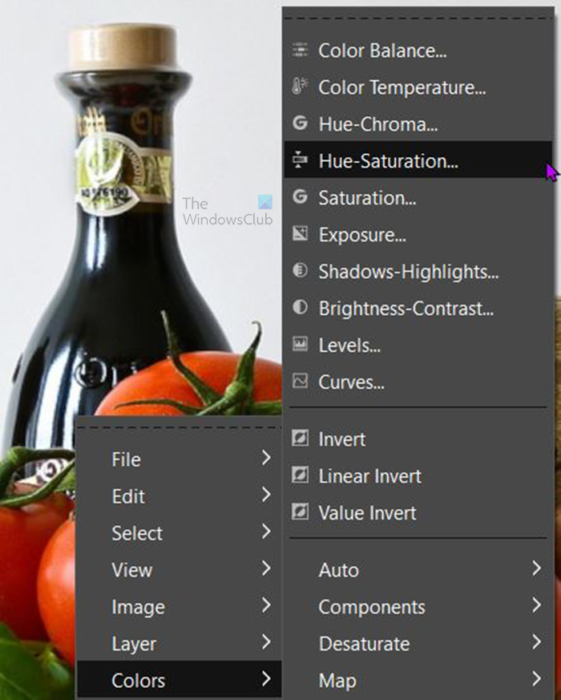
Another option to get to Hue-saturation is to right-click the image. A menu will appear click Color then click Hue-saturation.
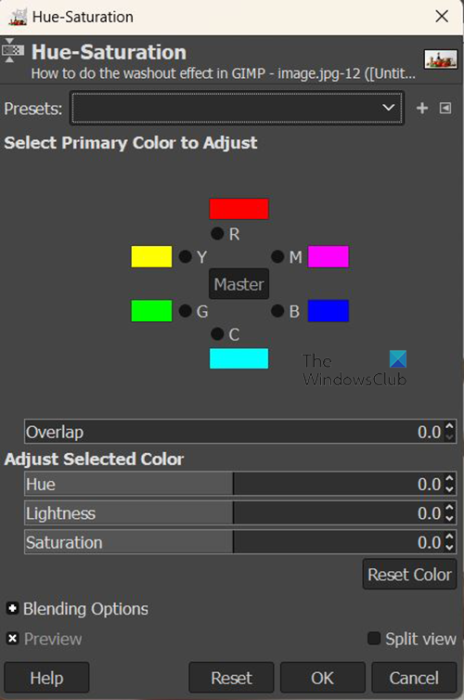
The Hue-saturation options box will open for you to make adjustments. You will see six colors that you can click if you want to adjust the Hue-saturation for a specific color. If you do not click a specific color, the overall colors will be adjusted.
You now need to adjust the slider for Lightness. Click on the Lightness slider and drag it to the right to make the image lighter. Ensure that the Preview option is selected so that you can see the changes happen as you move the slider.
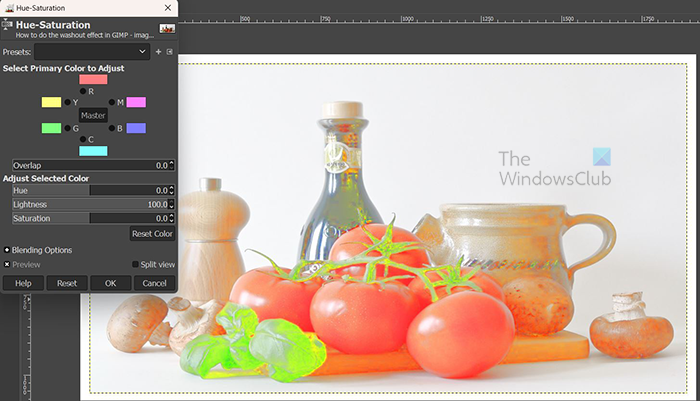
The further right you go the more washed out the image will become. The effect will require more or less lightness depending on the Image used.
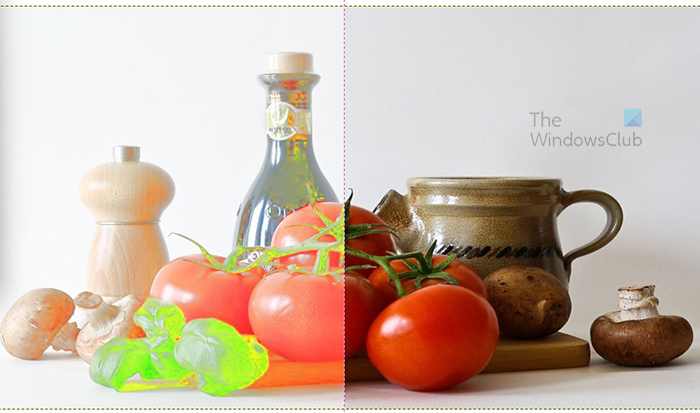
If you want to see a side-by-side comparison between what the image looked like before the adjustments are made select the Split view option. You will see the image divided in two with one section remaining unchanged and one section being the active area. Don’t worry when you exit the Hue-saturation options or uncheck the Split view option the changes will be made to the full image. the Split view option is not available even in some paid software. The Split view is a very helpful feature in GIMP.
When you are satisfied with the results press Ok to close the Hue-saturation options window and keep the changes. You can also press Reset color if you want to return the colors to their default settings.
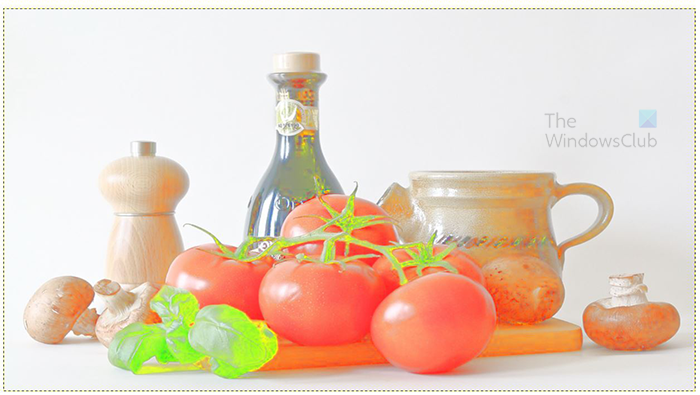
This is the image looking washed out.
3] Save the working file
You can save the image so that you can still edit it at a later time. To save the image as an editable GIMP file go to File then Save as. Choose a location that you want to save to and name the file then press Save.
4] Export a flattened copy
You may want to share the washed-out image, use it on a website, print it, or share it over digital media. This means that you will want to flatten the image. to flatten the image and save it in a format that is easy to share go to File then Export as or press Shift + Ctrl + E. The Export image window will open. Choose a file name and a location and press Export.
Read: How to add a Glow to an Object in GIMP
How do I make an image look washout in GIMP?
Making an image look washout in GIMP is quite easy, just follow the steps below.
- Place the image in GIMP
- Right-click on the image then go Color then Hue-saturation
- When the Hue-saturation option window appears, click and drag the Lightness slider to the right
- When the color of the image reaches a satisfactory level click Ok to keep the settings and close the Hue-saturation options window
Can I save the Hue-saturation settings for future use?
If you want the washout Hue-saturation settings that you just did to be available as a preset, click the + symbol beside the Preset window in the hue-saturation options window. The Save settings as named preset window will open. Name the setting then press Ok. The preset will be available in the preset drop-down box the next time you use Hue-saturation.