When you are having a bad day at work, nothing works for you. So, even after trying to download a new app from the store multiple times, you end up having gained nothing. Also, you might see Error 0x80040154 on your Windows computer. Let’s see how to fix it.
Fix Error 0x80040154 on Windows 11/10

Error 0x80040154 can be seen when running Windows Update, downloading apps from the Microsoft Store, running Outlook, in Mail & Calendar app, in Microsoft Edge browser, etc. Here’s how to resolve the issue in Windows Update or Microsoft Store.
How to fix Microsoft Store error 0x80040154
If you’re having trouble launching Microsoft Store or downloading an app and see Microsoft error 0x80040154, here are a few things you can try to fix the problem.
- Check or Change your Internet connection and see
- Clear contents of DataStore folder
- Reset the Microsoft Store Cache
- Run DISM Tool
- Check if licensing on Windows Store is synced or not.
Sometimes, you may succeed in starting the download, but it will abort abruptly with error message Code: 0x80040154.
1] Check or Change your Internet connection and see
If you’re having trouble launching Microsoft Store, and see the 0x80040154 error, Check for connection problems and make sure that you’re signed in with a Microsoft account.
Or else, try this simple workaround and see if it works. For some strange reason, this has been known to help. So, if you are using a cabled broadband connection, switch to a WiFi connection – or vice versa and check if it solves the issue.
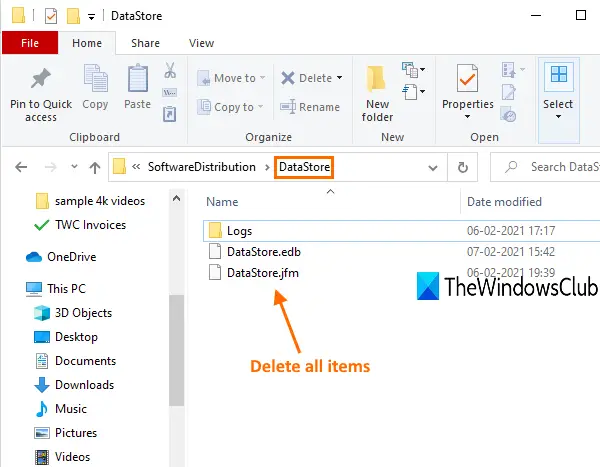
2] Clear contents of DataStore folder

The DataStore folder in Windows 10 stores temporary files and LOG files associated with Windows update and Update history.
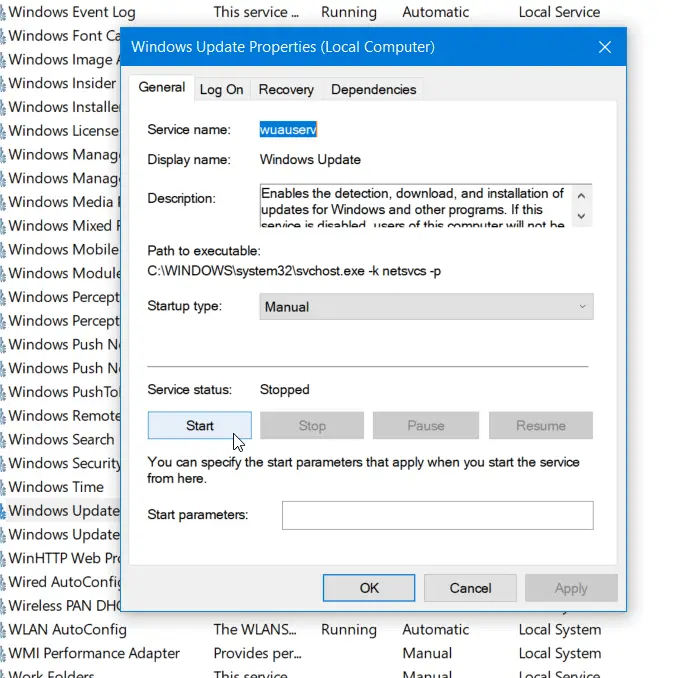
Open Windows Services Manager and stop the Windows Update service. After that, follow these steps:
- Open File Explorer using Win+E hotkey
- Paste
%windir%\SoftwareDistribution\DataStorein the address bar - Press Enter to open the DataStore folder
- Select all files and folders present in the DataStore folder
- Delete them.
Now restart the Windows Update service again using Windows Services Manager and then try to run Windows Update again.
3] Reset the Microsoft Store Cache
If downloading of Windows Store apps get stuck midway and throws up the 0x80040154 error, reset the cache for Microsoft Store. You can do this either via Windows Settings or use the built-in command-line tool wsreset.exe.
4] Run DISM Tool
This DISM tool scans system files, checks for any system inconsistencies or corruption and fixes them readily by replacing the damaged files.
5] Check if licensing on Windows Store is synced or not
Sometimes, the Microsoft Store error code could occur due to problems with the licensing. This happens when the licensing is not synced properly. In such cases, you may not be able to install apps on your Windows computer or could see the Microsoft Store Error 0x80040154. To manually sync it, go to Microsoft Store.
Open Settings > App Updates > Sync Licenses.
Then, restart the system and try downloading apps again.
How to fix Windows Update error 0x80040154
0x80040154 -2147221164 REGDB_E_CLASSNOTREG
To fix Windows Update error 0x80040154, follow these steps:
- Run Windows Troubleshooter
- Reset Windows Update Components to default
- Check Windows Update Services status
- Clear the BITS queue
- Download its stand-alone installer.
Let us look at them in a bit more detail.
1] Run Windows Troubleshooter
Use the Windows Update Troubleshooter from Microsoft. It resets Windows Updates settings to defaults. You may also run the Online Windows Troubleshooter from Microsoft.
2] Reset Windows Update Components to default
Use the Reset Windows Update Agent Tool and see if it helps you. This PowerShell script will help you Reset Windows Update Client. See this post if you want to manually reset each Windows Update components to default.
3] Check Windows Update Services status
Open Windows Services Manager and check the Windows Update related Services like Windows Update, Windows Update Medic, Update Orchestrator Services, etc are not disabled.
The default configuration on a standalone Windows 10 PC is as follows:
- Windows Update Service – Manual (Triggered)
- Windows Update Medic Services – Manual
- Cryptographic Services – Automatic
- Background Intelligent Transfer Service – Manual
- DCOM Server Process Launcher – Automatic
- RPC Endpoint Mapper – Automatic
- Windows Installer – Manual.
This will ensure that the required Services are available.
Apart from the direct service, you should find the dependencies of Windows Update service and ensure if they are running or not.
To get started, search for “services” in the Taskbar search box and click on the search result. After opening the Services window, find out Windows Update, DCOM Server Process Launcher, and RPC Endpoint Mapper. Check if they are running or not.

If not, you need to start those services one after one.
4] Clear the BITS queue
Clear the BITS queue of any current jobs. To do this, type the following in an elevated CMD and hit Enter:
bitsadmin.exe /reset /allusers
5] Download its stand-alone installer
Search on the Microsoft Update Catalog website for the Windows Update patch using the Update KB number, and download its stand-alone installer. Now apply the patch manually. Search for just the number; don’t include KB.
Hope something helps.
Leave a Reply