Hard disk errors Quick 303 and Full 305 are diagnostic error codes. They are specific error messages that indicate the hard drive has failed or is dead and needs to be replaced immediately. Many computer users encounter these errors and do not know how to resolve them. This post offers the most suitable solutions you can try to resolve the issue successfully.
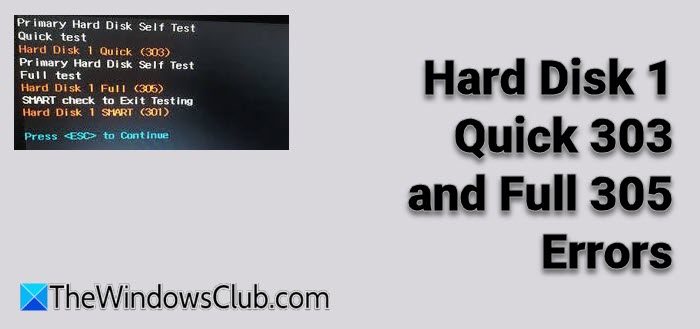
Fix Hard Disk 1 Quick 303 and Full 305 Errors
There are a few ways you can fix the Hard drive issues. We believe that the options below will be enough to solve your problem. So be sure to read carefully and follow the instructions below.
- Prepare a Recovery Disk.
- Backup Data from the Failing Hard Disk.
- Recover Data from the Recovery Disk.
- Contact Support for further assistance.
Let us look into this from a more detailed perspective.
1] Prepare a Recovery Drive
To create a recovery drive in windows, go to the search box next to the Start button, search for Create a recovery drive and then select it. You might be asked to enter an admin password or confirm your choice.
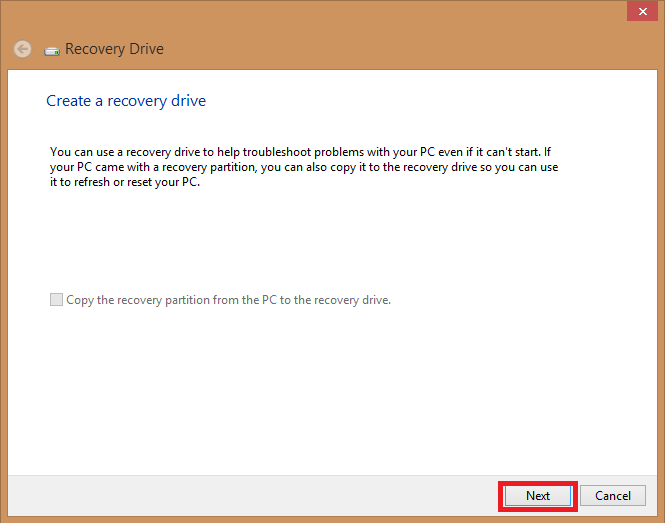
When the tool opens, make sure the Backup system files to the recovery drive is selected and tap Next.
Connect a USB drive to your computer, select it, and then click on Next.
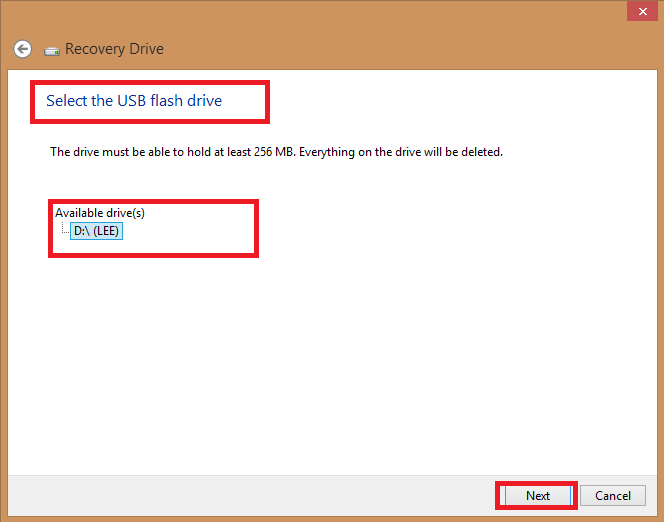
Select Create. Many files need to be copied to the recovery drive, so this might take a while.
NOTE: Use an empty USB drive because this process will erase any data that are already stored on the drive. You’ll need a USB drive that’s at least 16 gigabytes.
2] Backup Data from Failing Hard Disk
The system can hardly boot when the hard drive fails with the Hard disk 1 quick 303 or Full 305 errors. The question now is, how can you backup data that is on the damaged hard drive? Here is how you go about it.
Use File History to back up to an external drive or network location. Select Start, go to Settings, and select Update & Security. Select Backup, click on Add a drive and then choose an external drive or network location for your backups.
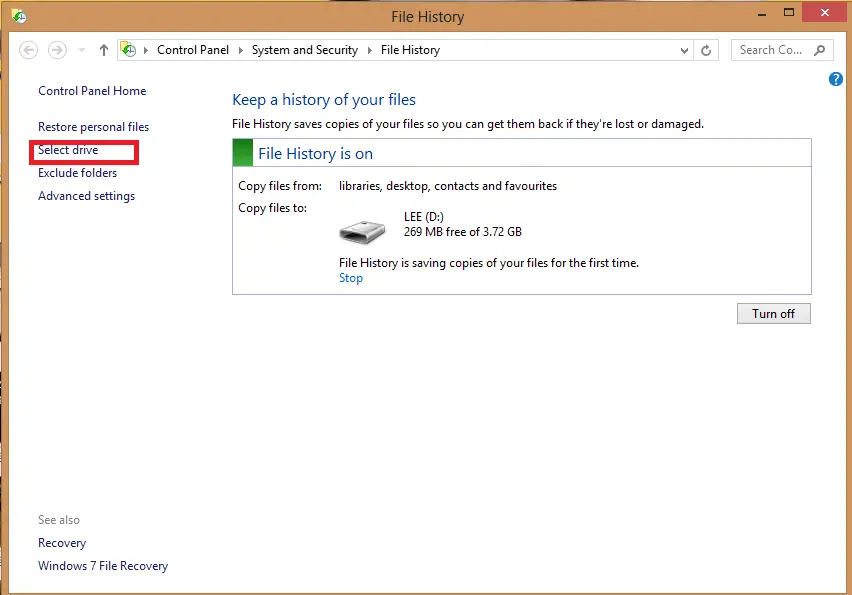
If you have done this and you’re missing an important file or folder that you have backed up, here’s how to get it back –
In the search box on the taskbar, type restore files and then select Restore your files with File History.
Look for the file you need, then use the arrows to see all its versions.
When you find the version you want, select Restore to save it in its original location. To save it in a different place, right-click Restore, select Restore to, and then choose a new location.
Tip: If you used Backup and Restore to back up files or create system image backups in previous versions of Windows, your old backup is still available in Windows 10. In the search box on the taskbar, type control panel. Then select Control Panel, click on System and Security, and select Backup and Restore.
3] Recover Data from the Recovery Disk
To recover your data from an external disk through the command prompt, use the attrib command.
It supports devices like Windows drive, external HDD, USB, SD card, and any other external storage media.
Note: Remain careful when you follow the command line about to be explained. A tiny wrong typing error can result in serious problems.
Here is a Step-by-Step Guide to Recover Files from an External Drive using CMD.
Plug an external storage media into your system.
Head over to the Start menu, key in cmd in the search bar, and hit the Enter key. This will open a pane on the left, showing the command prompt.
Right-click on Command Prompt and select open as admin.
In the CMD command line, key in the following command:
attrib -h -r -s /s /d drive letter:\*.*"
For instance, use
attrib -h -r -s /s /d H:\*.*"
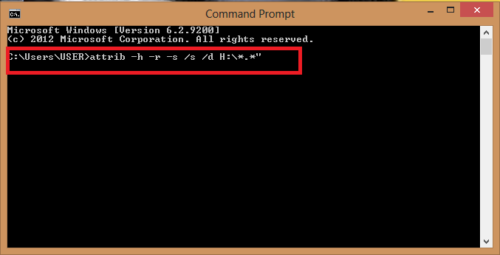
If the drive you wish to recover is H. Replace H with the external drive letter of your external storage media.
You can also decide to use this alternative method:
Press Windows +R keys simultaneously, and key-in cmd in the search box.
In the command line, key in
chkdsk G/f
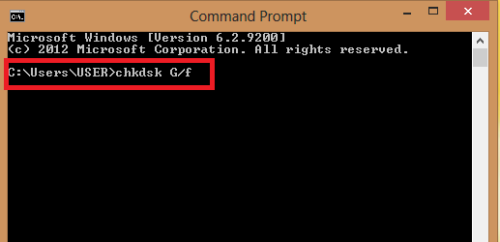
Where G is the disk letter you desire to recover.
Press Y until the command line starts again.
Once again, enter the drive letter, in this case, G, and hit the Enter key. The command line will go back to start.
Enter the following command:
[G : \ >attrib –h –r –s /s /d *.*]
Replace G with your disk letter and the command will retrieve all files in the drive.
After completion of the recovery process, you can create a new folder on the external drive with all recovered files.
The files might come in .chk format. Change the file extension and choose a preferred extension for each file.
Some of you may not want to go through this process when given the hard disk 1 quick 303 and full 305 errors. In that case, a piece of professional and reliable data recovery software will be helpful.
You may also want to look at how to Recover Data from a damaged Hard Drive for more details.
4] Contact Support for Further Assistance
In a case where your computer is covered under warranty, you can contact HP support for further assistance and in a scenario where you don’t have a warranty, you can receive 24/7 online support. Just call 800-474-6836 for your HP product questions and 800-652-6672 for your Compaq product questions and an HP representative will explain your out-of-warranty service options.
I hope this helps you.
Leave a Reply