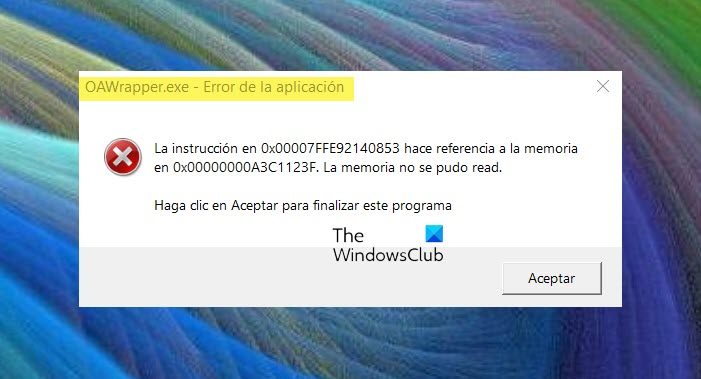
If you are experiencing the OAWrapper.exe application error on your Windows PC, this guide will help you fix it.

What is OAWrapper.exe?
The OAWrapper.exe (OpenAutomate Wrapper) process is a part of the NVIDIA GeForce Experience Application Ontology and Autodesk software. It is primarily used for game optimization, automatic driver updates, game recording, and other GPU-related features. Also, it is required to build proper communication between the Autodesk apps and software.
Can I delete OAWrapper.exe?
If you don’t use the applications that use OAWrapper.exe, you can choose to delete the process. There can be other reasons, like OAWrapper.exe taking unreasonably high CPU usage, due to which you might want to delete the process.

On the other hand, there might be a virus or malware disguising itself as OAWrapper.exe. So, if you notice some suspicious behavior with the process, check its location. The genuine OAWrapper.exe process is present at the below location:
C:\Users\<USERNAME>\AppData\Local\NVIDIA\NvBackend\ApplicationOntology\
If you find it at a different location, it will most likely be malware. Hence, you can close the process and delete the OAWrapper key from your Registry. Here’s how you can do that.
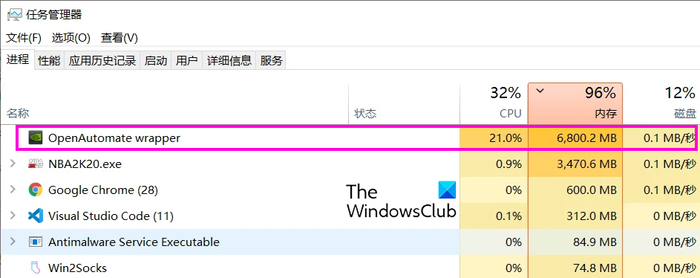
OAWrapper.exe high CPU usage
To fix the OAWrapper.exe application error or if it has a high CPU usage, you can terminate the OAWrapper.exe process. If you don’t use an application that uses OAWrapper.exe, this fix is most suited to you. This will fix the error temporarily. The process will restart as you reboot your computer.
To close the OAWrapper.exe process, follow the below steps:
- First, open Task Manager using the Ctrl+Shift+Esc hotkey.
- Now, from the Processes tab, look for the OAWrapper.exe process and select it.
- Next, click on the End task button to close it.
- Check if the error has stopped now.
You can also try removing the OAWrapper key from the Registry Editor if you are facing issues with the process. It will stop it from opening at system startup. Here’s how you can do that:
First, open the Run command box using Win+R and enter regedit in it to open the Registry Editor app.
Now, navigate to the following location in the address bar:
Computer\HKEY_LOCAL_MACHINE\SOFTWARE\Microsoft\Windows\CurrentVersion\Run
Next, look for the OAWrapper key in the right-side panel, select it, and press the Delete button to delete it.
Once done, restart your PC to let the effects take place.
Note: Keep a backup of your Registry to be safer.
How to fix OAWrapper.exe Application error?
If you keep getting the OAWrapper.exe Application error on your PC, you can follow the below solutions to fix the error:
- Keep your Windows and related apps up-to-date.
- Reinstall the NVIDIA GeForce Experience app.
- Uninstall the related application if not required.
1] Keep your Windows and related apps up-to-date
First of all, you need to ensure that your Windows OS and the applications that use the OAWrapper.exe process are up-to-date. You can update Windows using the Settings app. You can also update all your installed software and Windows apps.
2] Reinstall the NVIDIA GeForce Experience app

This error might result from corrupted or incomplete installation files of the NVIDIA GeForce Experience app. Hence, you can try reinstalling the app and then see if the error is fixed. Here’s how you can do that:
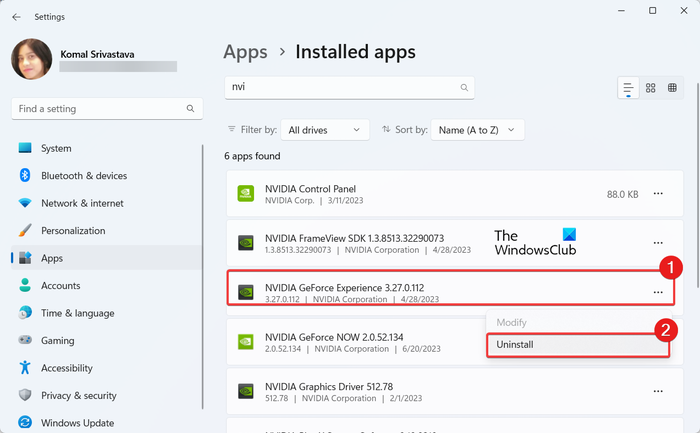
First, open the Settings app using Win+I and navigate to the Apps > Installed apps section.
Now, look for the NVIDIA GeForce Experience app in the list and press the three-dot menu button present next to it.
After that, select the Uninstall option and then proceed with the onscreen instructions to complete the uninstallation.
Once done, restart your computer and open the NVIDIA website. Download the latest version of NVIDIA GeForce Experience and install it on your computer.
Check if the OAWrapper.exe application error is now fixed.
See: SearchProtocolHost.exe Application Error (0x0241938e).
3] Uninstall the related application if not required
If you don’t require an application that uses the OAWrapper.exe process anymore, you can uninstall it and then see if the error is fixed. To do that, open the Settings app using Win+I and navigate to the Apps tab. Next, select the Installed apps option and then select the three-dot menu button present next to the app you want to remove. Then, choose the Uninstall option and confirm the app removal by clicking the Uninstall option. Follow the prompted instructions and then reboot your computer.
I hope this helps!
Now read: Fix WerMgr.exe or WerFault.exe Application Error in Windows.
Leave a Reply