If you want to generate a GUID or Globally Unique Identifier in Windows 11, here is how you can do that. You can generate a GUID for almost anything, including your system, documents, network, hard drive, etc., with the help of this step-by-step guide.

What is a GUID?
GUID stands for Globally Unique Identifier, which helps you identify a certain thing, such as your computer, hard drive, file, network, etc. It could be used for different purposes. The most important thing about GUID is that it is always unique and a 128-bit text string. However, they always come in a specific way – first, you could be 8 hexadecimal digits. Then, you can see three sets – each containing 4 hexadecimal digits. Finally, you could see a set of 12 hexadecimal digits.
A typical GUID looks something like this:
AAAAA123-BBBB-4567-890C-123DEF456789
However, it could also come with a bracket. For your information, they are the same, and you can use them for the same purpose.
Read: How to find GUID in Windows.
How to generate a GUID (Globally Unique Identifier) in Windows 11 using Command Prompt
To generate a GUID (Globally Unique Identifier) in Windows 11/10 using Command Prompt, follow these steps:
- Search for cmd in the Taskbar search box.
- Click on the Run as administrator option.
- Click on the Yes button.
- Enter this command to create GUID with brackets: powershell ‘{‘+[guid]::NewGuid().ToString()+’}’
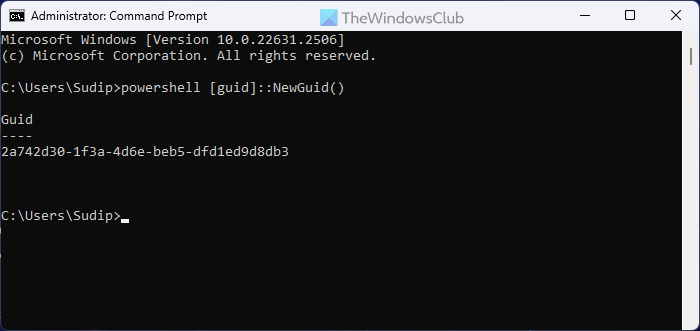
- Enter this command to create GUID without brackets: powershell [guid]::NewGuid()
To learn more about these steps, continue reading.
First, you need to open the Command Prompt with administrator permission. For that, search for cmd in the Taskbar search box and click on the Run as administrator button. Then, click the Yes button on the UAC prompt.
Now, you have two options. If you want to create a GUID with brackets, enter this command:
powershell '{'+[guid]::NewGuid().ToString()+'}'
However, if you want to create a GUID without brackets, enter this command:
powershell [guid]::NewGuid()

The newly created GUID will be visible on your screen immediately.
How to generate a GUID (Globally Unique Identifier) in Windows 11 using PowerShell
To generate a GUID (Globally Unique Identifier) in Windows 11 using PowerShell, follow these steps:
- Search for powershell in the Taskbar search box.
- Click on the Run as administrator option.
- Click the Yes button.
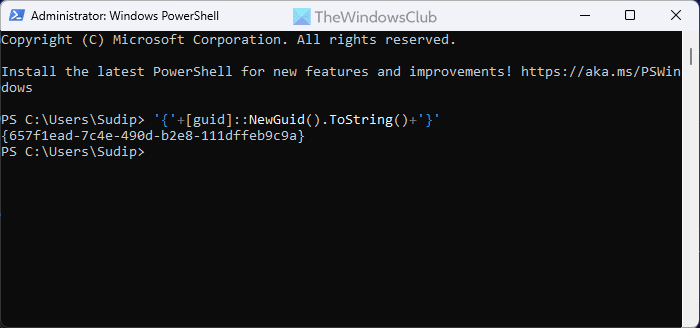
- Enter this command to create GUID with brackets: ‘{‘+[guid]::NewGuid().ToString()+’}’
- Enter this command to create GUID without brackets: [guid]::NewGuid()
To know more about these steps, keep reading.
To get started, you need to open elevated Windows PowerShell window. To do that, search for powershell in the Taskbar search box, click on the Run as administrator option, and click on the Yes button on the UAC prompt.
Then, if you want to create a GUID with brackets, enter this command:
'{'+[guid]::NewGuid().ToString()+'}'
If you want to create a GUID without brackets, enter this command:
'{'+[guid]::NewGuid().ToString()+'}'

That’s all!
Read: What is GPT Partition or GUID in Windows
How do you create a Global Unique Identifier?
To create a Global Unique Identifier, you need to use Command Prompt or Windows PowerShell. Alternatively, you can use Windows Terminal as well. Once it is opened, use the aforementioned command to get the job done. You must use the command according to the needs since commands depend on whether you want brackets or not.
How do I find my GUID in Windows 11?
To find disk and volume GUID in Windows 11, you need to use Command Prompt. First, list all the disks and select the one you want to find the GUID for using this command: select disk [disk-number]. Then, enter this command to obtain the GUID: uniqueid disk.
Read: Event ID 158 error – Identical disk GUIDs assignment in Windows.
Leave a Reply