Photoshop has a lot of features that can make your work so much easier and more realistic. Making proper shadows for your artwork is important as the shadow will make it more realistic. Shadows have to correspond with the surroundings and lighting in the image. Learning how to get realistic shadows from an image in Photoshop is very important. This is important, especially in cases where you are placing the subject image on a different background.
Shadows are important because they correspond with the image and the lighting. Shadows also correspond with the intensity of the light. To create the correct shadow based on the light, study real shadow in different light, different intensities, and different times of the day.
How to get Realistic Shadow for an Image in Photoshop
This article will show you how to get a Realistic Shadow for an Image in Photoshop. You will learn how to get shadows from an image, you will then use this technique for your image and lighting situation.
- Open and prepare Photoshop
- Add image to Photoshop
- Create a new layer below or above the image
- Create a selection of the subject of the image
- Fill the selection with black and place it on the new layer below
- Deselect
- Bring the shadow to the bottom of the subject
- Match the shadow to the subject and the lighting
- Change the shadow’s color, color mode, and opacity
- Make the shadow layer a smart object
- Blur the shadow
- Add a layer mask to the shadow
- Apply a gradient to the shadow
1] Open and prepare Photoshop
The first step is to open and prepare Photoshop. Find the Photoshop icon and double-click it to open Photoshop. When Photoshop is opened go to File then New, the New document options window will open. Here you will choose the options that you want for your document then press Ok. The new document will come up blank and ready for you to work.
2] Add image to Photoshop
You now need to add the image to Photoshop, there are a few ways that you can do it. You can find the image then right-click on it and choose Open With then Adobe Photoshop (version). You can also go into Photoshop then g to File then Open. When the Open dialogue box appears, search for the file, select it, and click Open. You can also get the image into Photoshop by clicking it and dragging it into Photoshop.

This is the image that will be used to add the shadow, it is a subject with a white background.
3] Create a new layer below or above the image
In this article, you will get the shadow from an image that is flat and not made up of other images. If your image has a background, you will create the new layer above the image.
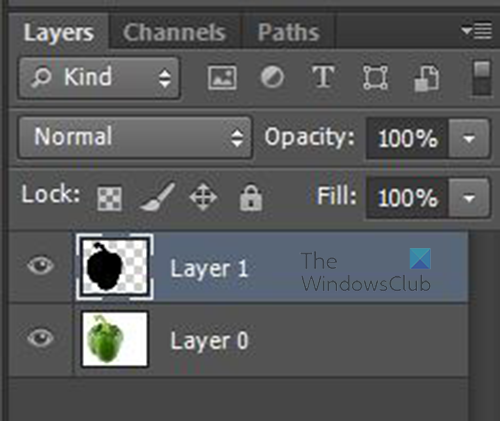
If your image has no background (PNG image) youcan create the layer below. To create the layer below the image, click on the image layer then hold Ctrl while clicking the Create new layer icon. If you are creating the layer above the image, just click the Create new layer icon. Name this new layer that you created below the image so that it is easily identified. You can name this new layer Shadow. Since this image that is used has a white background, the new layer will be created above.
Troubleshoot
If the new layer cannot be created below, then the image layer is locked and is a background layer. To create a layer below the background layer, you will have to duplicate the layer or convert it to a regular layer. To convert it to a regular layer, right-click on it then from the menu click Layer from background.
4] Create a selection of the subject of the image
It is time to make a selection (outline) of the image. You can use the Quick selection tool for this.

The Quick selection tool is located in the same group as the Magic wand tool.

With the Quick selection tool selected, select the image until the selection is made around the image.

To make sure that the image is fully selected, click Q to turn on Quick mask showing what parts of the image are selected. If you are satisfied with the selection press Q to turn off Quick mask.
5] Fill the selection with black and place it on the new layer
Now that the new layer is above the image and the selection of the image is created, you need to fill the selection with black. To fill the selection with black, make the foreground color black.
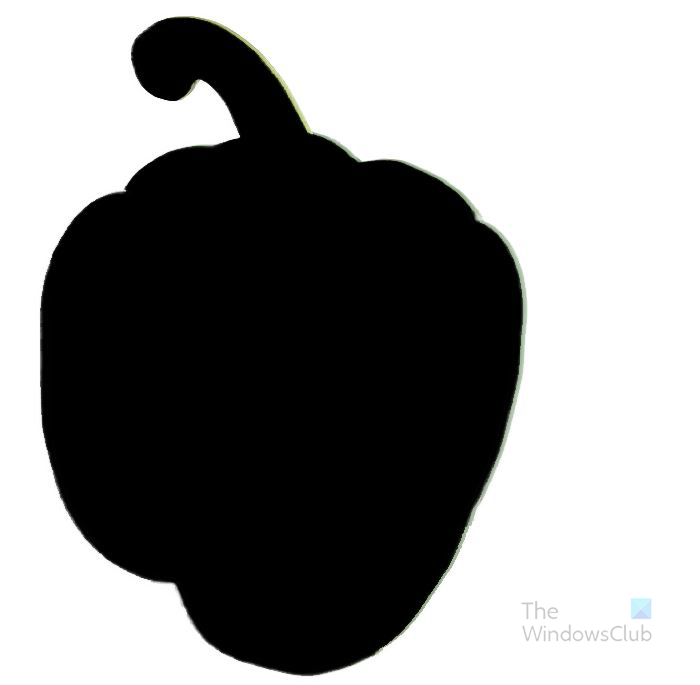
With the foreground color black, click the new layer then hold Alt + Backspace.
6] Deselect
When the layer is filled with black, you will still see the selection around it, you will need to deselect. To deselect press Ctrl + D.
7] Bring the shadow to the bottom of the subject
With the shadow created, you now need to get it into position. The position of the shadow will be determined by the direction of the light source. In this case the light source is coming from the upper left. This means that the shadow will be at the bottom right.
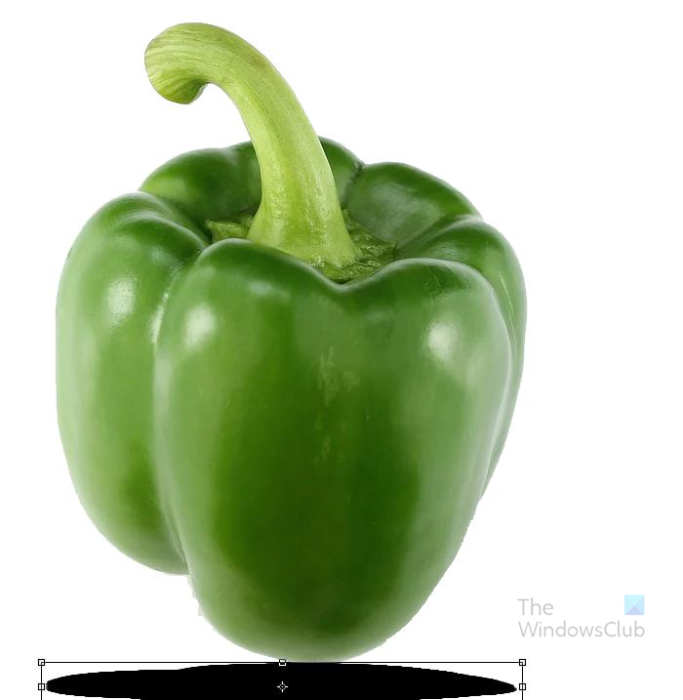
To get the shadow at the bottom, click on the shadow layer and press Ctrl + T. This will bring up the transform box around the shadow. Click and drag the shadow down.
8] Match the shadow to the subject and the lighting
To make the shadow more realistic, you will need to make it align correctly to the image, you can do this by moving the shadow closer to the image then using warping the shadow to make it fit correctly.
Adjust the shadow based on your lighting
You would then also use free transform to get the shadow over to the right of the image. You should also move the shadow closer to the bottom of the image to make it more realistic.
You would then Free transform the shadow to get it to be at the right of the image. Click on the shadow then press Ctrl + T to bring up the transform boxes. You then grab the top middle handle while holding Ctrl and drag it to the right. Keep adjusting until you get the shadow how you want it.
Tip
If your shadow will be placed on an image with a background and you are not removing the background, you may have problems placing the shadow. The best place for the shadow layer is below the image layer. However, if you have a background the image will hide the shadow, hence, placing the shadow above the image. placing the shadow above the image can cause placement problems depending on where you want to place the shadow. To fix this, do the following.
- Use the Quick selection tool and make a selection of the image but not the background.
- When the image is selected, right-click on the image and choose Layer via copy. A copy of the selection will be added to the layers panel.
- You should then place the shadow layer between the image and the copy of the selection. The shadow will look like it is at the bottom of the image and it will look more realistic.
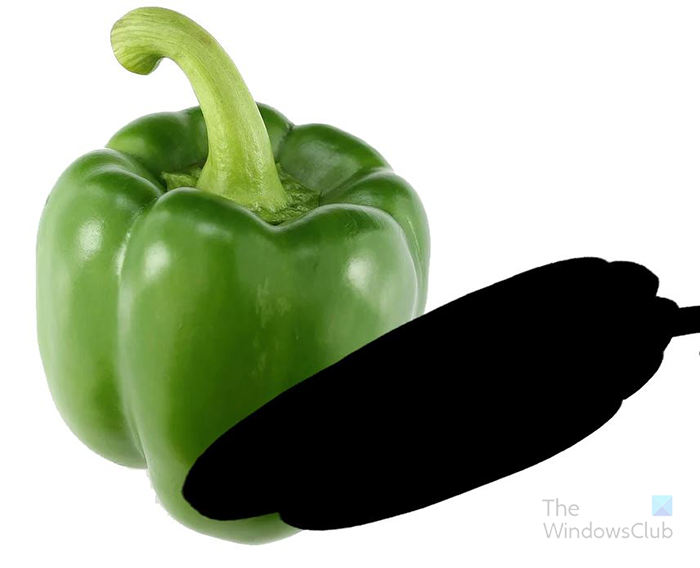
This is the image before the subject was copied and the shadow layer was placed between both images.
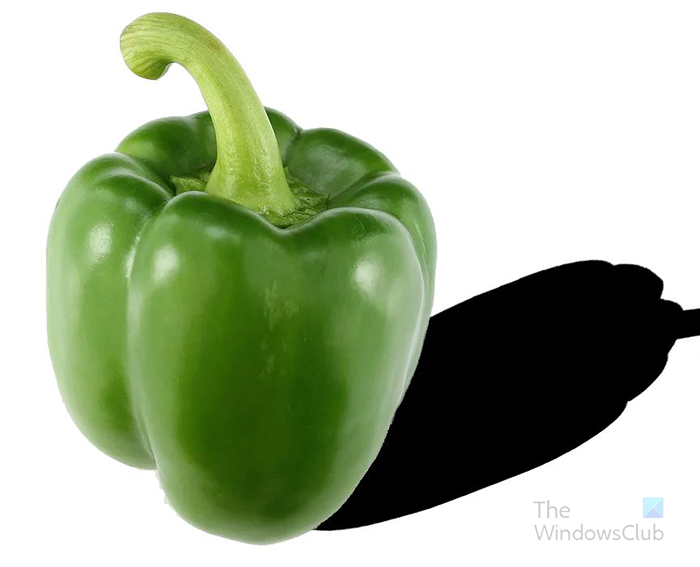
This is the image after the copy, the shadow now fits the image. In some cases, you would have to use the Puppet warp to make the shadow fit the image. For this demonstration, the image used and the shadow direction fits perfectly without the need to use the Puppet warp.
9] Change the shadow’s color, color mode, and opacity
To make the shadow more realistic, you would need to change the shadow’s color, color mode, and opacity.
Change the shadow’s color
If you observe a real shadow, you will notice that it is not all black. You can use Photoshop to sample a real shadow then analyze the colors and you will see that it is not all black.
To change the shadow’s color, right-click the shadow layer and from the menu choose Blending options. When the Layer style options window appears, click Color overlay. Click the color swatch and when the Color picker appears, choose a color that is lighter than black. You can always get the color more perfect later after you change the opacity and mode. When you have chosen the lighter color press OK.
Change the shadow’s Color mode
Now that the shadow’s color is a lighter shade, it is time to change the color mode. To change the color mode of the shadow, click on the shadow layer and go to the top of the layers panel where you see normal.
Click the word Normal to reveal the list of color modes. From the list press Multiply.
Change the shadow’s Opacity
Real shadows are a bit transparent; you can see things through them. To make this shadow more realistic, you will have to decrease the Opacity. To decrease the opacity, go to the top of the layers panel and look for Opacity. When you click the drop-down arrow, you will see the slider that you can adjust. You can also type in the percentage opacity that you want. Experiment with the different percentages until you are satisfied with the results. Remember that the shadow will depend on the light source, the time of day, and the color of the background.
10] Make the shadow layer a smart object
Before doing certain edits on a layer, it is best to convert the layer into a Smart object. Making the layer a smart object protects it from destructive edits and allows you to redo edits that would otherwise be permanent.
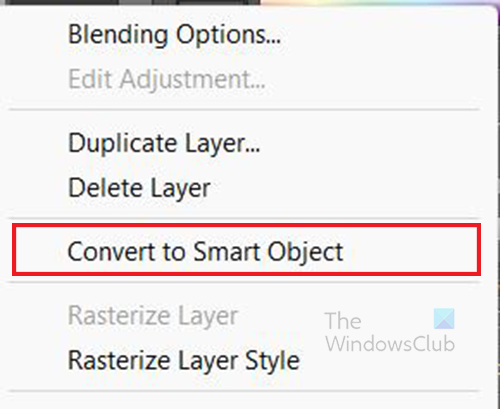
To convert the shadow layer to a Smart object, right-click it in the layers panel. The menu will appear, click Convert to smart object.
11] Blur the shadow
Real shadows are not sharp, they are blurred. To make your shadow look more realistic you will need to blur it. To blur the shadow, select its layer, go to the top menu bar, and click Filter then Blur then Gaussian blur.

When the Gaussian blur window appears adjust the slider to make the shadow blur to your preference. When you are satisfied with the results press Ok.
If you need to make adjustments to the Gaussian blur in the future, you can look under the shadow layer and click the word Gaussian blur. This layer was created because the shadow layer is a Smart object. If it wasn’t a smart object then the Gaussian blur would be added directly to the layer and it could not be undone.
12] Add a layer mask to the shadow
This step requires you to add a layer mask to the shadow layer. This step is important because you will add the gradient to the layer mask in the next step. This will allow you to be able to make adjustments to the gradient without directly affecting the layer. To add the layer mask click on the shadow layer then go to the bottom of the layers panel and click the Add vector mask icon. You will see a white thumbnail appear beside the shadow layer thumbnail.
13] Apply a gradient to the shadow
As you know, shadows are not a straight color all the way through. The parts closest to the object are darker and it gets lighter the further it gets away from the object. To achieve this color variation, a gradient is used. The gradient will move from dark to light. To apply this gradient, click the shadow layer then select the Gradient tool on the left tools panel.

When the gradient toolbar appears at the top of the Photoshop window, click the gradient swatch. A drop-down will appear with different gradient options, click the Black, White gradient swatch. With this gradient selected, click the part of the shadow closest to the object then drag away to the furthest part of the shadow. If the gradient is lighter closer to the image, select the reverse option on the gradient bar at the top. You could also click and drag from the furthest part to the shadow to the part closest to the image.
Unlink the layer mask from the layer
If you want to have more control over the gradient, you can unlink the layer from the layer mask. To unlink the layer mask, click the chain icon between the layer mask and the layer icon. When they are unlinked you can use the mouse to move the gradient. When you are finished adjusting, you can then click between the shadow layer icon and the layer mask to relink.

This is the shadow with the gradient added to it.
TIP: This post will show you how to make a Natural Shadow for a composite image under an Object or Person in Photoshop.
How do I add a drop shadow in Photoshop?
To add a drop shadow in Photoshop, do the following.
- Select the layer that you want to add the drop shadow to
- Right-click on the layer in the layers panel
- From the menu that appears click Blending options
- In the Layers style window click Drop shadow
- In the drop shadow options, adjust the Distance, Spread, and Size. You can also change the color of the drop shadow.
- When you are finished, click Ok to keep the shadow options and close the Layer style window.
Read: How to use Content-Aware Crop and Fill in Photoshop
What does the Shadows/Highlights adjustment do in Photoshop?
The Shadows/Highlights adjustment allows you to brighten or darken images in Photoshop. You may want to lighten images that are too dark or darken images that are too bright. You can also do a mixture of lightening and darkening on an image. the Shadows/Highlights allow you to do detailed lightening and darkening of images. You can access the Shadows/Highlights adjustments by going to the top menu and clicking Image then Adjustments the Shadows/Highlights. You will get an options window where you can make adjustments to the Shadows and Highlights of your image.
Leave a Reply