For tables, borders are lines that mark where the columns and rows are and allow you to see where the data is located, but what if you want to hide the table’s borders because it is the look you prefer. Microsoft OneNote has a Hide Borders feature; this feature allows users to hide borders within the table.
How do I hide all OneNote Table borders?
Hiding Borders in OneNote is simple with just a click, making rows and column lines in your OneNote table not visible; some users even prefer the no borders look for their table. In this tutorial, we will discuss the process of hiding borders within your OneNote table.
How to hide the Borders of Tables in OneNote
To hide borders in OneNote, follow the steps below.
- Launch Outlook
- Create Table
- A Table tab will appear with several features
- Click anywhere on the table
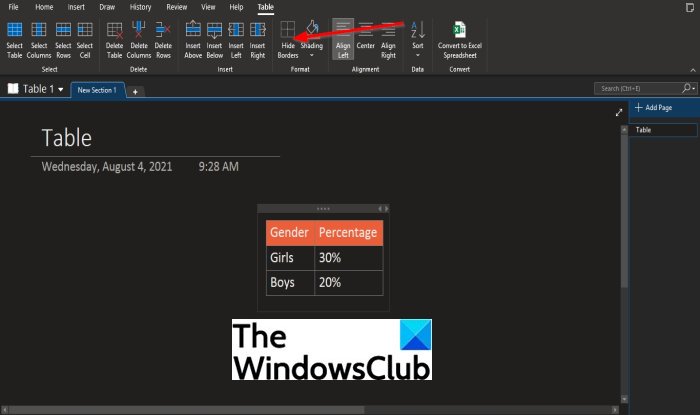
- Click the Hide Borders button
- The borders in the table are now hidden
Launch Outlook
Create a Table

A Table tab will appear with various features to format your table.
Click anywhere on the table, then click the Hide Borders button in the Format group.

The borders in the table are hidden.
If you want to return the borders to the table, click the Hide Borders button again.
Which tab do you select to hide the borders from the table in OneNote?
The tab to use in OneNote to hide the borders from a table is the Table tab, but you have to create a table first to gain access to the Table tab. The table tab is a tab that contains features to format your table to the style you want.
We hope this tutorial helps you understand; how to hide the borders of tables in OneNote; if you have questions about the tutorial, let us know.
Leave a Reply