Importing your Facebook contacts into Gmail is very much a possibility. Still, it is not something that either company has advertised because it is not a straightforward thing. To import your Facebook contacts, we must first go through several stages.
How to import Facebook contacts to Gmail
Luckily for you, this article will go into great detail to explain how to import all of your Facebook contacts to Gmail. This is a good idea, too, because it never makes sense to only have contacts in a single place. Always try to diversify when using services on the web because nothing lasts forever.
- Go to Your Facebook Information
- Download Your Information
- Extract the newly downloaded data
- Convert the HTML file to CSV
- Open Google Contacts
Let us talk about this in greater detail.
1] Go to Your Facebook Information
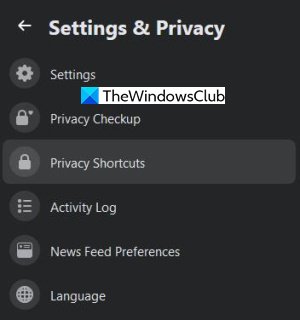
The first step is to navigate to Your Facebook Information. To do this, folks must first click on the arrow button located at the top-right corner within Facebook. After that, select Settings & Privacy > Settings, and right away, please click on Your Facebook Information.
You should now see several options on the right side, but only one of them is essential to you in this situation.
2] Download Your Information
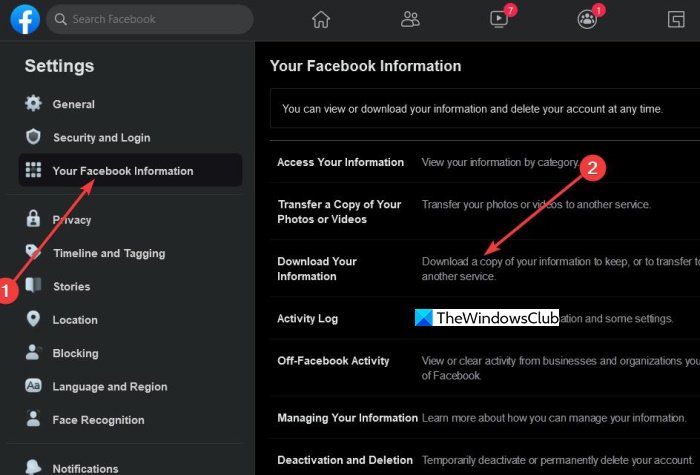
Moving forward, folks must then click on Download Your Information because this is where they will be required to get all of their contact information on a Windows 10 computer.
Now, once you’ve moved to the new section, it should look like classic Facebook, but we expect things to change on this end eventually.
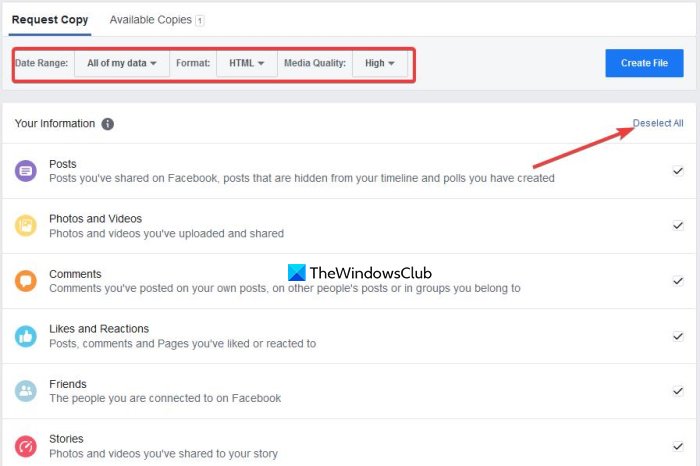
The next step is to look for Date Range and select All of my data. When it comes down to Format, choose HTML. Media Quality is not essential in this situation, so ignore it.
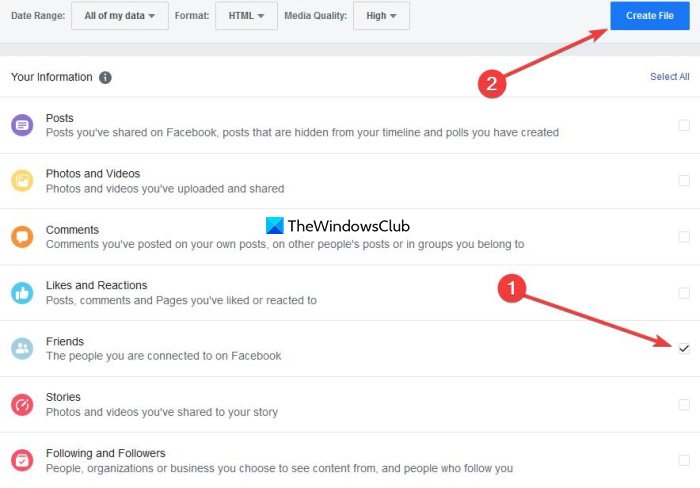
Below the button that says Create File, click on Deselect All then from there, tick the box beside of Friends. You can now return to the Create File button and click on it. After a short while, you should see something comes up saying, A copy of your information is being created.
Give the system some time to gather all the information for download. Depending on how many Facebook friends you have, it could take multiple minutes to complete.
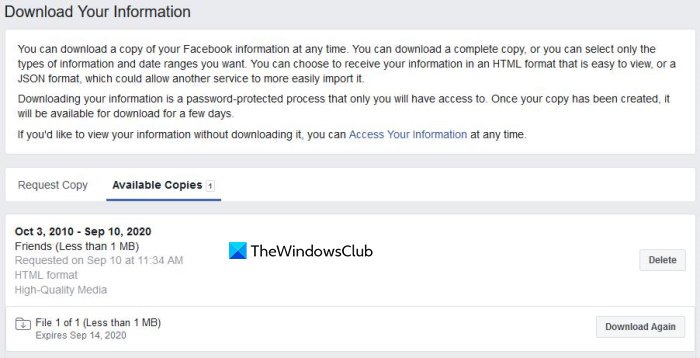
Once you receive notification that the download is available, click on Available Copies and choose the Download button to download the data to your computer. You may be asked to sign in with your password before the download begins.
3] Extract the newly downloaded data
The information you recently downloaded is located in a ZIP file, so you have to extract it to gain access. Once extracted, you should see several files, but we are only planning to use Friends.
Read: Useful Facebook Add-ons, Tips, and Tricks.
4] Convert the HTML file to CSV
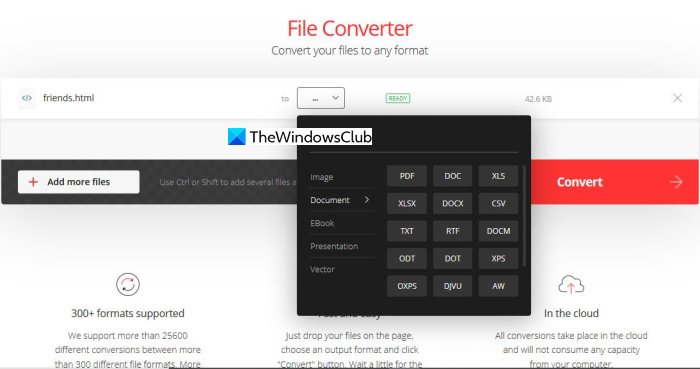
Currently, HTML is not an option for importing Facebook contacts into Gmail; the best option is CSV. We will then need to convert friends.html into friends.csv, so how can we do this?
Well, we would like to recommend an online tool known as Convertio. Visit the official website, click Choose files, select friends.html, and hit the Enter key on your keyboard. A new page should appear, and you will need to select the output format.
Choose CSV from the list, then hit the red Convert button. Wait a short moment for the server to prepare the file, then click the Download button.
Read: How to export and download your Gmail email data as a MBOX file.
5] Open Google Contacts
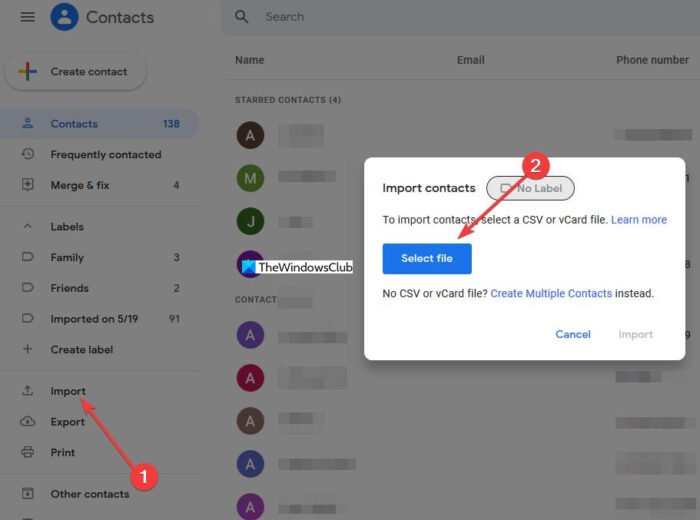
Before getting into Gmail, we must first fire up Google Contacts because this is where we will import friends.csv.
To begin the process, click on Import, then select friends.csv and hit the OK button.
Once the importation is over, launch Gmail, and all your Facebook contacts should now be available to you.
Read: How to auto-delete Selected Email from Gmail using filters.