A table is combined by rows and columns; it is an object that helps users to organize their information within their document or slide. The Table feature offered in PowerPoint allows users to insert a table, draw a table or insert a table using an Excel spreadsheet.
How to Insert a Table or Draw a Table in PowerPoint
Follow the methods below to insert a table in PowerPoint:
How to insert a table in PowerPoint
Launch PowerPoint.

On the Insert tab, click the Table button in the Tables group.
In the drop-down menu, select the small boxes that represent columns and rows and select how many rows and columns you want in your table. The Table will appear on the slide.
You can also select the Insert Table option.

An Insert Table dialog box will open.
In the dialog box, enter the number of columns and rows you want and click Ok.
How to draw a table in PowerPoint
The Draw Table feature allows users to design their table by drawing the tables rows and columns by themselves. Follow the steps below to draw a table.
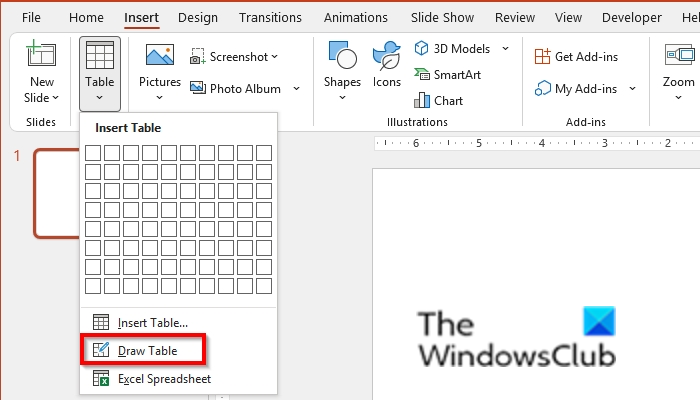
On the Insert tab, click the Table button in the Tables group.

On the drop-down menu; select Draw Table.
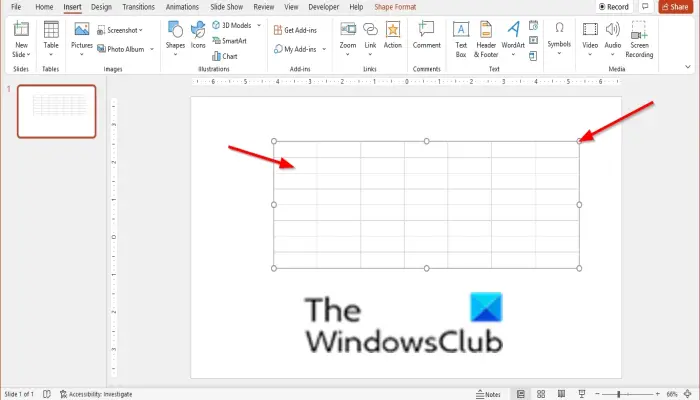
Draw the cell into the slide.
Repeat steps more than once to create a table.
How to insert a table using Excel Spreadsheet
On the Insert tab, click the Table button in the Tables group.
On the drop-down menu, select Excel Spreadsheet.

It will open a window showcasing a mini-Excel spreadsheet on the slide.
Enter data into the spreadsheet in that window.
To return to the original PowerPoint window, click the slide in the navigation pane.

You can drag the points around the table to enlarge the table.
To return to the window with the mini-Excel spreadsheet, double click the cell in the table.
How do you customize a table in PowerPoint?
Once you have created a table, a Layout tab will appear on the menu bar; you can use the various tools offered, such as tools to insert rows and columns, Merge, View Gridlines, Alignment, Arrange and change Cell Size and Table Size.
Read: How to turn off Design Ideas in PowerPoint
How do you draw a diagonal line in a table in PowerPoint?
Follow the steps below to draw a diagonal line in a table in PowerPoint:
- Select the table cell where you want to add the diagonal line.
- On the Table Design tab in the Table Styles group, click Borders and select Diagonal Down Border or Diagonal Up Border from the menu.
- The option you have selected will appear in the table.
We hope this tutorial helps you understand how to insert a table or draw a table in PowerPoint; if you have questions about the tutorial, let us know in the comments.
Leave a Reply