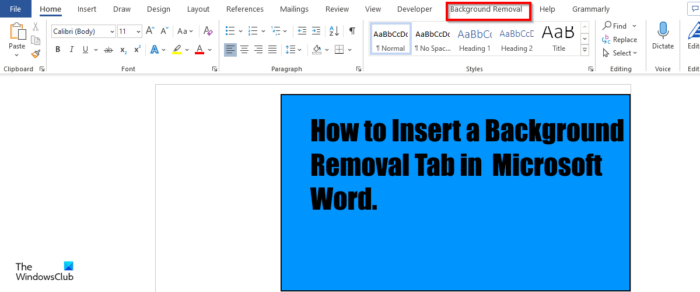
In Microsoft Office, you can add commands and tabs to your ribbon by using the customized ribbons settings. When persons insert pictures into their documents, a Picture Format tab will appear that allows them to customize their pictures and even remove the background of the pictures, but what if you want to remove a background of a photo without going on the Picture Format tab? In Microsoft Word, a person can add a Background Removal tab to their ribbon, which of all the features offered removes the background. In this tutorial, we will explain how to insert and use a Background Removal tab in Word.

How to insert and use Background Removal in Word
Follow the steps below to insert a Background Removal tab in Word:
- Launch Microsoft Word.
- Click File.
- Click Options on the backstage view.
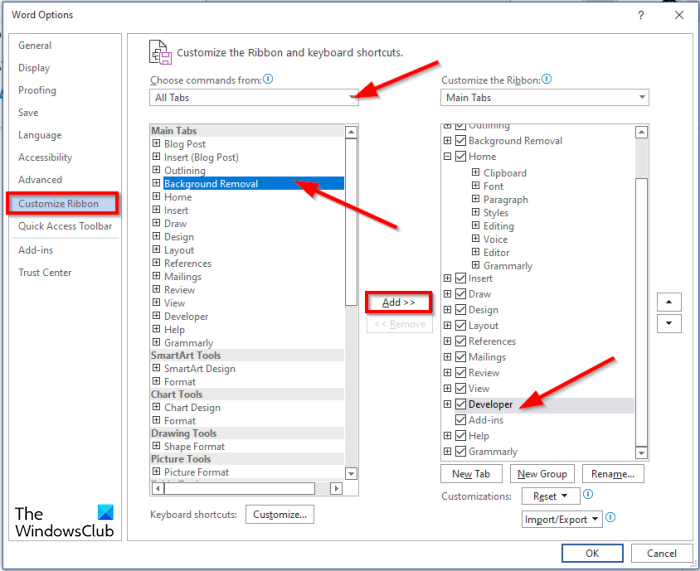
- Select All tabs from the Choose Command From list.
- Scroll down until you see the Background Removal tab, then click the Add button.
- The Background Removal tab is on your Word Ribbon.
Launch Microsoft Word.
Click the File tab.
On the left pane, click Options on the backstage view.
An Outlook Options dialog box will open.

Select All tabs from the Choose Command From list.
On the right of the dialog, you can select which tab you want the Background Removal tab to come after (optional). In this tutorial, we selected the Developer tab.
Back in the list of the Main tabs, scroll down until you see the Background Removal tab, and then click the Add button.
Then click OK.
Now look on your ribbon to see the Background Removal tab.
How do you remove background in Word?
Follow the steps below to remove a background from a picture in Microsoft Word:
- Select the picture, then go to the Format tab.
- Select the Remove Background button.
- It will now open on the Remove Background window.
- You will see some of the areas in your picture are marked with magenta.
- Mark the areas to keep with the Mark Areas to Keep button.
- Mark the areas to remove with the Mark Areas to Remove button.
- If you are satisfied with your results, click the Keep changes button.
- The modified photo will appear in your document.
How do you put a background on Microsoft Word?
Follow the steps below to insert a background on Microsoft Word document:
- Click the Page Layout tab.
- Click the Watermark button in the Page Background group.
- In the Printed Watermark dialog box, click Picture Watermark.
- Then click the Select Picture button.
- In the Insert Picture dialog box, select a picture.
- Then click Insert.
- Back in the Printed Watermark dialog box, select the maximum Scale and uncheck the Washout check box and then select the Washout.
- Then click the Apply button, then select the Close button.
- The background image is inserted into your Word document.
How do I remove text background in Word?
Follow the steps below to remove a text background in Word:
- Type the text into the Word document.
- Then highlight the text and select the Font Color button in the Font group.
- Select the White color from the menu.
We hope this tutorial, will help you to understand how to insert & use the Background Removal tab in Word.
Leave a Reply