Microsoft Word is more than just a tool for typing text. It can be used for other types of editing as well, and that includes spicing up your text to look more professional. For example, if you want to circle your text, or add a text around a circle, these are things you can do, and we are going to explain how to get them done. One of the reasons one might want to add a circle around a text is to emphasize it, but there are other reasons as well, so do what makes you feel comfortable. In this post, we show you how to insert text in a Circle. We also show you how to circle Text in Microsoft Word using built-in functions.
How to add a Circle around Text in Word
Drawing a circle around a text is easier than you might imagine. We promise that this article will not be difficult to understand, so read carefully and things should turn out just fine.
- Open Microsoft Word
- Launch a new document
- Navigate to Shapes
- Select the circle shape
- Draw the shape in your document
- Edit Shape Format
- Drag circle over text
1] Open Microsoft Word
To begin this task, you must first launch Microsoft Word. You can find the icon on the Desktop, Taskbar, or from within the Start Menu.
2] Launch a new document
After you’ve fired up Word, you must now click on Black Document to open a new document, or launch one you’ve been working on before; the choice is yours.
3] Navigate to Shapes
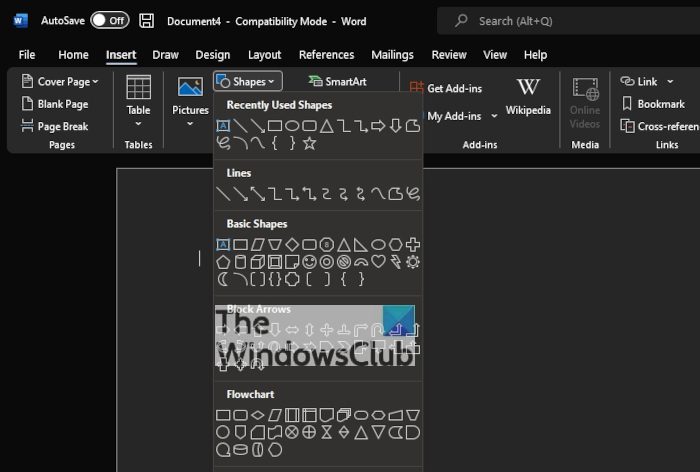
The next step, then, is to locate the Shapes area. To do this, click on Insert > Shapes. You will see a dropdown menu showcasing several different types of shapes. The options to choose from are as follows:
- Lines
- Basic Shapes
- Block Arrows
- Flowchart
- Callouts
- Start and Banners
4] Select the circle shape
From under the Basic Shapes category, please click on the circle icon, or to be more correct, the oval icon.
5] Draw the shape in your document
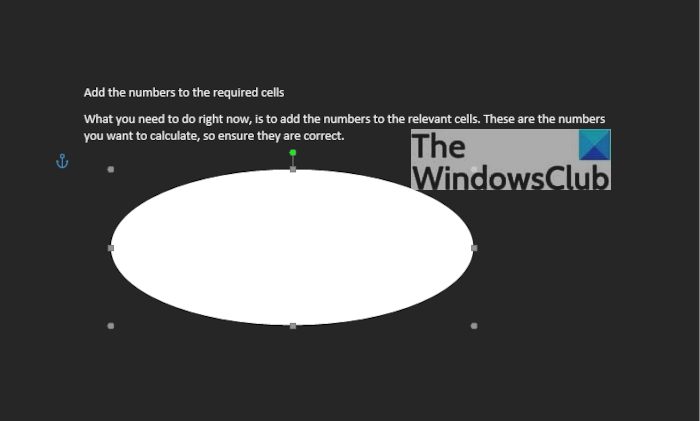
After selecting the circle, you must press and hold the left-click button, then drag to create the circle in the preferred size and position.
6] Edit Shape Format
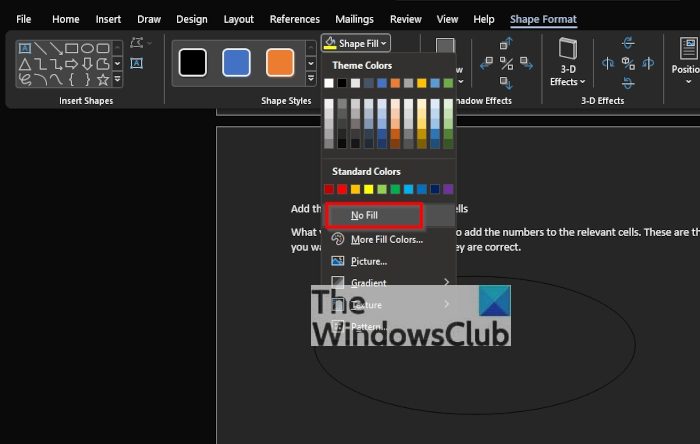
By default, the circle will be added to your document with a color-filled center. This means, the text won’t show on the inside, so we need to change this.
To get it done, click on the shape, then select Shape Format > Shape Fill > No Fill. Doing this will remove the color from within the center of the circle.
From there, you can click on Shape Outline to determine the color of the circle’s outline.
7] Drag circle over text

The final thing you will want to do, then, is to drag the circle over the preferred line of text. Adjust the circle to allow the text to fit perfectly in the center, or in whichever form you wish.
Read: How to insert a blank page anywhere in your Word document
How to Circle Text in Word
Apart from just creating a circle around text, folks can also create the text. Let’s look at how to do this.
- Navigate to WordArt
- Select the WordArt style you want
- Click on Shape Format or Drawing Tools Format
- Go to Transform
- Choose the circular shape
- For the newer version of Microsoft Word
- Set the circular word around a picture or shape
1] Navigate to WordArt
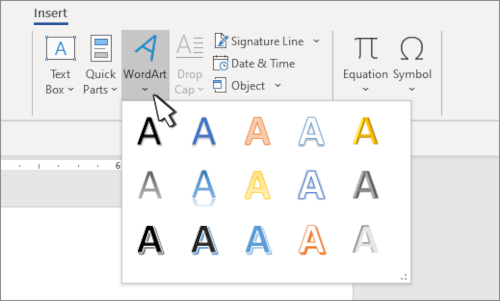
We assume you already have a Microsoft Word document opened, so from your current position, click on Insert, then select the WordArt icon from the Text menu.
2] Select the WordArt style you want
From here, you must choose the WordArt style that makes sense for your needs. Once selected, you must then type the preferred name or words for your art and hit the OK button. The art will appear in your document.
3] Click on Shape Format or Drawing Tools Format
After your WordArt has made its way to your document, you must then move to choose either Shape Format, or the Drawing Tools tab. Doing this will highlight new features to play around with.
4] Go to Transform
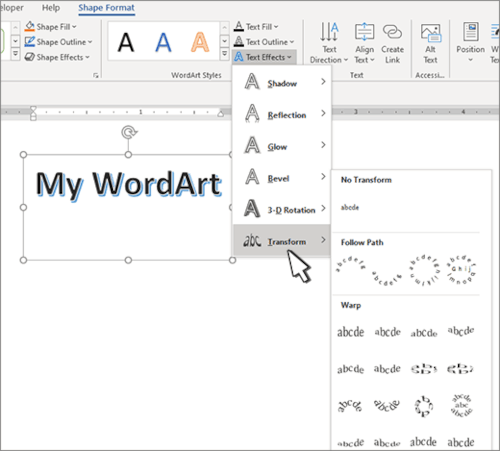
Next, you are required to click on Text Effects, and after that, select Transform to reveal an additional dropdown menu.
5] Choose the circular shape
From under the Follow Path category, please click on the circular shape and add it to the document.
6] For the newer version of Microsoft Word
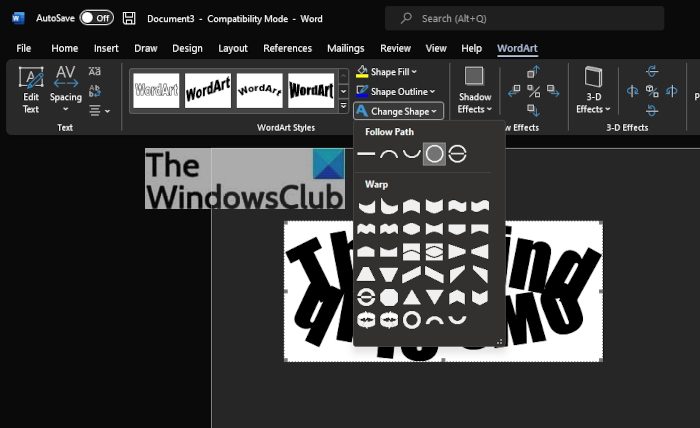
After you’ve added the WordArt to the document, please click on the WordArt tab > Change Shape, then select the circle under Follow Path.
7] Set the circular word around a picture or shape

To top it off, drag the newly created WordArt and place it around a circular picture. Simply drag the edge of the WordArt to ensure it fits perfectly around, and that’s it, you’re done.
Read: How to mirror an Image in Microsoft Word
Can we write in shape in Word?
Yes, we can write custom text into a shape in Microsoft Word. There is a dedicated section available in MS Word for it. We can select a shape like Rectangle, Oval, Down Arrow, Star or Five Points, etc., and start writing a text into the selected shape.
How do I insert text into a shape in Word?
To insert text into a shape in a Microsoft Word document, access the Insert menu, click on the Text Box drop-down menu, and choose Draw Text Box. Now click on the document, use the Insert Shapes menu from the left section, select a shape, and add that shape to the document. You can also select Shape Styles, Shape Effects, etc., and write your text in that shape.
Read: How to download Microsoft Word, Excel, PowerPoint on Mac.