The Shape feature in Microsoft Word allows users to add ready-made shapes to the document, such as Circles, rectangles, and arrows. When the shape is selected, the color and body can be customized to the look you want.
Adding a shape in a Microsoft Word document is easy, but what if you want the text to be inside it. Microsoft Word has a feature that can fit text inside a shape. The text fill shape is like a textbox where you can format the text inside the shape; you can increase and decrease the size of the text, Underline, Bold, italic, and change the font and color of the text. Placing a text into shape is useful when creating flowcharts, network diagrams, and mind maps.
How to insert Text into a Shape in Word
To insert Text into a Shape in Word, follow these steps:
- Open Word document
- Insert Shape
- Right-click and click Add text
- Type or paste the text into the shape
- Click outside the shape
- Save document and exit.
In this tutorial, we will explain how to insert text into a shape; follow the steps below.
Launch Microsoft Word.

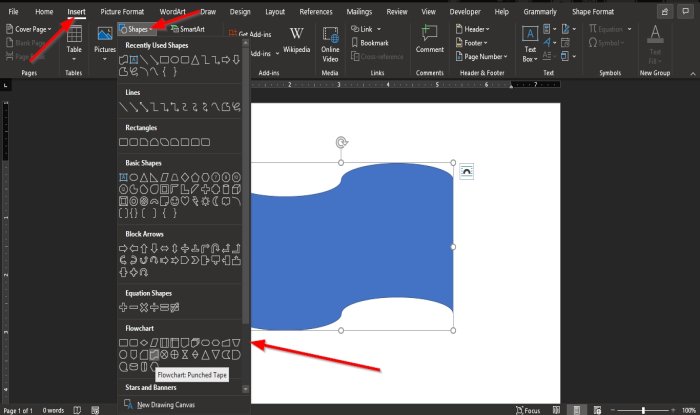
Click the Insert tab and click the Shapes button in the Illustration group.
Choose a shape from the list.
Please draw the shape into the document by dragging the mouse and release it when you reach the size you want.

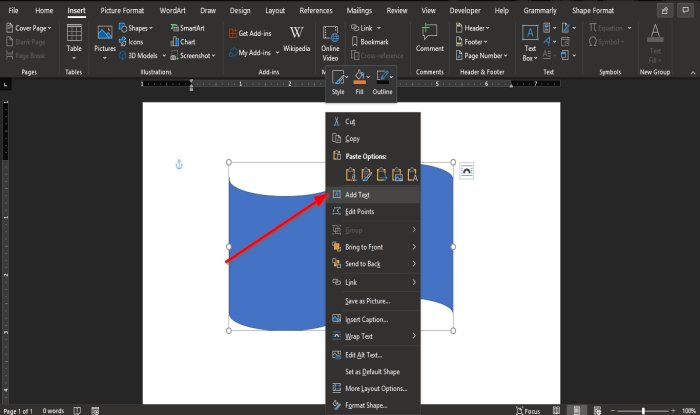
Right-click the shape and click Add text from the context menu.

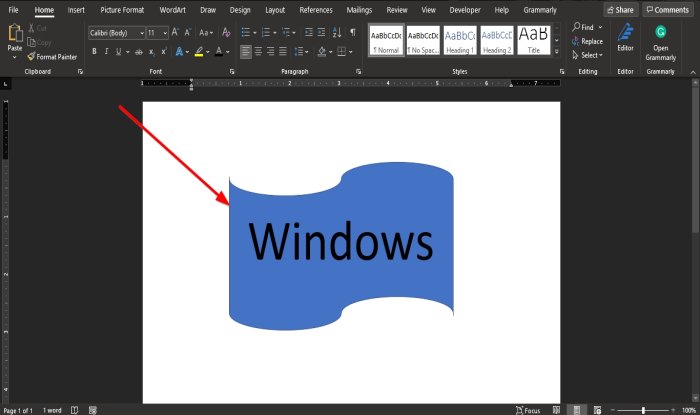
Enter the text into the shape.
Click outside the shape.
Now, we have a text inside the shape.
You can also format the text inside the shape by changing the font, increasing and decreasing the size, changing the style to underline, italic and bold, and change the color to what you want.
We hope this tutorial helps you understand how to insert text into a shape in Microsoft Word.
Now read: Best Invoice Templates for Word Online to create Business Invoices for free.
Leave a Reply