Malware attacks and virus attacks are common on PC if we don’t pay attention to the kind of programs we install. Windows comes with Windows Security and also there are many free antivirus programs available to install and safeguard our PC. ClamAV is one such free antivirus program you can use on your PC. In this guide, we show you how to install and use ClamAV on Windows PC.
ClamAV is a free open-source antivirus that is developed by CISCO Systems. It is designed to scan files quickly and offer real-time protection (Linux only). The antivirus has the capability to detect millions of viruses, worms, trojans, and other malware, including Microsoft Office macro viruses, mobile malware, and other threats. ClamAV is an absolutely free-to-use antivirus that you can use on your PC.
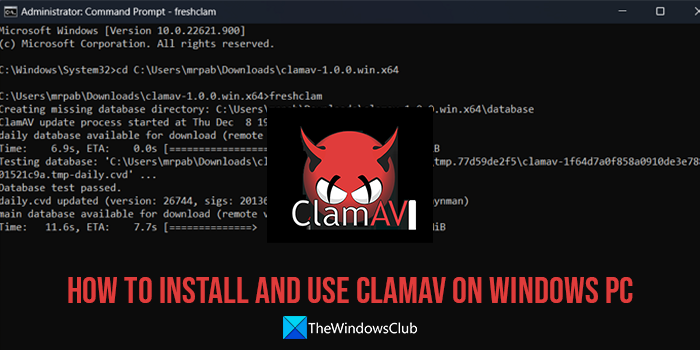
ClamAV Version 1.0 is now finally available for Windows, macOS, BSD, and Linux systems!
Installing ClamAV on Windows PC is an easy process that looks complicated. To install ClamAV on a Windows PC, you need to have
- A ClamAV installer or portable zip file
- A source code editor like Visual Studio Code, Notepad ++, etc.
If you do not have a source code editor installed on your PC, download a program of your choice and install it on your PC.
Related read: How to Install and Set Up Visual Studio on Windows
How to set up and use ClamAV on Windows PC
Here’s how you install and use ClamAV on Windows 11/10 systems.
- Download the ClamAV installer from the official website.
- Run the installer on your PC.
- Go to the installation path and find the conf_examples folder.
- Copy the two files from there and paste them into the ClamAV installation folder.
- Remove .sample from their file names.
- Open the two files in the source code editor and remove the Example text and save them.
- Run Command Prompt as an administrator.
- Copy and paste the ClamAV path in the Command Prompt after typing cd. Then, press Enter.
- Then, type freshclam and press Enter.
- You can now use ClamAV to run scans and protect your PC.
Let’s get into the details of the process to install and use ClamAV on Windows.
To get started, download the ClamAV installer file or a Portable Zip file from the official website. Run the installer or extract the zip file. Whatever option you chose, the process remains the same from here on. Now, open the ClamAV installation folder in the Program files folder or the extracted ClamAV portable folder. You will see the conf_examples folder there. Open it and copy the two files you see there.
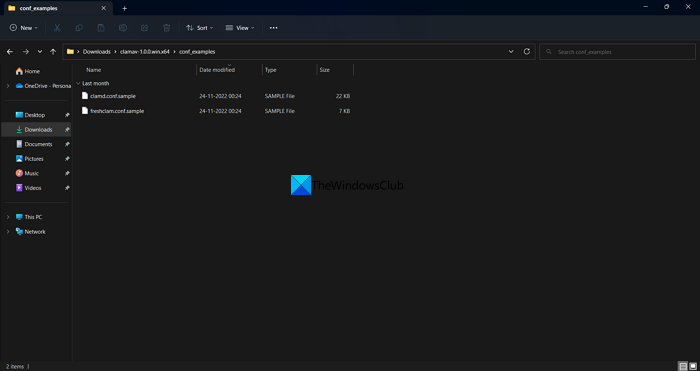
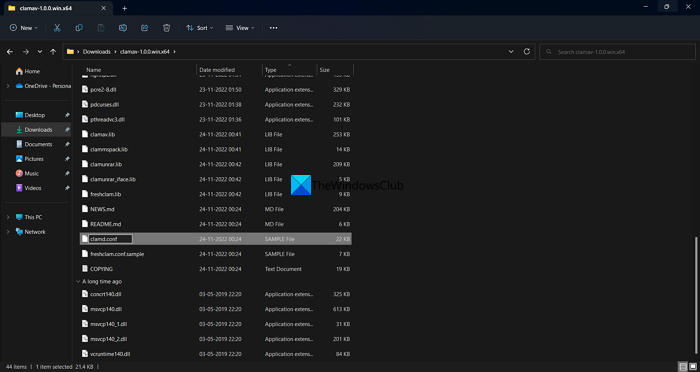
Press the back arrow in the Explorer bar to go back to ClamAV main folder. Now, paste the files into the folder. Remove the .sample from the file names by renaming them.
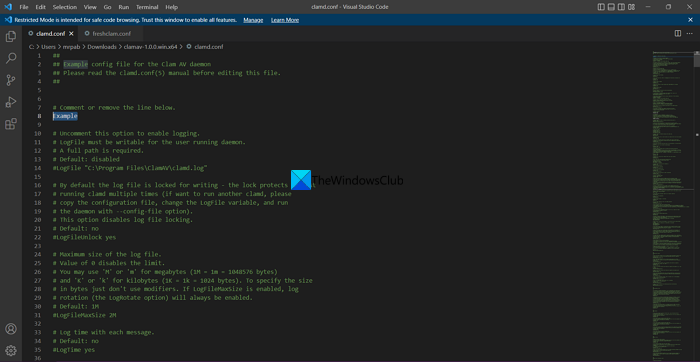
After renaming the files, open both files in a source code editor and remove the Example text under the line # Comment or remove the line below. You have to do the same on both files and save them.
Copy the ClamAV path from the address bar of the Explorer. Now, open Command Prompt as an administrator and type cd, and paste the ClamAV folder path. Press Enter to run the command. It will open the ClamAV folder in the Command Prompt. Type freshclam and press Enter.
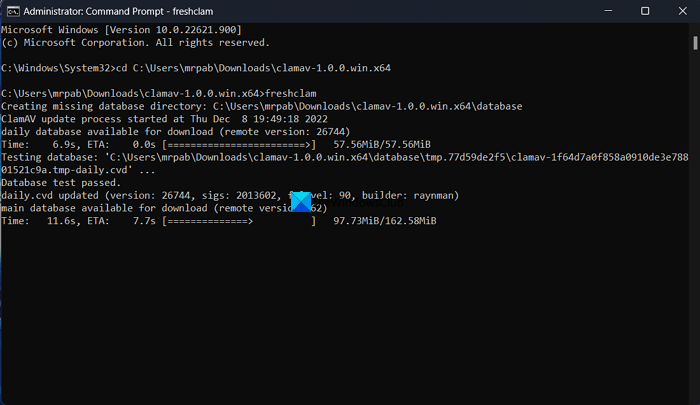
It will configure ClamAV for Windows and make it ready to use and protect your Windows PC. You can use the following command to scan a file directory by replacing the file directory with the path of the file you want to scan,
clamscan [options] [file/directory/-]Remember that you need to first open the ClamAV folder on the elevated Command Prompt and then run the clamscan command for further usage.
There are different options clamscan command comes with. Each option has an additional command. These are the few commands you can use along with clamscan to use ClamAV to scan and protect your PC.
--log=FILE– save the scan report to FILE--database=FILE/DIR– load virus database from FILE or load all supported db files from DIR--official-db-only[=yes/no(*)]– only load official signatures--max-filesize=#n– files larger than this will be skipped and assumed clean--max-scansize=#n– the maximum amount of data to scan for each container file--leave-temps[=yes/no(*)]– do not remove temporary files--file-list=FILE– scan files from FILE--quiet– only output error messages--bell– sound bell on virus detection--cross-fs[=yes(*)/no]– scan files and directories on other filesystems--move=DIRECTORY– move infected files into DIRECTORY--copy=DIRECTORY– copy infected files into DIRECTORY--bytecode-timeout=N– set bytecode timeout (in milliseconds)--heuristic-alerts[=yes(*)/no]– toggles heuristic alerts--alert-encrypted[=yes/no(*)]– alert on encrypted archives and documents--nocerts– disable authenticode certificate chain verification in PE files--disable-cache– disable caching and cache checks for hash sums of scanned files
To use the above commands, open the elevated Command Prompt and open the ClamAV folder. Then, type clamscan followed by the above command and press Enter.
For example, if you need to save a scan report to a file, type
clamscan --log=FILE
and press Enter.
This is how you can install and use ClamAV on your Windows PC. You can download the ClamAV installer or Portable Zip file from the ClamAV.net website.
ClamAV works absolutely fine on your Windows PC and protects it. You need to run the commands and get your work done. Though the process to install and use ClamAV seems complicated, it is worth your time as the virus signatures that come with ClamAV detect any type of virus, malware, etc.
Related read: Free Anti-Ransomware software for Windows computers.
Leave a Reply