Google Docs is now increasingly being used as the primary tool to write and compile documents, and for good reason. Some say that it doesn’t offer as many or as good features as Microsoft Word, but there are some very special utilities that set it apart, especially for those who are acclimatized to working on it. Google Docs offer a wide range of fonts, each different than the other, but there’s a good chance the one font you’re looking for may not be present. Today, we will be discussing the different ways in which you can install a custom font of your choice on Google Docs. We will be talking about two approaches for the same.
How to add a Custom Font to Google Docs?
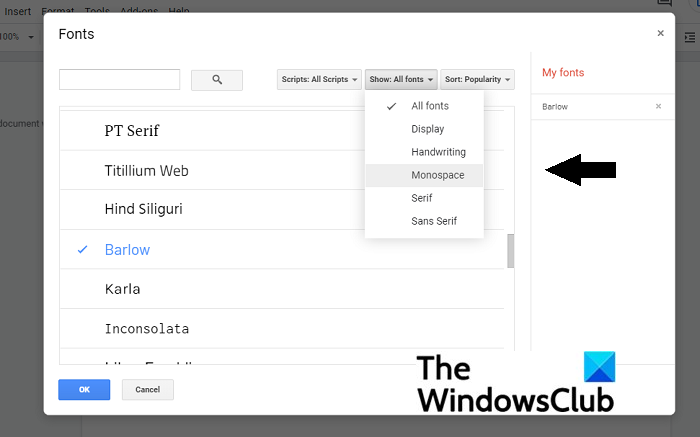
Before you begin the process, it can be helpful to preview how the font will look on Google Docs. In order to do that, open the Fonts drop-down menu and click on More Fonts. This will open a dialog box as is shown in the picture below. Here, you have a list of all the fonts. You can use the ‘Show: All Fonts’ drop-down to see the fonts of a particular category.
Let’s get on with the tutorial. We will see how to add custom fonts using Extensis Fonts, Google Fonts website & filter and sort already installed fonts on Google Docs. The first way in which you can add custom fonts on Docs is via an Add-on called Extensis Fonts.
How to add custom fonts using Extensis Fonts
The Extensis Fonts add-on brings an easy solution to this question. The installation is very quick and it is just as easy to use a font via this tool. In order to install it, follow the steps below:
- Open a fresh Google Doc
- From the tabs on top, click on Add-ons and select Get Add-Ons
- In the prompt that will then open, search ‘Extensis Fonts’ and select the result
- Click on Install, grant it the requisite permissions and you’re done!
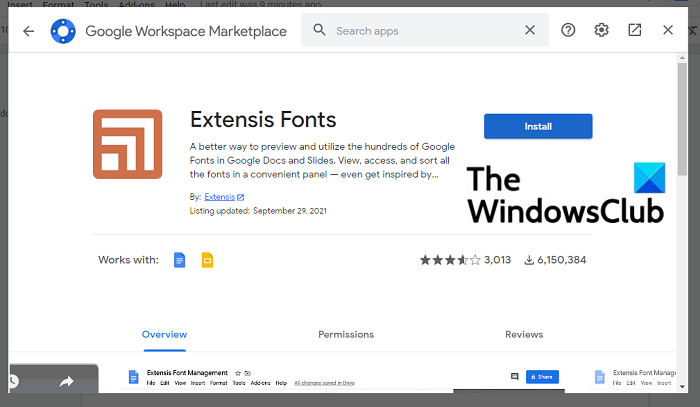
Now, to use it, again click on Add-Ons. If you’ve completed the installation process, you’ll see Extensis Fonts there with a ‘Start’ option. Click on Start and a toolbar will appear on the far-right side of the screen with a list of available fonts.
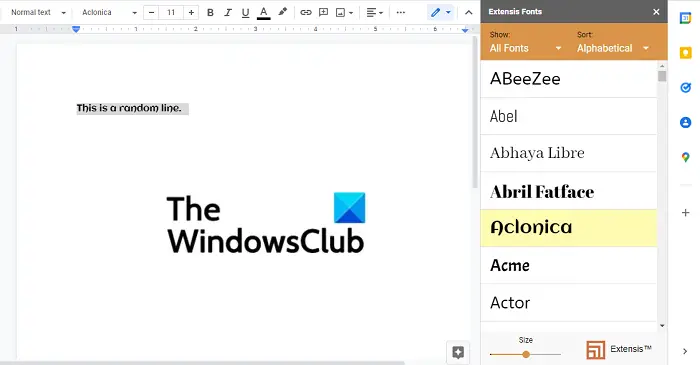
Select the text on which you want to apply the font and click on the font of your choice. At the bottom of this is a bar to configure the font display size, so you can adjust it to make fonts appear bigger or smaller on the add-on bar.
Read: Free Fonts download website.
How to add custom fonts using the Google Fonts website
Using the Extensis Fonts tool may not be the best solution if you run Docs locally on your Windows PC. In such a scenario, you can make use of the official website for Google Fonts. The official portal is a goldmine of fonts, but it is restrictive in its ability to modify the way those fonts look on a document.
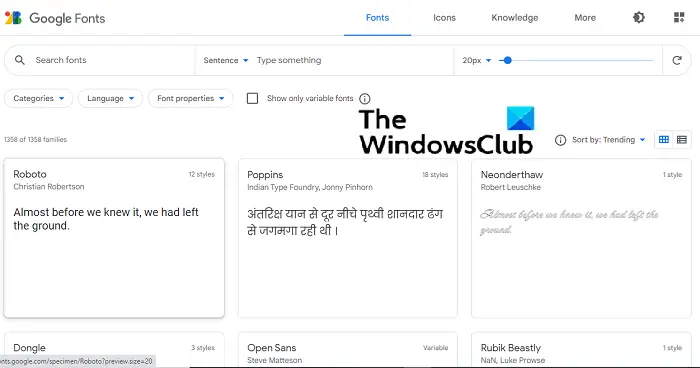
The available fonts are all on display on the website’s front page. There are also options to adjust the size of the fonts displayed with a bar similar to the one in Extensis Fonts and also an option to categorize fonts so that it is easier to look for the font suitable for you. Use the Search button and you can have access to a specific font instantly.
The process to download and install a font is very easy. Once you’ve found the font of your choice, click on it and you’ll be presented with the different families of the font. Different families of a font differ in their boldness levels and how strong the shade of the color is. Below the families are the Sample glyphs, which give you an idea of how letters and characters look in this font. Once you’ve finalized the font style you want, click on ‘+ Select this Style’. You can select multiple families of a font. Once the selection has been made, click on the Download All button. All the font families selected will be downloaded in a bundle as a ‘.zip’ file.
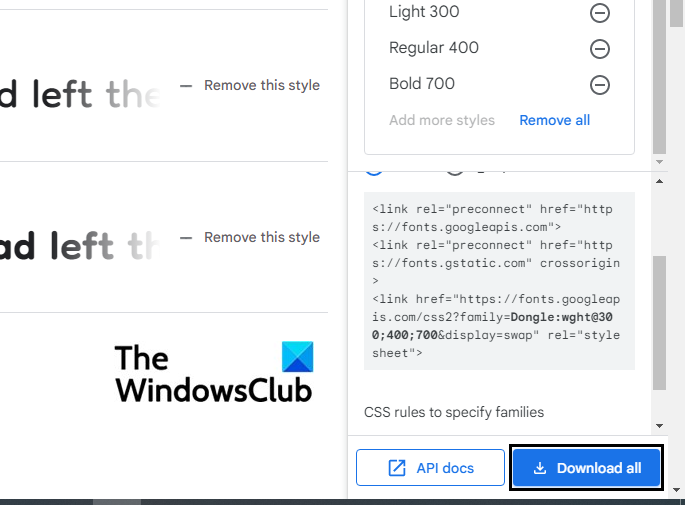
Now, open File Explorer and extract the contents of this zip file. Inside, there will be a TTF file for each family. Right-click on font and select Install. The process will take just a few seconds and once done, you can open a word processing tool on your PC and begin to use it. This font can also be used on image editing software like Paint and Adobe Photoshop.
Users should note that since the font file is downloaded and installed locally, it will only show up on applications downloaded on your PC and not on an online word processing tool like Docs.
Related: How to add a Font to Google Docs?
How to filter and sort already installed fonts on Google Docs?
On Google Docs is also an option for you to filter fonts that are already installed on your Google Docs set up on the basis of language, font type, etc. This doesn’t allow you to install any new fonts on Google Docs but simply expand the fonts list by adding some more options, ones that aren’t used very frequently by users and thus, aren’t a part of the Fonts drop-down.
The procedure to do this is very simple. Open a blank document on Google Docs and from the tabs on top, open the Fonts drop-down and click on More Fonts.
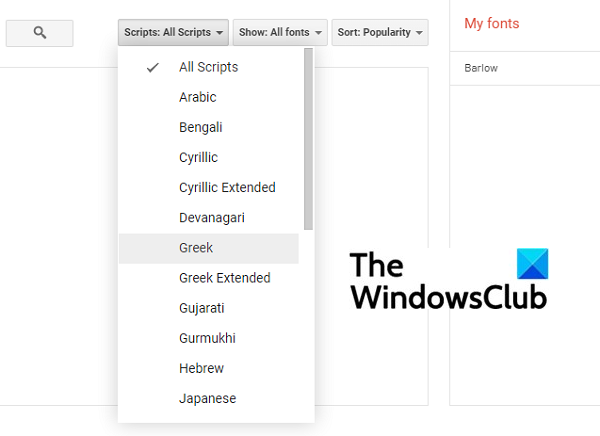
Here, you have three ways in which you can filter fonts. First is the Scripts section where you can sort fonts based on their language. Next, is the Show Fonts section where categorization is done based on Font type and applicability like Display, Handwriting, etc. And finally, you can sort them based on popularity, alphabetical order, etc.
TIP: SkyFonts lets you download & Install Google Fonts onto Windows PC.
What font does Google Docs use?
Google Docs, uses the font Arial by default. It’s a classic and straightforwardly simple sans serif font.
Read: Identify Fonts with free online font identifier tools.
What is the biggest font on Google Docs?
Google Docs supports font sizes up to 400 pt and you can change the size as per your requirements.
We hope that this works as a comprehensive guide on how you can use fonts on Google Docs and is of help to you!
Leave a Reply