Fedora is a Linux Operating System that is very useful for software developers, cloud engineers, and tech enthusiasts in general. Even though you can install Fedora alongside your current operating system, it makes more sense to create a virtual machine and install Fedora on it. In this post, we are going to do the same using one of the best VM tools, Oracle VM VirtualBox. So, if you want to install Fedora on Oracle VM VirtualBox, this guide is for you.

How to install Fedora on Oracle VM VirtualBox
To install Fedora on Oracle VM VirtualBox, you need to follow the steps mentioned below.
- Download the ISO File of Fedora
- Install the VirtualBox
- Set up the VM
- Boot with and Install Fedora
Let us talk about them in detail.
1] Download the ISO File of Fedora

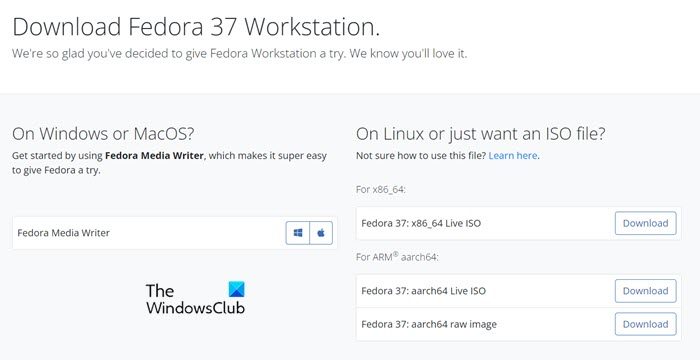
To install software, what do you need? The software itself. So, in order to install Fedora, you need the ISO of Fedora. To do the same, navigate to getfedora.org and click on the Download Now button from the Fedora Workstation section. Select the operating system you want to download the file for and then download it. Make sure to keep the ISO at an accessible location.
2] Install VirtualBox
Once you have downloaded the ISO file, it’s time to download the VirtualBox on which we will be installing Fedora. VirtualBox can be downloaded from its official website, virtualbox.org. Just click on the Download button to get a copy of the software, then, go to the Download folder, and install VirtualBox. You just have to follow the on-screen instructions to complete the process.
3] Set up the VM

Now that we have everything we need to install Fedora, let us set up and configure the Virtual Machine before installing the OS. Depending on your computer’s configuration and the resources you have allocated to it, Fedora will fly or crawl on your system. That is why make sure to choose wisely. To do the same, follow the prescribed steps.
- Open VirtualBox on your computer.
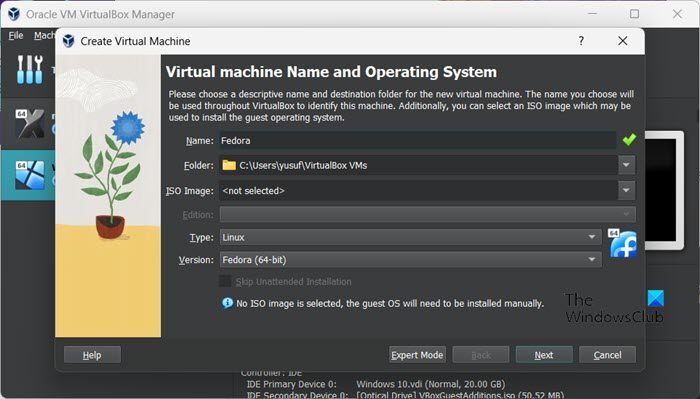
- Now, click on the New button.
- Type “Fedora” in the Name field. This will automatically set the Type to Linux and the Version to Fedora (64-bit). If not, just do it yourself to make your OS ready.
- Click Next.
- Set up Base Memory to 2048 MB and Processor to 1 (at least).
- Uncheck Enable EFI and then click Next.
- Tick the box associated with Create a Virtual Hard Disk now and Disk Size to 15.00 GB.
- Make sure that Pre-allocate Full Size is not checked and click on Next.
- Finally, click on Finish.
Now that we have created the virtual machine, let us go to the next step.
4] Boot with and Install Fedora
Now that we have created a Virtual Machine, we need to boot using the ISO file and then install the Operating System. To do the same, you just need to follow the steps mentioned below.
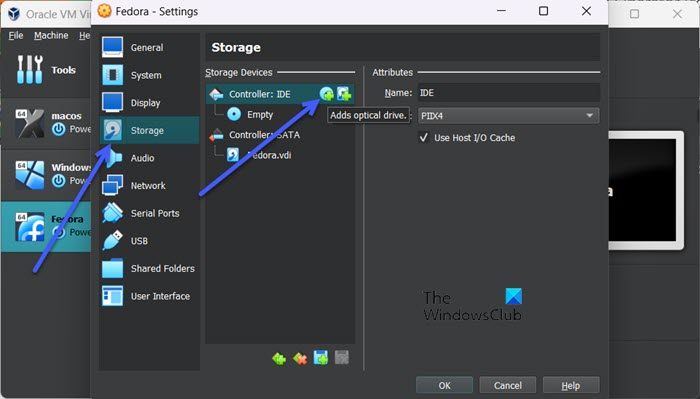
- Select the Virtual Machine that you have created and click on Settings.

- Go to the Storage tab and then click on the Optical Disk button.
- Click on Add, navigate to the location where you have stored ISO, and then add it.
- Then click on Choose > Ok.
- After configuring the settings, select Fedora and click on Start.
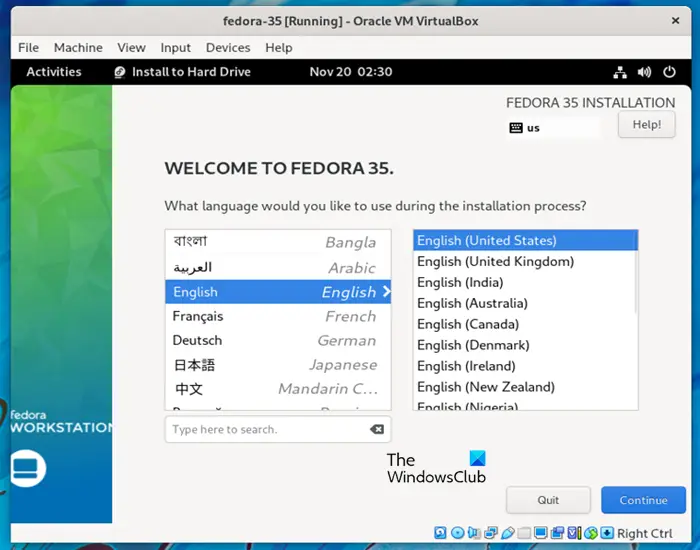
- Wait for the VM to turn on and once it boots up, click on Install Fedora to Hard Drive.

- Select the language and click Continue.
- Now, select Installation Destination from System and then continue.
- Set up your account and complete the installation.
That is how you can install Fedora on a Virtual Machine.
Just like that, you can install any Linux Operating System on a Windows machine using the VirtualBox or other VM tools. All you need is the VM software and the ISO file. That will allow you to run two operating systems at the same time. You can also install Linux on Hyper-V if that’s what you prefer.
Fedora, just like most Linux OSs, natively supports the virtualization extension which allows the user to create virtual machines with hardware and peripherals effortlessly. This capability has been granted to the Linux-based OSs due to KVM or Kernal-based Virtual Machine. This works alongside QEMU to enable the virtual environment. So, if you want to natively install Fedora and then Windows on top of it, you can do that using KVM.
Leave a Reply