Are you interested in exploring the world of cybersecurity? Installing Kali Linux in VirtualBox on Windows 11/10 is a fundamental step that offers a convenient and safe environment to do so. It is a specialized Linux distribution designed for digital forensics, penetration testing, and security auditing. In this article, we’ll see how to easily set up Kali Linux within VirtualBox.
How to install Kali Linux in VirtualBox on Windows 11
To install Kali Linux in VirtualBox on your Windows computer, follow the steps mentioned below:
- Download Kali Linux ISO
- Install VirtualBox, and create a new VM
- Install Kali Linux on VirtualBox
- Complete installation.
1] Download Kali Linux ISO
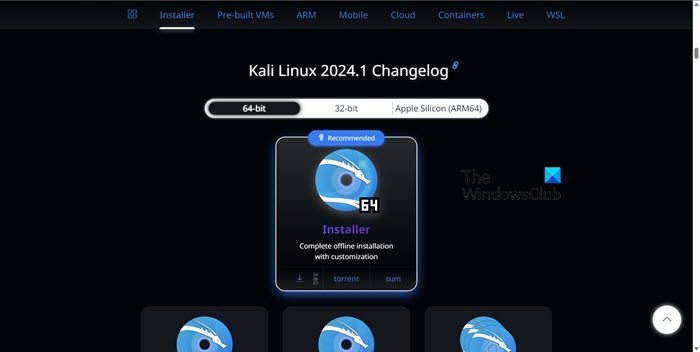
Navigate to kali.org to download the ISO image of Kali Linux. Check and select the correct architecture, 32-bit or 64-bit. Each image provides the option to choose a graphical user interface (such as Gnome, KDE, XFCE, LXDE, etc.) during installation. The latest version of Kali Linux is available on the main download page, while older versions can also be downloaded if required.
You can download images using either HTTP or Torrent protocols. Save the ISO file to a specific folder that you can remember. Once downloaded, you may verify the SHA256 checksum to ensure that the image is consistent.
2] Install VirtualBox and Create a new VM
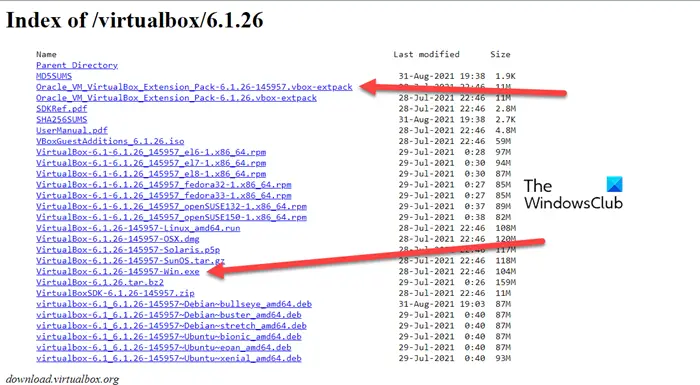
Once the Kali Linux ISO is downloaded, the next step is to download and install VirtualBox, if you haven’t already. Navigate to virtualbox.org and install it. Once you’ve done this, the next step is to create a new VM.
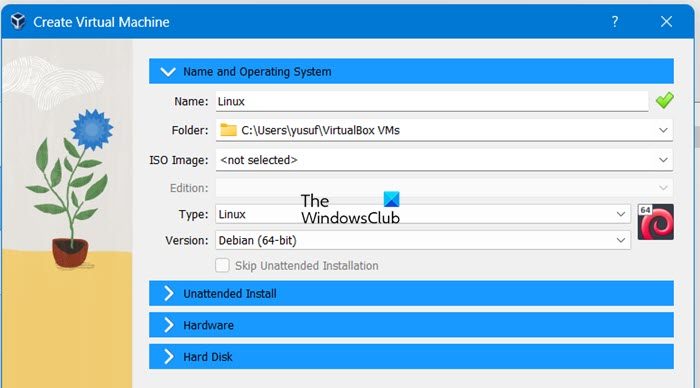
Here’s how to create a new VM:
- Launch VirtualBox, click on the Machine tab, select the New button, or press the Ctrl+N keys to create a new virtual machine.
- Now, we are going to configure some of the VM parameters: First give it a name, select its type – Linux, and the version – Debian (64-bit). Next, allocate memory (RAM) to the Virtual Machine, considering that enough unallocated memory is available for the host OS. Then, create a Virtual Hard Disk, setting the Virtual Disk file location, size, and type.
- Lastly, hit the Create button to create the new Virtual Machine.
Some additional settings need to be configured before installing Kali Linux, as mentioned below.
Click the freshly created Virtual Machine and then open its settings.
- First on this list is configuring the Display setting by clicking on Display and then on the Screen option. Set the Video Memory to 128 MD to prevent any potential hang-ups. Users can also enable 3D acceleration for programs that need it.
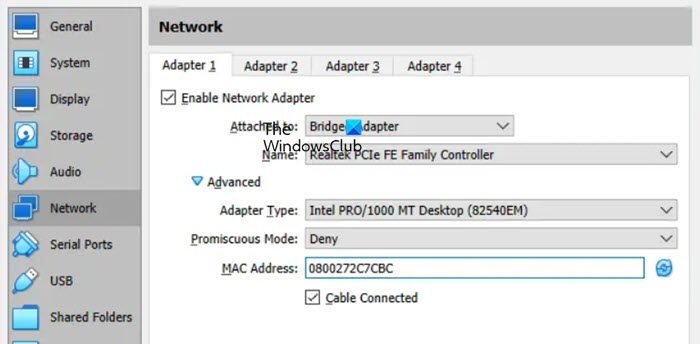
- Next up is Network, so head to network settings, opt for the VM’s Virtual Network adapter mode, and choose Brdiged. Furthermore, options like network adapter name, type, and MAC addresses can also be configured.
- Lastly, we are going to configure boot options. For that, we will insert an ISO DVD image into the VM’s virtual DVD drive and then boot a virtual machine from that ISO disk.
- Now go to VM settings, navigate to Storage, select the IDE controller for the virtual Optical drive, and click the space. Then, select the disc icon near IDE Secondary Master, click Choose Virtual Optical Disk File, and browse the Kali Linux installation ISO image we downloaded earlier. Lastly, select the OK button to save the changes.
3] Install Kali Linux on VirtualBox
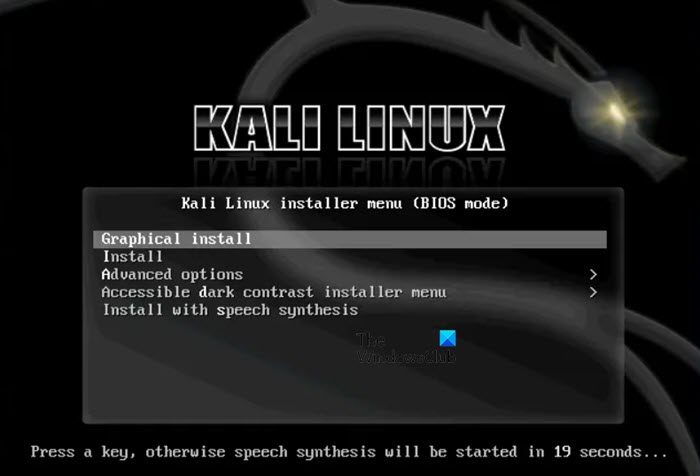
We have configured all the necessary settings, and now it’s time to initiate the Kali Linux installation process. The steps mentioned below are for doing the same.
- Launch the VirtualBox, select your VM, and click on Start.
- Upon booting from a virtual DVD, a boot menu will appear, presenting various options for Kali Linux such as Boot from Live DVD, Install, and Graphical Install. Choose ‘Graphical Install’ and press Enter to proceed.
- There are more options, such as language, location, keyboard layout, and entering the hostname for the Linux system. After each setting, click the Continue button to move forward.
- If you don’t utilize the network domain, leave it as it is, and move on to user credentials, enter a username for the primary login account for Kali Linux, and then again for the Linux system account. Both these names can be similar or different, and it’s up to the users.
- Now, select a password, select a precise time zone, and set the Partition disks setting- Guided as this allocates the entire disk for a single partition. Follow it by selecting the partitioning scheme- All files in one partition, the overview- Finish Partitioning and Write changes to disk, and hit the Yes button to write changes to the disk.
Let the system be installed, and wait for Kali Linux to copy files onto the Virtual Disk. Next, opt for a desktop environment; Xfce is a lightweight default choice. Lastly, ensure GRUB is installed on the hard disk. Since there are no other Oses or boot loaders, select Yes for GRUB installation.
4] Complete installation
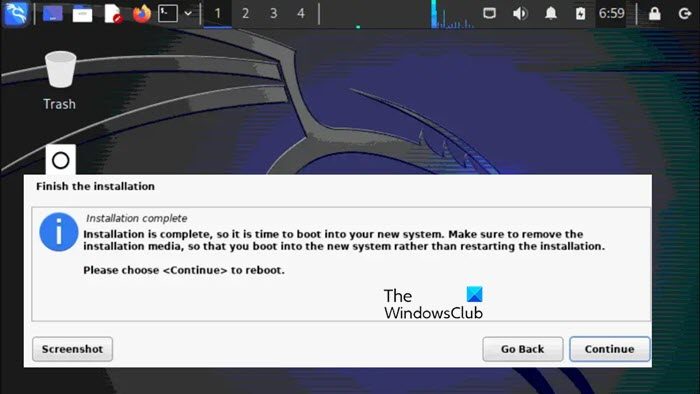
After Kali Linux is installed on VirtualBox, a notification message will pop up on the screen. After the installation, restart the Virtual Machine to initiate the boot process for Kali Linux installed within VirtualBox.
That’s it!
Read: How to install Fedora on Oracle VM VirtualBox?
Is Kali Linux available in VirtualBox?
Yes, Kali Linux is available for installation and use within VirtualBox. It can be installed to provide users with a safe and isolated environment to experiment with cybersecurity tools and techniques without affecting their primary operating system. To do the same, check out the procedure mentioned above.
Read: How to install Linux Ubuntu on Hyper-V in Windows?
How to install Kali Linux image?
To install Kali Linux, we typically download the Kali Linux ISO image from the official website and then use it to set up a Virtual Machine, as we did earlier. It can also be installed on a physical computer.
Read Next: How to install VMWare ESXi Hypervisor in Hyper-V Virtual Machine.
Leave a Reply