If you are an aspiring database administrator, you need to learn various DB technologies, such as Oracle, MySQL, SQL Server, and MongoDB. In this post, we are going to learn about MangoDB, which is a NoSQL Database, and see how to install MongoDB on Windows 11, we will also install some tools required to use it.

Install MongoDB on Windows 11
MongoDB is a popular open-source NoSQL document database that offers flexibility and scalability. It uses a JSON-like format called BSON (Binary JSON) for data storage, providing an intuitive representation compared to traditional relational databases. Known for its high performance and automatic scaling, MongoDB is ideal for modern applications requiring flexible data models. It is commonly used for content management, real-time analytics, and managing large volumes of unstructured data.
If you want to install MongoDB on Windows 11, follow the steps mentioned below.
- Download MongoDB installation media
- Install MongoDB on your computer
- Configure Environmental Path Variable
- Access MongoDB and install related tools
Let us discuss them in detail.
1] Download MongoDB installation media

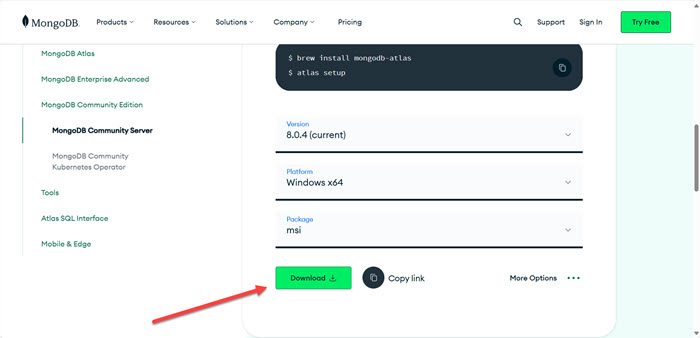
First, we need to download MongoDB’s installation media. To do so, navigate to mongodb.com. Scroll down, and select the Version, Platform, and Package. Since this tutorial is for Windows, we have selected that option, we went with msi package (you can also go with ZIP as the package will be a lot smaller), and at the time of writing, the latest version is 8.0.4, hence, we went with that. Click on the Download icon. This will start the download process, wait for it to complete, and move to the next step.
2] Install MongoDB on your computer

Now that we have downloaded the installation media of MongoDB, we are good to install it on the system. To do so, follow the steps mentioned below.
- Double-click on the installation media of MongoDB and launch the installation wizard.
- Click on Next, tick I accept the terms in the License Agreement and click on Next.
- Let’s go for a full installation, for that, click on Complete.
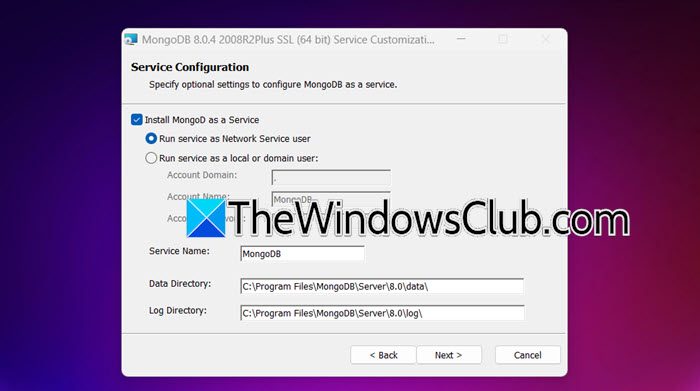
- Make sure that Install MongoDB as a Service is ticked, if you want your local domain, tick Run services as a local or domain user, otherwise, go with Run services as Network Service user (default). Set the folder for the Data Directory and Log Directory. Click on Next.
- Tick Install MongoDB Campus and click Next.
- Finally, click on Install.
The process will take some time, also, you will get a UAC prompt, click Yes when required, wait for all this to happen and you will get a prompt asking you to reboot the computer upon completion of the installation process.
If you want to see if MongoDB is installed, go to C:\Program Files\MongoDB\Server\8.0\bin. You will find all the MongoDB files there.
3] Configure Environmental Path Variable

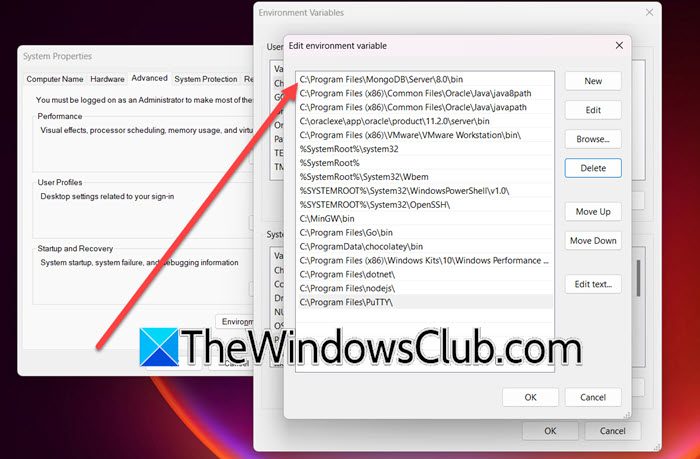
At times, even after installing MongoDB, the path variable doesn’t get added to the path. To do so, hit Win + S, type “Environmental Variable”, and open the utility. Then, click on Environmental Variables, and from System Variables, select Path > Edit > New, paste C:\Program Files\MongoDB\Server\8.0\bin, and click Ok.
4] Access MongoDB and install related tools

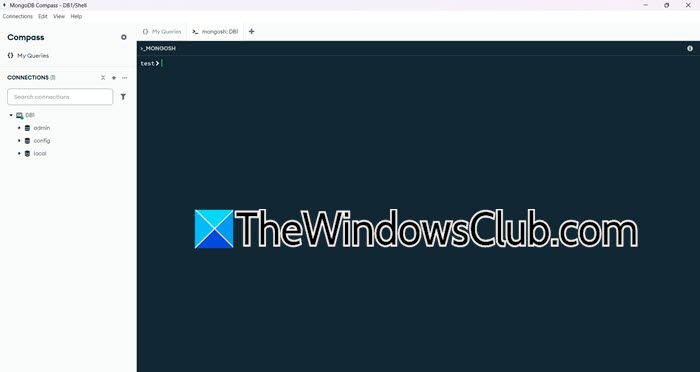
After setting up the environmental variable and installing MongoDB, let us see how to access it. During the installation process, we asked to tick the Install MongoDB Campus option. If you have done that, you are good to access MongoDB using the MongoDB Campus tool which you can open by searching out of the Start Menu.
If you want to connect to the local session in MongoDB, click on Add new connection, keep the URL as the default (it will be from the local host), give the name along with other details, and click on Save & Connect. To create a new database, you can click on the Plus (+) icon right next to your connection name and enter the required details.
MongoDB Campus is not the only tool you need to use MongoDB, we have listed a few that you might want to install on your computer.
- Mongoose: An ODM (Object Data Modeling) library for MongoDB and Node.js, simplifying database interactions.
- Studio 3T (formerly Robo 3T): A powerful GUI tool for MongoDB with features like IntelliShell, query builder, and data visualization.
- NoSQLBooster: A feature-rich, cross-platform GUI for MongoDB that offers an IDE-like experience.
- MongoDB Shell (mongo): The command-line interface for interacting with MongoDB, useful for scripting and automation.
- mongodump and mongorestore: Tools for creating and restoring backups of MongoDB databases.
- mongostat: Provides real-time performance metrics for MongoDB servers.
- mongotop: Monitors collection-level activity in real-time, helping identify performance bottlenecks.
- MongoDB Atlas: A cloud-based platform for managing MongoDB databases with built-in monitoring, backups, and auto-scaling.
- Percona Monitoring and Management (PMM): An open-source platform for monitoring MongoDB and other databases.
Hopefully, now you know how to install and configure MongoDB on your Windows computer.
Read: How to install and configure DNS on Windows Server
How do I start MongoDB service in Windows 11?
If you want to start MongoDB Service on your Windows computer, you need to run mongod –config “C:\mongodb\bin\mongod.cfg” –install in the elevated mode of the Command Prompt. You can open the Services app and then check the “MongoDB” service (it may have a slightly different name to it).
Read: Fix Unable to Install SQL Server on Windows 11
How do I start a service in Windows 11?
To start a service in Windows 11, open the Services app by searching it out of the Start Menu. Look for the service that you need to start, right-click on it, and select Start. If you want to make it automatic, right-click, select Properties, change the Startup type to Automatic, and click on Apply > Ok.
Also Read: Secure and protect MongoDB database from Ransomware.
Leave a Reply