It is important to know how to install previous versions of Adobe Creative Cloud apps. When you install a newer version of a Creative Cloud app, the old version will be removed by default.

Adobe Creative Cloud (Adobe CC) is Adobe’s new Cloud-based subscription for their apps. Having their apps based in the cloud makes them more accessible to everyone who wants to get them. As these apps get updated, some people would like to keep older versions or revert to older versions for whatever reasons. If you wanted the old version, then you would need to know how to install previous versions of Adobe Creative Cloud app.
How to install previous versions of Adobe Creative Cloud apps
There are cases when you need to install a previous version of a creative Cloud app. You may have updated a Creative Cloud app but there are bugs and you need to install a previous version and wait until the bugs are fixed in the newer version. This article will show you how to install previous versions of Adobe Creative Cloud app.
- Open the app
- Scroll to the needed app
- Choose other version
- Install the version that you want
1] Open the app
On your device, open the Creative Cloud desktop app.
2] Scroll to the needed app
You will need to choose the app that you want to install the previous version of.

To do this simply scroll down in the Creative Cloud desktop app. When you have found the app, click the More icon.
3] Choose other version

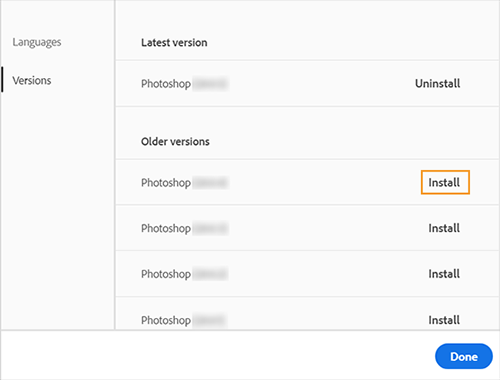
When you click the more icon a drop-down list will appear. From this list choose Other version.
4] Install the version that you want

When the list appears showing the other versions, install the version that you want.
Important note:
If you want to keep your app preferences from the current one that you have installed, you need to uninstall it before you install the previous version. When you are installing the previous version you will be asked if you want to preserve preferences, select Keep.
How to keep previous versions of your Creative Cloud apps
You may want to keep the previous versions of your apps while you install a new version. Whenever you install a new version of a Creative Cloud app, the previous version is uninstalled by default. To keep previous versions, you can set a preference. To keep the previous version of one or more apps do the following.
![]()
Select the account icon in the upper right of the Creative Cloud app. A menu will appear, select preferences.

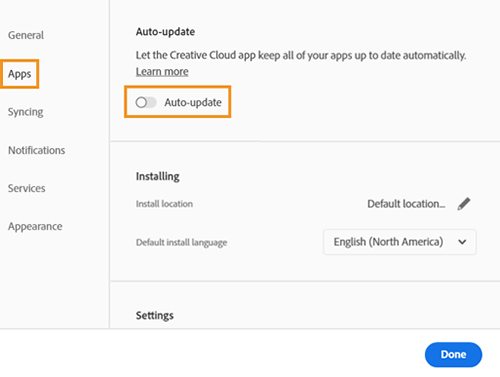
On the left of the preferences window, you will see some tabs including the apps tab. Select the Apps tab and enable auto-update.

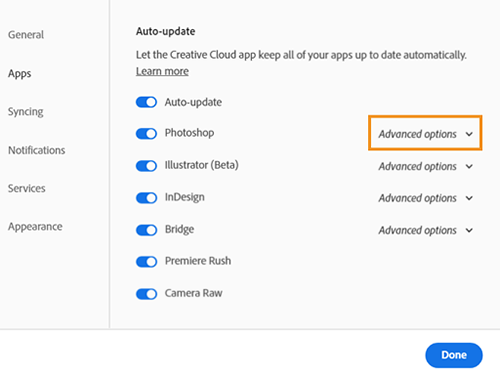
Look for the app that you want to keep the previous version of and select Advanced options.

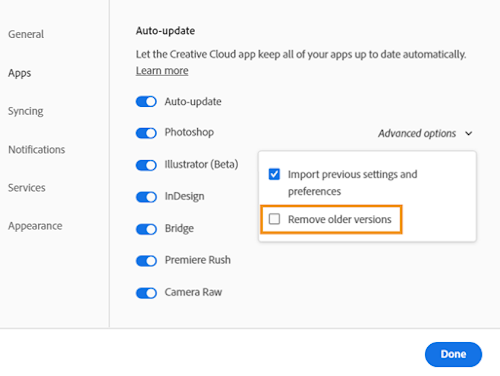
You would then deselect Remove older version.
Read: How to use Adobe Creative Cloud Cleaner Tool
How do I restore a previous version of an Adobe file?
If you need to get back to an older version of a PDF file before the current changes, you can do so. You can restore the PDF file using the File History. To do this follow the steps below.
- Right-click the PDF file and click Restore previous version
- Select another version of your file (one with a date before the last save date)
- Click Restore)
How do I see version history on a PDF?
You can track changes that have been made to a PDF file. This is important if you want to see if someone made changes to an important document that you sent for a signature. Adobe Acrobat DC Pro has a tool called Compare Files. Compare files allows you to see what changes were made to a PDF file and when. To use Compare Files, open your original PDF, go to View in the top menu then select Compare Files from the drop-down list.