This post will show how to install PyTorch on your Windows 11 device. PyTorch is an open-source machine learning library used for a wide range of tasks in the field of artificial intelligence and machine learning. Keep reading this post to learn how to install it on a Windows 11 device.

What is PyTorch?
PyTorch is a versatile and powerful open-source machine-learning library. It is designed to provide a flexible, efficient, and strong support for custom development of deep learning models. It simplifies the creation of artificial neural network models and is mainly used in fields like data science and artificial intelligence. Some key features it offers are:
- Dynamic Computation Graph
- Automatic Differentiation
- Neural Network Library and GPU Acceleration
- Deployment Options for Exporting and Deploying Models
- Strong Community and Ecosystem
- Cross-Platform Compatibility
How to install PyTorch in Windows 11?
Follow these steps to install and configure PyTorch on your Windows 11/10 device:
1. Firstly, you’ll need to install the Python environment on your PC. We’ll do so by using Anaconda as a package manager. Download and install Anaconda to get started.
2. Once the installation is complete, click on Start, search Anaconda Powershell Prompt and select Run as Administrator.
3. Type these commands one by one to verify versions of Anaconda and Python.
python --version
conda --version

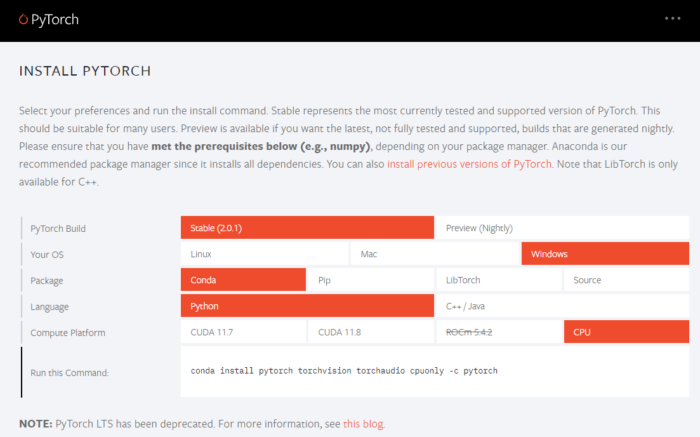
4. You’re now allowed to install the PyTorch package from binaries via Conda. Open PyTorch.org and select the installation details as mentioned below.
- PyTorch build: Stable
- Your OS: Windows
- Package: Conda
- Language: Python
- Compute Platform: CPU

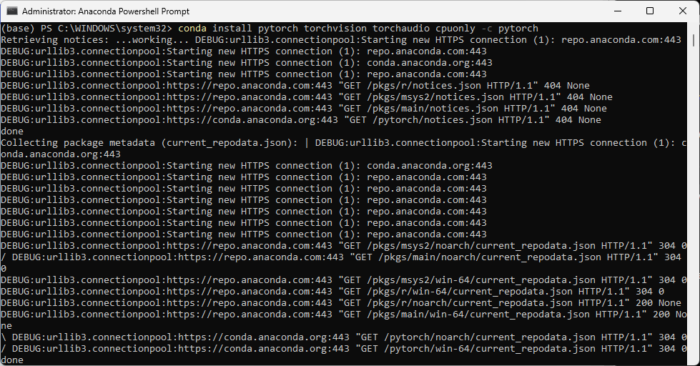
5. Once you select all these options, a command will appear to install PyTorch. Run the command in the Anaconda Powershell Prompt, and the installation process will begin. In the case of Windows, the command will be:
conda install pytorch torchvision torchaudio cpuonly -c pytorch

6. It may ask permission to extract the required packages. Type Y and hit Enter to proceed.
7. Once the procedure completes, close the Anaconda Powershell Prompt and restart your device.
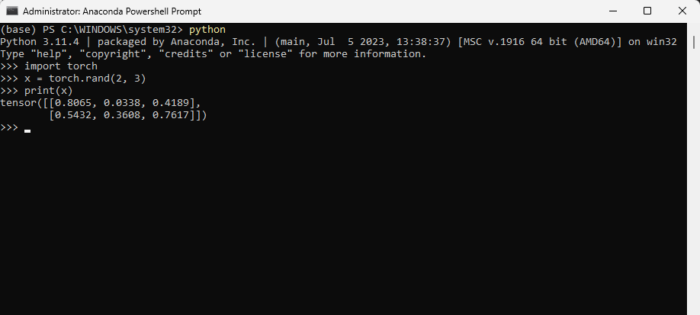
8. Once your device reboots, open the Anaconda Powershell Prompt again and run these commands one by one to verify the installation.
python
import torch
x = torch.rand(2, 3)
print(x)
The output after running this code should be a random 5×3 tensor. The numbers may be different, but they should look similar to the one in the image below.

9. And Voila! You’ve successfully installed and configured PyTorch on your Windows 11 device.
Read: How to open and view Python PY files on Windows
I hope these steps help you install and use PyTorch on your device.
Does PyTorch support Windows 11?
Yes, PyTorch supports Windows 11. You can install and use it on your Windows device smoothly, as many developers and researchers use it for deep learning and machine learning tasks.
How to setup PyTorch with CUDA in Windows 11?
For setting up PyTorch with CUDA on Windows 11, install the CUDA Toolkit and cuDNN from NVIDIA’s website. Next, install Anaconda and run these commands in the Anaconda Powershell Prompt:
conda create --name myenv python=3.8
conda activate myenv
conda install pytorch torchvision torchaudio cudatoolkit=xx.x -c pytorch
That’s it!
Leave a Reply