Microsoft System Center Configuration Manager (SCCM) is a Windows product used for managing, deploying, and securing devices and applications across an enterprise, including tasks like endpoint protection, patch management, and software distribution. This post will show how to install the SCCM Console on Windows 11.
What is a SCCM console?
Microsoft System Center Configuration Manager (SCCM) is part of the Microsoft System Center suite of products. It is a powerful and versatile tool for IT professionals, allowing them to streamline operations and increase efficiency. With SCCM, administrators can remotely install, update, and manage software, hardware, and other resources across their networks.
Install the SCCM Console on Windows 11
Before installing the SCCM Console, we need to meet the following requirements.
- You should have Windows 11 or Windows 10 operating system installed.
- The user account has administrative privileges to install the console and Read permission to access the installation file.
- Also, your account requires permission to connect to the Configuration Manager site.
- In version 2107, the ConfigMgr console requires Microsoft .NET Framework 4.6.2, with version 4.8 recommended. Update the .NET framework to the latest version when installing the console on other devices.
Read: How to check if User Account has Admin rights in Windows 11
After meeting all the prerequisites, we must select one of the two source paths.
ConsoleSetup folder in the installation path on the site server: \Tools\ConsoleSetup
When you set up a site server, it puts the console installation files and supported language packs into the Tools\ConsoleSetup subfolder. You can also copy the ConsoleSetup folder to another place for installation. Whenever you update the site, it keeps its local version current.
Configuration Manager installation media: \SMSSETUP\BIN\I386
When installing the Configuration Manager console from the installation media, it always installs the English version, regardless of whether the site server supports different languages or the target computer’s OS is set to a different language. Start the console installer from the ConsoleSetup folder rather than the source media when possible.
Copy the entire console setup folder to a shared folder on the SCCM server. This folder can be used when installing the console on Windows 11 computers. It’s important not to install the console using the CD with the latest source files, as this is an unsupported scenario and may cause issues with the console installation.
To install the SCCM Console on Windows 11, follow one of the methods mentioned below.
- Install the SCCM Console using Microsoft Endpoint Configuration
- Install the SCCM Console using the Command Prompt
Let us talk about them in detail.
1] Install the SCCM Console using Microsoft Endpoint Configuration Manager
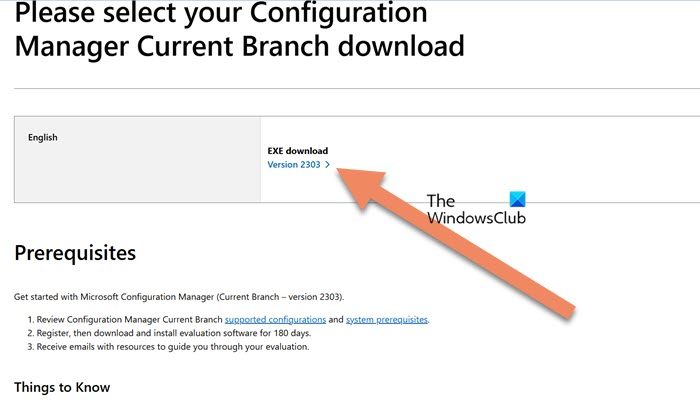
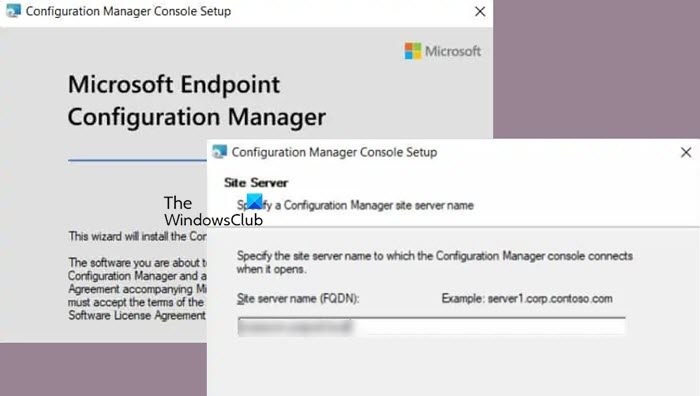
Our first method includes installing the SCCM Console using the setup wizard. Before proceeding, we need to first install SCCM Baseline Media.

A Configuration Manager baseline media contains all the necessary setup files for installing SCCM or Configuration Manager. If you need to perform a fresh installation of Configuration Manager, the baseline install media is what you should use.
You can go to microsoft.com to download the setup and install it on your computer.

You can now follow the steps below to install the SCCM Console.
- First of all, mount the ConfigMgr baseline media.
- Now, go to the SCCM Installation Media and launch splash.hta.
- Go to Tools and Standalone components > Install Configuration Manager console.
Finally, follow the on-screen instructions to complete the setup process.
If an older version of the Configuration Manager console has been installed, upon launching the console, the console upgrade window will appear. Proceed with the console upgrade by clicking “OK.” You need to keep the console updated if you don’t want to run into compatibility issues.
2] Install the SCCM Console using the Command Prompt
You can also install the SCCM Console using the Command Prompt. In this case, start CMD as an administrator and change the directory using the CD command to the path to the console setup folder. Then, run the following command.
ConsoleSetup.exe /q TargetDir="%ProgramFiles%\ConfigMgr Console" DefaultSiteServerName=MyServer.Contoso.com
Make sure to change SiteServerName with the actual name of your site.
Read: Windows Admin Center: Manage servers, clusters, infrastructure
How do I open the Configuration Manager console in Windows 11?
You can open the Configuration Manager from the Control Panel. So, open the Control Panel, set View by to Large icons, and then open Configuration Manager. Remember that the Configuration Manager is available on Windows 11 Pro and Enterprise.
Also Read: Allow Standard users to Run a Program with Admin rights.
Leave a Reply