VMware is among the well-known virtual machine software. It allows you to install a package of utilities called VMware Tools. By installing this package, you will get quite a better performance related to graphics, sound, and management. If you want to install VMware Tools on a guest operating system, you can follow this article to learn the steps. Sometimes some features of VMware may not work without the VMware Tools package. Therefore, it is quite important to install that in case you are using Windows, Linux, FreeBSD, and NetWare guest OS.

The VMware Tools is a free set of services and modules that enable several features in the guest virtual machine – for example, faster graphics performance, improved mouse performance and the most significant is the ability to transfer files between Virtual Machine and Host Computer. The VMware tools must be installed if you want to enable the extra VMware features on the guest machine.
Install VMware Tools on guest operating system
As this VMware Tools package is OS-based, you need to create the virtual machine first. Once you have done that, close the VMware app completely and run VM as administrator and select the installation on your left-hand side.
Log into your virtual machine. If you have multiple virtual machines, you need to choose the one where you want to install it.
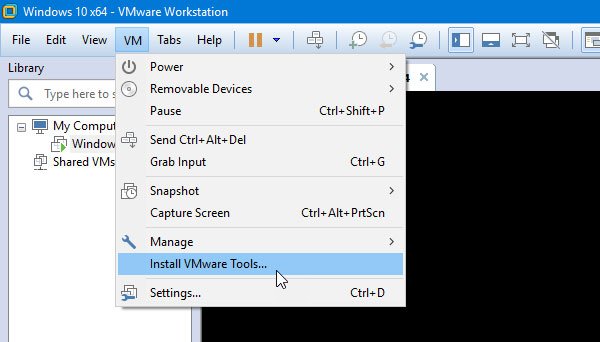
Next, go to VM > Install VMware Tools.
It should open a prompt where you can find the installation wizard. If you do not see such a window, you need to press Win+R and type this-
D:\setup.exe
Here D is your virtual CD-ROM drive.
In one window, you will get an option to choose an option among Typical, Complete, Custom.
It is suggested to use Typical when you want to install the tools for the current VMware products only – but you can choose Complete if you’re going to run the virtual machine on more than one VMware product.
After finishing the installation, you need to restart your virtual machine to get the effect.
That’s all!