Windows 11 is one of the hottest topics in the world of computers, and many are willing to test this much-awaited Operating System. The best way to test it is on a Virtual Machine. Hence, we brought to you this guide to install Windows 11 on Oracle VM VirtualBox.
Can I install Windows 11 on VirtualBox without TPM?
Just like any other OS, one can install and use Windows 11 on Virtual Machine. However, you must have TPM or Trusted Platform Module to install Windows 11 on VirtualBox. You just have to allocate the right amount of memory and disk space, and you will be good to go. However, the experience won’t be as smooth as it would be on a physical computer, but if you want to access Windows 11 early then it is a good option.
Install Windows 11 on Oracle VM VirtualBox
Before starting the installation of Windows 11 on VirtualBox, you should enable hardware virtualization.
These are the things you need to do to install Windows 11 on Oracle VirtualBox.
- Download Windows 11 ISO file
- Download and Install Oracle VM VirtualBox
- Create a new Virtual Machine
- Start VM and Boot from Windows 11 ISO file
- Install Windows 11 on VM
Let us talk about them in detail.
1] Download Windows 11 ISO file
Windows 11 ISO file is a must-have if you are trying to install Windows 11 on VirtualBox. You can download the official Windows 11 ISO from Microsoft and save it on the host computer.
2] Download and Install Oracle VM VirtualBox
If you already have the VirtualBox, you can skip the process. But if you don’t have the VM in question, download it for free from virtualbox.org.
If you are on Ubuntu, paste the following command in the terminal to install Virtualbox on your system.
sudo apt install VirtualBox
3] Create a new Virtual Machine

To create a new Virtual Machine, follow the given steps.
- Open Oracle VM VirtualBox.
- Click New.
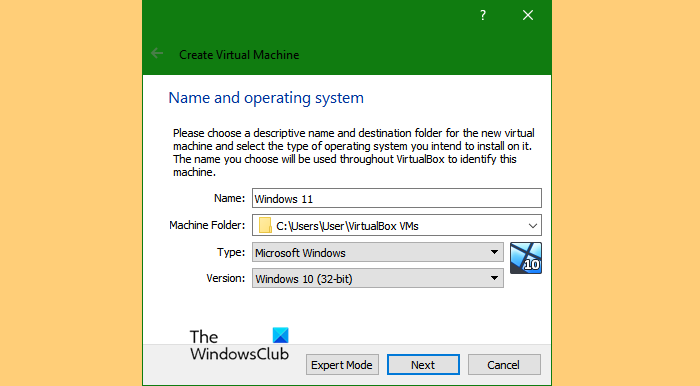
- Name it “Windows 11″, set the Type to Microsoft Windows, Version to Windows 10 (64-bit), and click Next.
- Now, set the Memory Size to 4000 MB or more.
- Select Create a virtual hard disk and click Create.
- Now, select VDI(VirtualBox Disk Image) and then ‘dynamically allocated’.
- Give VM some hard disk space using the slider and click Create.
4] Start VM and Boot from Windows 11 ISO file

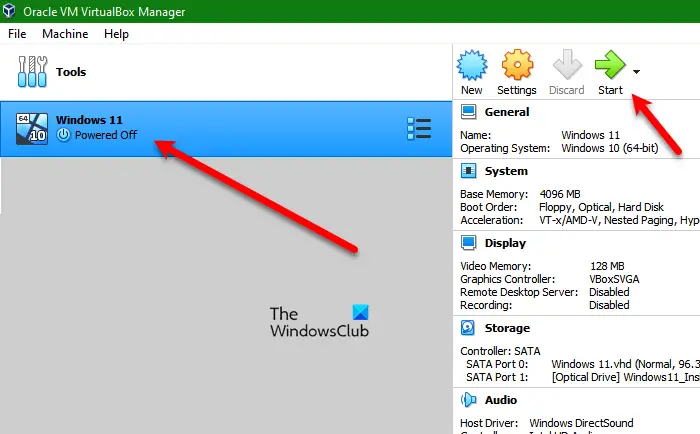
You will be able to see the newly created VM on the left side of the VirtualBox window. Select it and click Start.

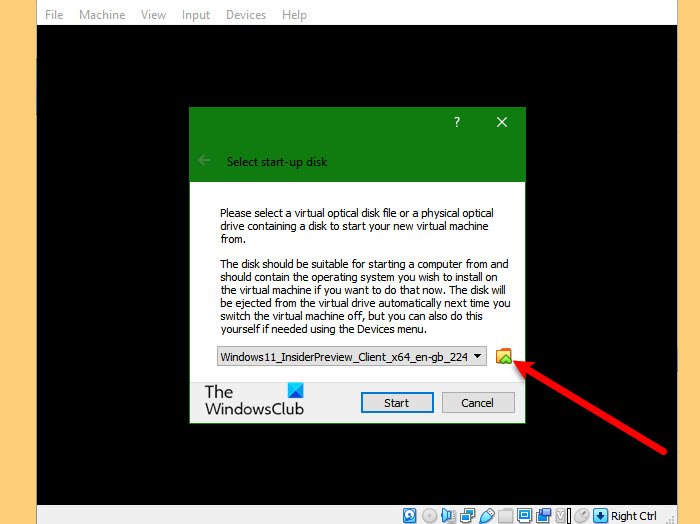
Now, click on the folder icon, then Add, now navigate to the location where you have stored Windows 11 ISO and select it.
5] Install VM on Windows 11

To install Windows 11 on VirtualBox, follow the given steps.
- Click Install Now.
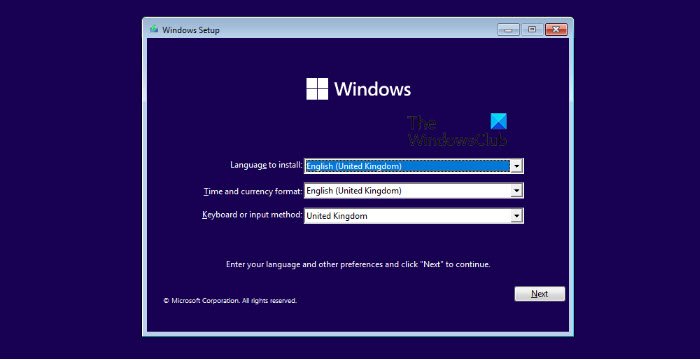
- Select Langauge to Install, Time and currency format, and Keyboard or input method. Now, click Next.
- Since we are installing for testing, click I don’t have a product key.
- Select the Windows 11 version that you want to install. In our opinion, you should install Windows 11 Pro and click Next.
- Accept the License and click Next.
- Click Custom: Install Windows only.
- Click Next as the VM will automatically clear the Virtual Drive.
Finally, follow the on-screen instructions to install Windows 11.
That’s it! Enjoy the brand new Windows.
Read: How to install VMWare ESXi in a Hyper-V Virtual Machine.
How to install VirtualBox Guest Addition in Windows 11?
To install VirtualBox Guest Addition, follow the given steps.
- Click Device from the VirtualBox menu.
- Launch File Explorer.
- Select CD drive with Virtualbox Guest Additions from the left panel.
- Now, open the VirtualBox EXE file.
Finally, follow the on-screen instructions and you will be good to go.
Read: How to install VirtualBox Guest Additions on Windows 11/10
How to install Windows 11 on VM?
To install Windows 11 on VM or virtual machine or VMware Player, you need to download the ISO first. Then, enable TPM for the virtual machine and select the ISO file accordingly. Next, you can go through the regular installation wizard and follow all the screen instructions to get the job done.
Read Next: How to install Windows 11 on VMware Workstation Player.