If you use a Mac and want to use Windows Server, you can opt for a virtual machine. There are various virtual machines you can use, two of the popular ones being, VMware Fusion and Oracle VirtualBox. In this guide, we will use VMware Fusion to install Windows Server on Mac.

Install Windows Server on Mac
To install Windows Server on a Mac computer, follow the steps mentioned below.
- Download and install VMware Fusion
- Download the Windows Server ISO file
- Set up your VM
- Boot up the machine and install the OS
- Start and set up your server
Let us talk about them in detail.
1] Download and install VMware Fusion
As mentioned earlier, to install Windows Server, we need to create a virtual machine. You can use VirtualBox if you want, but for the guide, let’s go with VMware Fusion. So, go ahead and download VMware Fusion Pro for free. Once downloaded, run the installer to install on your computer.
2] Download the Windows Server ISO file

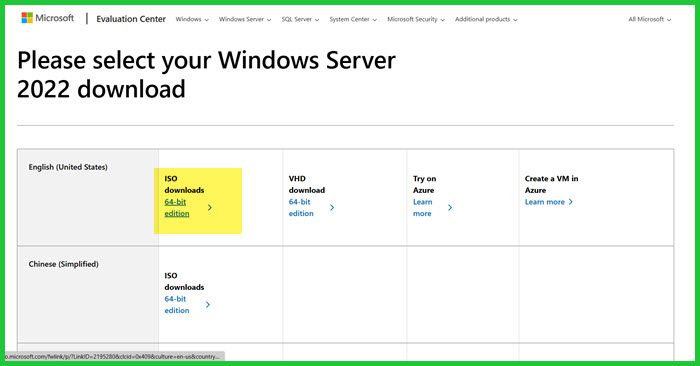
Next up, we need to download the ISO file of the Windows Server. For that, go to microsoft.com. Visit the website and click on “Evaluate now” next to Windows Server 2022 (or any other version of Windows Server), click on Download ISO, and enter the details to enroll in the free trial. Once done, click on Download now, make sure to download the ISO for your preferred language.
3] Set up your VM

Once you have both software, we can proceed with setting up the virtual machine. However, before we proceed with the installation process, it is recommended that you terminate all the other processes and close any resource-hopping application if you don’t want your system to heat up. After taking the precaution, follow the steps mentioned below.
- Open VMware Fusion.
- Select Install from disk or image.
- Now, click on Use another disk or disk image, navigate to the location where you have stored the file, and select it. Click on Continue.
- Once you are on the Configuration tab, disable Use Easy Install, and click on Continue.
- In the Specify the boot firmware, select UEFI, and click on Continue.
- Click on Customize Settings.
- Select where you need to store the virtual machine and give it a name.
- Once the settings wizard appears, click on Processor & Memory.
- Adjust the Processors to at least 4 and then set the memory, we recommend you at least allocate 2 GB (2048 MB); click on Show All.
- Go to Display, tick Accelerate 3D Graphics, and then set your Shared graphics memory (set it depending on your requirement). Additionally, set the Battery life. Tick Use full resolution for Retina display and click on Show all.
- Now, go to the Hard Disk option, and check the required space.
- We recommend you go through each and every option to make sure that you are selecting all the features you need.
After reviewing every setting available and being satisfied with it, you can close the wizard and proceed to the next step.
4] Boot up the machine and install the OS

Now that we have our machine ready, it’s time to start with the installation process. To do so, follow the steps mentioned below.
- Click on the Play icon to start the machine.
- Click on the spanner icon to open the Settings.
- Go to Startup Disk, select CD/DVD, and click on Restart.
- Once your virtual machine restarts, Windows Server Installation will begin.
- Select the language, and click on Next.
- Click on Install now, and wait for the Setup is starting screen to end.
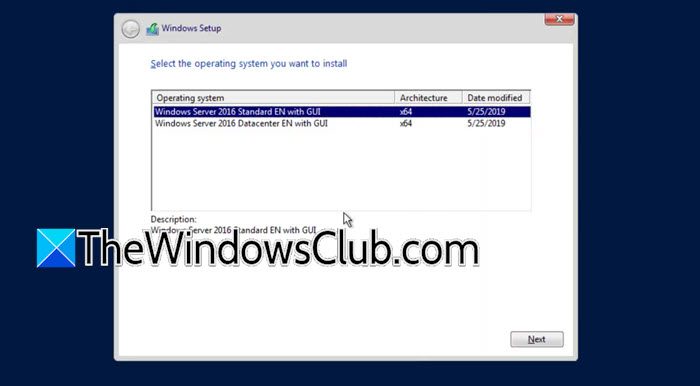
- Select the version of Windows Server you want to install, and click on Next.
- Now you need to go for the custom disk option, erase the disk if required, and the start installation process.
Once you have initiated the installation process, you will see a progress bar as this process will take some time to complete.
5] Start and set up your Server
Once you start your machine, you will be asked to enter the password for the admin user. Make sure that you can remember this password, as you are required to enter it every time you start your device.
That’s how you can install Windows Server on a Mac device using VMware Fusion.
Read: How to install Windows Server on VMware Workstation
Can I install Windows Server on a Mac?
Yes, you can install Windows Server on a Mac as a virtual machine. There are two common utilities, Oracle VirtualBox and VMware Fusion, that you can use for the same. In this tutorial, we saw how you can install Windows Server on a Mac using VMware Fusion, so, just go through it, and you will be good to go.
Read: Install and configure MultiPoint Service on Windows Server
Can Mac access Windows Server?
There are various tools that allows you to access Windows Server from your Mac computer remotely. Tools such as the VMware Horizon client and Windows app (previously known as Remote Desktop) are good options for this endeavor.
Also Read: Install and configure Windows Admin Center.
Leave a Reply