What if you want to lock some cells on your worksheet but not the entire worksheet? In Microsoft Excel, you can lock a specific cell or cells from people trying to edit essential information in it or them.
How do I make a cell non-editable in Excel?
To make your cell non-editable in Excel, you have to lock the cell and use a password to protect the information you want to be non-editable. Locking your cell also can prevent your data from being deleted.
How to lock cells in Excel
To lock cells in Microsoft Excel, follow the methods below.
- Launch Microsoft Excel
- Select the cells you want to lock
- On the Home tab, in the Alignment group, click the bottom right small arrow
- A Format cells dialog box is open; click the Protection tab
- Check if the lock checkbox is selected
- Then click OK
- Select the cells that you will allow users to edit
- In the Alignment group, click the bottom right small arrow, again
- In the Format cells dialog box, uncheck the lock checkbox
- Click OK.
- Click the Review tab.
- In the Protect group, select Protect Sheet and reapply protection
Launch Microsoft Excel.
Select the cells you want to lock.
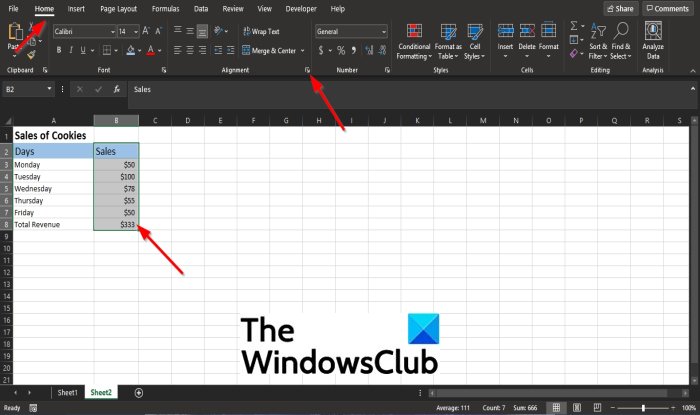
On the Home tab, In the Alignment group, click the bottom right small arrow or right-click the selected cell and click Format Cells.
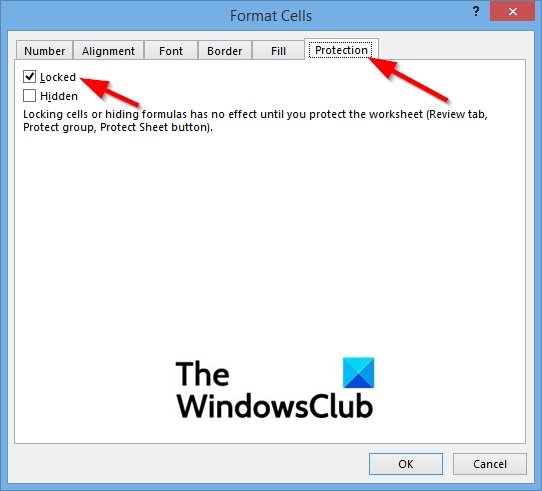
A Format Cells dialog box is open.
In the dialog box, click the Protection tab.
On the Protection tab page, check if the lock checkbox is selected.
Then click OK.
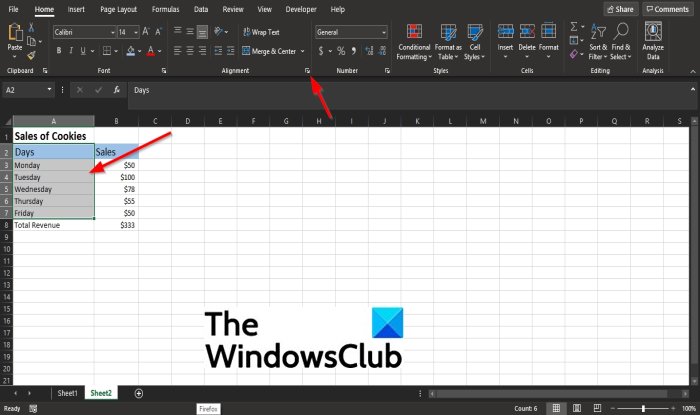
Now, select the cells that you will allow users to edit.
In the Alignment group, click the bottom right small arrow, again.
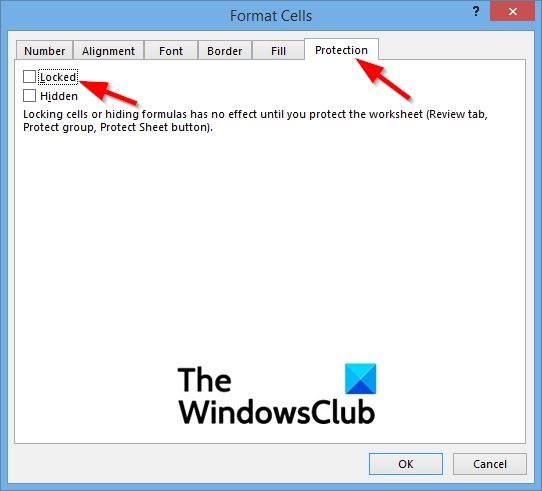
In the Format Cells dialog box, uncheck the lock checkbox.
Then click OK.
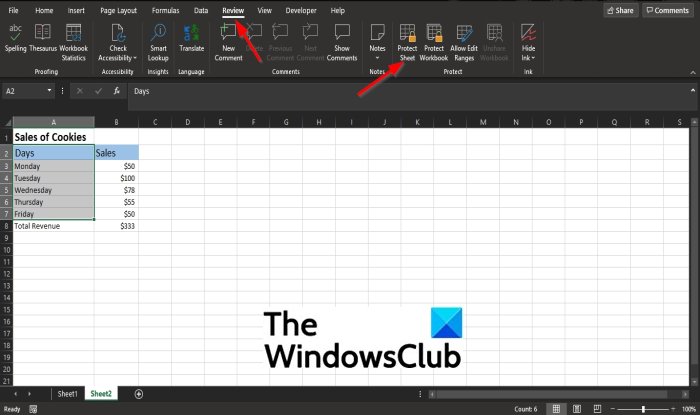
Click the Review tab on the menu bar.
In the Protect group, select Protect Sheet and reapply protection.
You will notice that you can edit some parts of the worksheet, but not all of it.
If you have questions about the tutorial, let us know in the comments.
Leave a Reply