Locking is a handy function in Excel that allows users to lock specific or all cells in a worksheet to prevent any intentional or unintentional editing of them. You can easily lock cells in a sheet by using the Format Cells function. But what if you want to lock only the cells with a formula in it? If you are looking for a tutorial to lock only formula cells in your Excel worksheet, we got you covered. In this post, we will show you the steps to lock, unlock, and hide formulas in Microsoft Excel.

How do I lock formulas in Excel but allow data entry?
To allow data entries while locking formulas in an Excel workbook, you must lock only those cells with formulas. For that, you must first unlock all cells, select cells with formulas, and then lock them using the Format Cells feature. Later, protect the sheet using the Review > Protect Sheet option. We have discussed these steps in detail below. So, let us check out.
How to lock Formulas in Microsoft Excel?
You can easily lock all the formula cells in your Excel worksheet using the Review tab. It provides a Protect Sheet feature using which you can easily lock cells. In order to lock cells with formulas, you need to follow a series of steps. Here are the steps you need to follow to lock formulas in Excel:
- Open the source Excel worksheet.
- Unlock all the cells using the Format Cells feature.
- View and select the formula cells you want to lock.
- Reopen the Format Cells dialog and tick the Locked checkbox.
- Click on Review > Protect Sheet and enter the password.
- Select the actions allowed to be performed by other users.
1] Open the source Excel worksheet
First of all, open the input Excel file in which you want to lock formulas using the File > Open option.
2] Unlock all the cells using the Format Cells feature
Now, you need to make sure that all the cells are unlocked and not protected. If you have previously applied protection to the worksheet, all the cells will be locked and you won’t be able to lock specific cells containing formulas. So, unlock all the cells before proceeding.
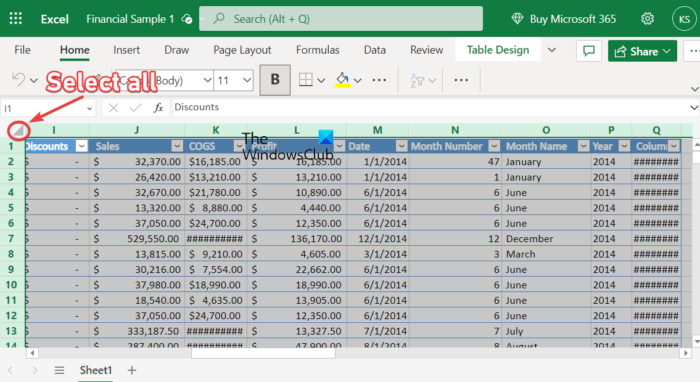
To unlock all cells in your worksheet, select all the cells by pressing the Ctrl+A hotkey or clicking on the Select All button (triangle icon present at the top-left of the first column).
Next, right-click on the selected cells, and from the appeared context menu, click on the Format Cells option. Or, simply press the Ctrl+1 hotkey to open the Format Cells option.
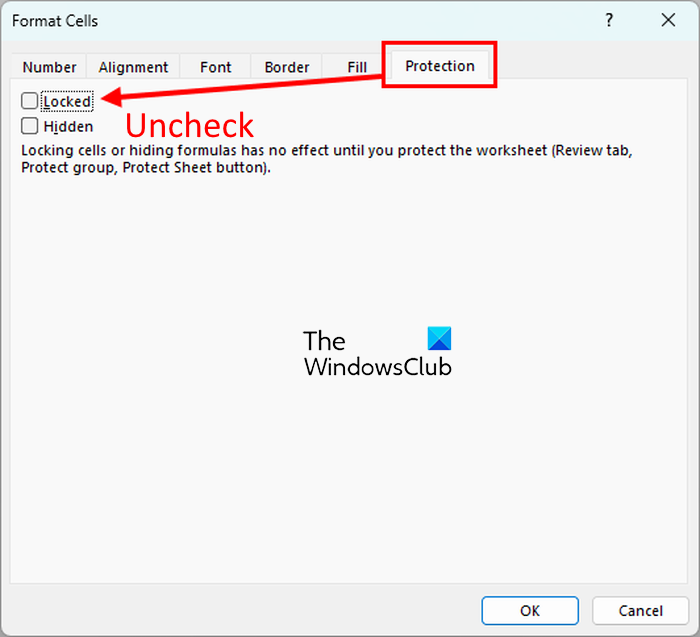
In the Format Cells window, go to the Protection tab and make sure to uncheck the Locked checkbox. When done, press the OK button to save changes and exit the dialog window.
See: Excel cannot Add or Create New Cells.
3] View and select the formula cells you want to lock
Once all the cells are unlocked, you need to display and select those cells that contain formulas. It can be a tiresome task to manually select formula cells in your worksheet. Hence, we will be using the Find & Select feature to select only formula cells.

First, go to the Home tab and click on the Find & Select drop-down arrow button from the Editing group menu. Next, click on the Go to Special option.
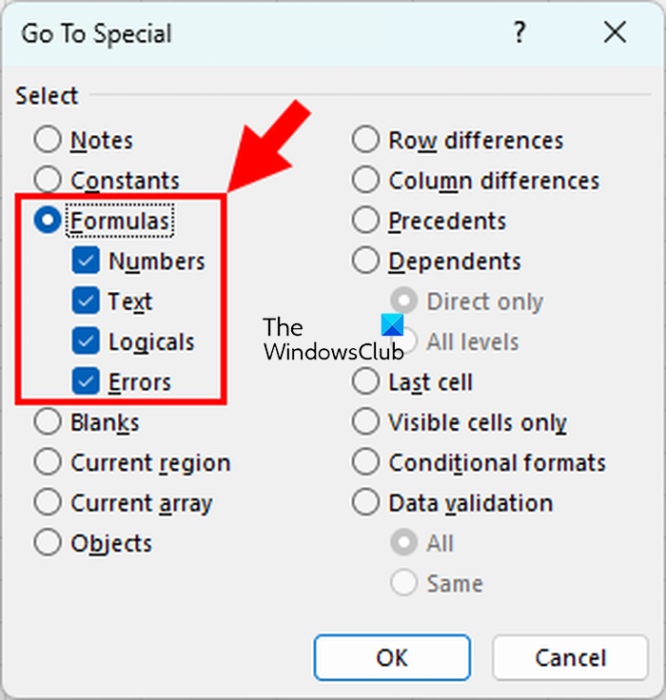
In the appeared dialog box, select the Formulas option. In addition, make sure all the formula types’ checkboxes including Numbers, Text, Logicals, and Errors are ticked, and then press the OK button. All formula cells will be selected now.
4] Reopen the Format Cells dialog and tick the Locked checkbox
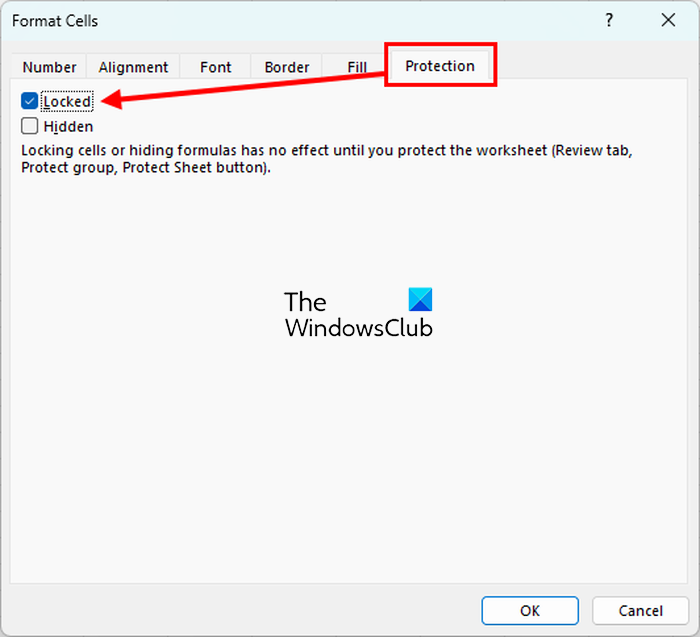
When the formula cells are selected, press the Ctrl+1 hotkey to quickly open the Format Cells dialog. Next, go to the Protection tab and tick the Locked checkbox. And then, press the OK button.
5] Click on Review > Protect Sheet and enter the password

The next step is to enter a password to protect your worksheet. For that, go to the Review tab and click on the Protect Sheet button from the Changes group. In the Protect Sheet dialog window, enter a password to protect your sheet in the respective field.
Read: Unknown error trying to lock file in Excel.
6] Select the actions allowed to be performed by other users
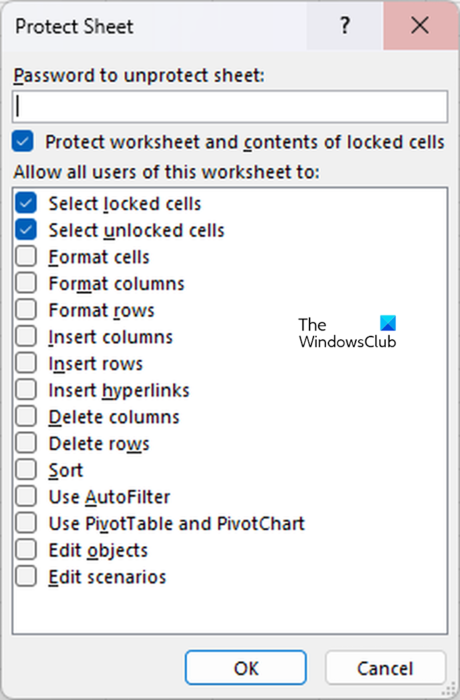
Apart from password protection, you can allow or disallow certain actions to be performed by other users like Select locked cells, Select unlocked cells, Format cells, Format columns, etc. Once done, press the OK button to save changes.
You will then be prompted to re-enter your password; do that and press the OK button. Your formulas will be locked and protected now.
Read: How to lock Chart position in Excel spreadsheet?
How to unlock formula cells in Microsoft Excel?
If you want to unlock all the previously locked formula cells in Excel, simply select the cells with formulas as discussed in step (3) above. Then, open the Format Cells dialog and uncheck the Locked option from the Protection tab.
How do I hide a formula in Excel without protecting the sheet?
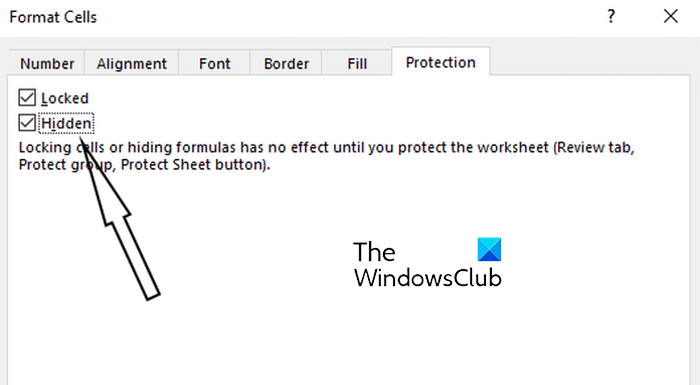
If you don’t want to display a formula in the formula bar, you can also hide a formula in a worksheet in Excel. To do that, right-click on the formula cell and click on the Format Cells option from the appeared context menu. Or, press the Ctrl+1 key combination to open the Format Cells dialog box. Next, move to the Protection tab and tick the checkbox present next to the Hidden option.
How do I lock a formula cell in Excel without protecting the sheet?
To lock a formula cell and prevent editing in it in Microsoft Excel, you are required to lock the cell as well as activate sheet protection. However, if you want, you can make sure that other data cells are unlocked and can be edited in your sheet. Just select all the cells you want to unlock, right-click on them, and then select the Format Cells option. Next, uncheck the Locked checkbox from the Protection tab. Also, while protecting the sheet, you can allow certain actions on unlocked cells.