It can be useful to display the same set of information over and over, until receiving the order to stop. That way, you can keep viewers informed about something interesting. Microsoft Office PowerPoint lets you loop its slideshows. The feature lies hidden under PowerPoint’s slideshow configuration area.
How to loop Slides in a PowerPoint presentation
A looping slideshow in PowerPoint lets the presenter display each slide automatically for a defined time interval. Thereafter, once the time elapses, the slide moves to the next slide. Once the slideshow reaches the end, it repeats from the same cycle all over again. Whatever the occasion might be, you can keep your visitors engaged by enabling the PowerPoint loop presentation.
This tutorial will show you how to loop a group of PowerPoint slides within a presentation to run automatically as a slideshow:
- Open your PowerPoint presentation
- Navigate to Set Up Slide Show
- Select Loop Continuously until Esc
- Next, Apply Slide Transitions.
Let us now see the procedure involved in detail.
To get started launch or open your PowerPoint presentation to which you would like to add the loop capability.
Then, navigate to ‘Set Up Slide Show’ option, residing under ‘Set Up’ group of the ‘Slide Show’ tab.

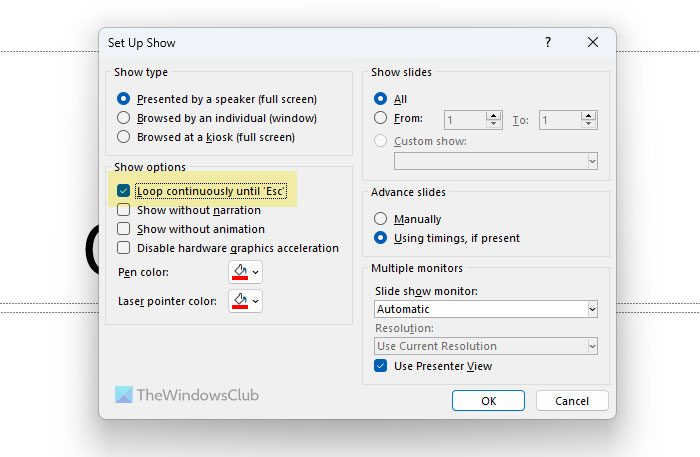
When the ‘Set Up Show’ window appears, go to ‘Show options’ group and check the box marked against ‘Loop Continuously until Esc’ description.
When selected, hit the ‘OK’ button located in the lower-right corner of the box.
Now, if you run the slideshow, it will end only when you press the ‘Esc’ key.
Apply Slide Transitions (Automatic)
Repeat the above steps to open the ‘Set Up Show’ windows again.
Here, make sure that ‘Using Timings, If Present’ option under the ‘Advance Slides’ heading is checked. If not, check the option.
Thereafter, configure a couple of options to lock certain functions.

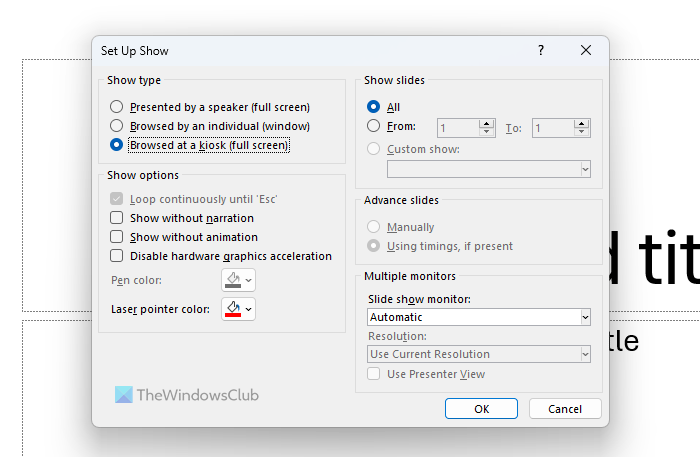
So, proceed further and select ‘Browsed at Kiosk’ (Full Screen) option visible under ‘Show Type’ group. Once, you configure this setting, the ‘Loop Continuously until Esc’ option will be automatically set up, if you had failed to do it earlier.
Choose ‘OK’ when done.
When the ‘Browsed at a Kiosk’ option is not selected or turned ‘On’, the automatic slide progressions can be terminated by pressing the Back key, knowingly or unknowingly. Selecting the option ensures, the Forward and Back keys are locked, allowing the slideshow to progress smoothly without any unwanted hassles.
Set timings
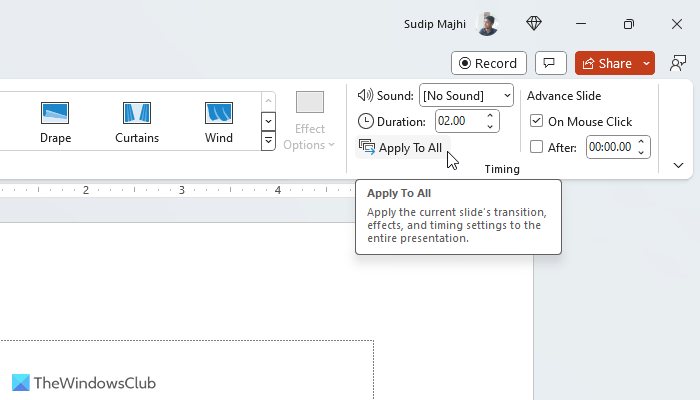
Go to the ‘Transitions’ tab. There, under the ‘Timing’ group, check the box just adjacent to ‘After’ and configure the timing for each slide to run.

Later, select the ‘Apply to All’ option in the same group.
That’s it! You have successfully enabled PowerPoint loop presentation for a project.
Read: Animations not working in PowerPoint [Fix]
How do I make PowerPoint slides run automatically?
To make PowerPoint slides run automatically, you need to enable an in-built setting. For that, go to the Slide Show tab and click on the Set Up Slide Show button. Next, head to the Show options menu and tick the Loop continuously until ‘Esc’ checkbox. However, if you want to apply the same setting to all the slides, you need to use the Apply To All option that can be found in the Transitions tab.
How do I loop a slide in PowerPoint with timing?
To loop a slide in PowerPoint with timing, you need to enable the Loop continuously until ‘Esc’ option first. If it is already enabled, you can go to the Transitions tab and head to the Timing panel. After that, choose a time as per your requirements and click on the Apply To All button. It will get your job done without any hustle.
Leave a Reply